Supplies (all Stampin' Up!® unless otherwise noted):
Card stock: Not Quite Navy, The Thrift Shop paper pad (October Afternoon)
Accessories: Fun Flowers die, Perfect Polka Dots embossing folder, 1-3/4" scallop circle punch, 1" circle punch, Scallop Edge Border punch, magnet strips (unknown), Scor-Tape (Scor-Pal)
I've seen many variations of magnetic bookmarks such as this, but I had never made one myself before this weekend. It was really fun and easy, and you could replace the flower with just about any shape: a snowflake or a heart for a seasonal gift, a large circle with an image or an inspiring word/quote, or even a small photo matted on card stock.
 |
| This is the completed bookmark when opened. |
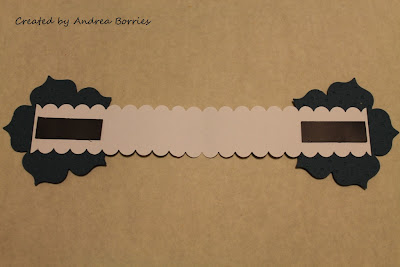
To make my bookmark, I cut a strip of the floral patterned card stock about 1-1/2" wide by 8" long. (It is card stock weight, so it is heavier than just patterned paper.) I folded the strip in half and then opened it to punch the scallop edges. Tip: On the front of my Scallop Edge Border punch, there is a little notch that shows where the middle of the punch is. I slid my (opened) strip of card stock in the punch and aligned the crease with that notch. Then I punched out the scallops to the right, then the left, then turned the strip around and punched the other side. By lining up the paper this way, the scallops on the front and the back of the bookmark match up when the bookmark is folded in half but not on a page. (They aren't exactly perfect but very close.)
 |
| This is the back of the completed bookmark when opened. |
The next time I give someone a book for a gift, I think I'll make a bookmark to put inside of it -- and it will probably have to match the book, too. Thanks for stopping by!


No comments:
Post a Comment