Sunday, April 21, 2024

Delicate Floral Frames

The cards I'm sharing tonight are ones I originally made to send to two of my cousins' daughters for their Confirmation. I don't have many religious stamps or dies, so instead I made two general cards using the Delicate Floral Frames stamp and die set (Simon Says Stamp). As it happens, I ended up not using these cards, so I'll just add them to my stash. 

I stamped the frame images and sentiments on watercolor paper using VersaFine Onyx Black ink. Since watercolor paper is textured, I used a stamp positioning tool so I could stamp multiple times and get a good image. Then I embossed them with clear embossing powder. I used Karin brush markers to watercolor the leaf and flower parts of the images and to add a touch of light gray for a shadow. When the paint was dry I cut out the images with the coordinating dies. (I did have a problem with a little bit of the embossing coming off after I die cut. Luckily it's not too obvious since the embossing powder was clear.)

For the card bases I used kraft card stock and splattered them with a bit of gold watercolor. (It's hard to see in the photo, but I promise it's there.) I made loops of gold thread and placed them behind the focal images, which I attached to the card bases with foam tape. I finished each card with a few gold sequins.

Thanks for stopping by!


Saturday, April 13, 2024

Time to Party

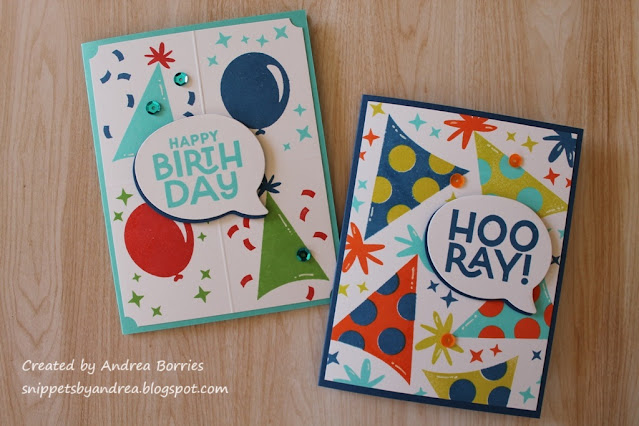
I always seem to be in need of birthday cards. I don't usually make specific birthday cards for specific people, so I like to have a nice variety in my stash to choose a good card for each recipient. So the Time to Party stamp set (from Simon Says Stamp) was perfect for creating a few fun cards.


For the first two cards I focused on masculine color combos. I often turn to shades of blue, orange, and green when I make cards for guys. They can be earthy, vintage, or, in the case of these cards, fun and vibrant. On the first card, I scored a panel of white card stock in half each direction and then stamped a main image and confetti/star images in each quadrant. With the second card, I stamped polka-dot party hats all over a white panel and filled in the white space with little stars. Both panels are layered on blue card bases, have a word bubble sentiment, and are finished with a few sequins.


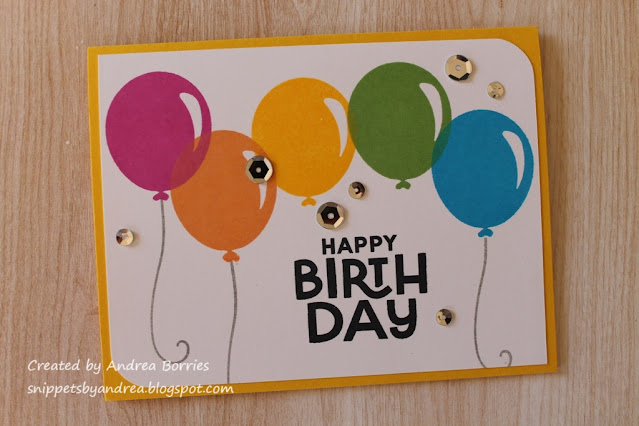
For the next card I wanted to make a balloon rainbow. This is a really clean and simple card and, I think, pretty self explanatory. I will mention that I used a few more sequins than I usually would -- two or three of them are covering up little ink smudges. Mistakes are just opportunities for embellishment, right? :)


For the last card I focused on sweet treats. I stamped and die cut a cupcake and an ice cream cone from the stamp set ... and then I didn't know what to do with them. I played around with several different layouts before finally settling on this one. I used a white die-cut frame on a dark pink card base to set off a "Happy Birthday" die-cut sentiment (from Gina K Designs). Then I placed the cupcake and ice cream cone in opposite corners and finished the card with a few blue sequins.

Thanks for stopping by!

Saturday, April 6, 2024

Two gel print cards

I have a quick post tonight to share two cards I made with gel prints from my last gel print session.


This is a 5" x 7" card, rather than a standard A2-sized card. I loved the way this gel print turned out, and I didn't want cut it down. I did trim it to about 4-3/4" x 5-3/4" and matted it with a 5" x 6" piece of black card stock. I adhered the panel to the kraft card base, lining up the top and bottom edges and centering the panel from right to left.

I wanted to add a little detail, so I used a white paint pen to doodle a border around the edge of the gel print and a loopy line on the empty edges of the card base. I used foam tape to add a sentiment strip, and finished off with a handful of clear droplets.


This is the only Easter card I made this year. And I actually made it back in January to include in a set of cards I was giving as a gift. I used a stitched rectangle die to cut the gel print and then layered it on a 4-1/4" x 5-1/2" piece of white woodgrain textured card stock. That panel was attached to a white card base.

I die cut the words "hope" and "love" from silver card stock and glued them to the gel print between the words that were part of the gel print. I cut a silver doily into small pieces and glued a piece to the lower right and upper left corners of the gel print. Two small punched yellow flowers add a pop of color on the cross image, and a scattering of mini pearls finish the card. 

Thanks for stopping by!


Sunday, March 31, 2024

Versatile card sets

This spring the parent association at my school is holding a silent auction fundraiser. Last year I donated a set of handmade cards to the silent auction, and they sold quickly, so I decided to make a set again this year. Well, actually I decided to make two sets: one with a retro swirl design and one a more traditional floral.


I love the way these cards turned out. I used the Retro Swirls A2 die from Erin Lee Creative. There are five “sections” of the swirl so I used five colors of card stock to make a bright rainbow and heavyweight white card stock for the card bases. I ran the die through my die-cutting machine with each piece of colored card stock and separated the pieces for each card. To glue the pieces, I started with the middle, chunkiest section of the swirl and then worked outward.

For the sentiments, I used the On Occasion stamp set and coordinating dies from Taylored Expressions. I like how the style of the font works with swirl, and there are five great sentiments in the set — one for each card. I stamped and die cut each sentiment, and then I cut each sentiment die two more times out of plain white card stock. I glued the pieces for each sentiment together in a stack and adhered them in the lower right corner of the cards. I finished each card with a few sequins.

Since I really liked the way these cards turned out, I decided to make five more in a different color combination:


I chose these beachy colors for a more neutral or masculine option. The only other change from the first version is that I used dark brown ink for the sentiments instead of black.

I debated making each version into a separate card set, but for some reason I like my card sets to have an even number of cards. So I went with one set of ten cards.


For the second set of cards I wanted to do something floral, but not too elaborate. After trying a few things, I settled on this layout. I used the Full of Flowers background stamp from Taylored Expressions to stamp four A2 panels of white card stock using black ink. I cut each panel into thirds to make ten patterned strips (with a little left over). I glued each strip along the bottom of a top-folding heavy white card base. Then I added a 1/4" strip of black card stock along the top of the I patterned piece on each card.

To make the colored flowers, I used the matching Full of Flowers - Singles stamps and dies from Taylored Expressions. I stamped the flowers and leaves several times and used the "filler" stamps (that come with the background stamp) to add the color. I die cut the elements and mixed and matched the pieces into ten groups.

Before adding the flowers I stamped a different sentiment on each card just above the black strip and toward the right side. (The sentiments are from the Sending Love Mail stamp set from Hero Arts.) Then I used glue and foam tape to add the flowers to create a little dimension. for the finishing touch I added three clear droplets around the flowers on each card.

I packaged each card set, with envelopes, in a small gift bag. I had planned to use clear card boxes that I have, but the stacks of cards were too thick. Unfortunately I didn't discover that until the night before I had to bring them to work; if I had realized it earlier, I would have made a cute holder for each set.

Thanks for stopping by!

Saturday, March 30, 2024

March Christmas cards: Christmas mice

Goodness, my blog posts have been few and far between this month. But I did manage to finish my March Christmas cards -- just in time to post them before the month ends.

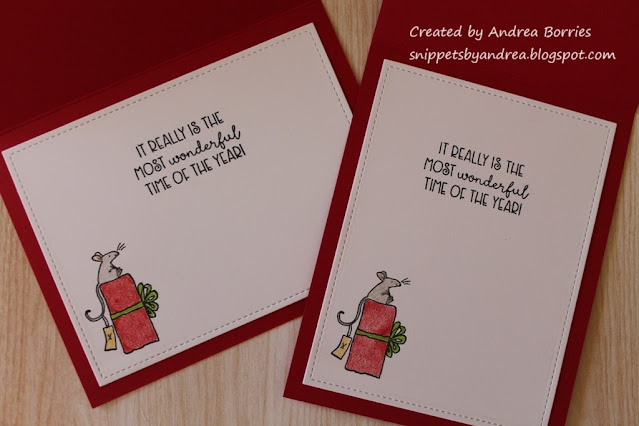
This month I used the Wonderful Time stamp set from Colorado Craft Company. I love the adorable illustrations by Anita Jeram, and this is the first set I've bought with her designs. I chose a simple layout -- just the main focal image and a sentiment -- because I didn't want to distract from these little mice decorating their Christmas tree. 

I don't love coloring the same image multiple times, so I only made eight cards of this design. I intended to make them all in horizontal orientation, but I goofed and stamped one of the inside panels vertically. Instead of throwing away that piece, I made two of the cards vertical -- and I think both layouts work.

I used Prismacolor pencils to color the images. I didn't do anything fancy with my coloring -- just some shading and a little color layering. I die cut the panels with a stitched rectangle die and adhered them to red card bases. For embellishment I placed a small twine bow on the base of the tree and added three sparkling clear sequins. 

The stamp set also included a couple of smaller images, so I decided to use one of them inside the cards along with a sentiment. I cut these panels out with the same stitched rectangle die so they coordinate with the front panels.

Thanks for stopping by!


Tuesday, March 19, 2024

First Class

Well, hello! I've been taking a little break from card making the last couple of weeks (just because I felt like doing other things) so I haven't had much to post on my blog. But today I'm going to share four cards made with the First Class stamps and dies from Ellen Hutson.


This stamp set includes a variety of images and sentiments that look like postage stamps. I stamped and die cut each image twice and colored them with alcohol markers, using the same color markers for all the images so they were easy to mix and match. I also used a casual, scribbly style to color so I didn't have to worry about them looking perfect. Then I divided up the colored images to make four cards.

The first two cards are birthday cards with the same layout. I embossed panels of colored card stock for the backgrounds, splattered them with gold paint, and adhered them to white card bases. I glued five of the postage stamp images onto the embossed card stock and used foam tape to add the "Happy Birthday" stamp in the center. For embellishment, I added a linen thread bow at the top of each card and finished with a few gold sequins.

This card also has a layout similar to the previous two. It has a horizontal orientation rather than vertical, but I used an embossed background and five images. I didn't add gold splatter to the background, but I did rub a watermark ink pad over the embossing to help the raised parts stand out. It's hard to see in the photo, but there is some looped gold thread behind the images near the upper left corner.


For the last card I used a map embossing folder for the background. Again I rubbed a watermark ink pad over the embossing. I wrapped some black-and-white baker's twine around the card front and, using foam tape, I added four of the images in a grid pattern. I finished the card with a few clear droplets.

Thanks for stopping by! I hope it won't be too long before I'm back again! :)


Wednesday, March 6, 2024

Full Bloom

One of the things I've been trying to work on with my crafting is using some of the products I own that I haven't used yet. Today's post focuses on the stamp set Full Bloom, which was one of the 2023 Stamptember stamp sets from Simon Says Stamp (in collaboration with Papertrey Ink).

I've come to enjoy stamp or die sets that have shelves and various items to place on the shelves. So the Full Bloom stamp set, with the ladder image and garden theme, immediately called to me. 

Naturally I wanted to use the ladder image for my first card, so I decorated it with a few of the images in the stamp set. I love the look of the two-step images, even though I didn't line them all up perfectly. I die cut the focal panel with the Essential Arches dies (Ellen Hutson) and matted it with rust card stock also cut into an arch. I wrapped a neutral trim around the front of a dark blue card base and used foam tape to attach the panel over the trim. I finished with two rust-colored enamel dots in the upper left corner.

For my second card I wanted to make something with a completely different look, so I focused on the floral images. I cut a piece of white card stock and, using a few different green inks, stamped the various stems along all the edges. Then I stamped the blossoms and finished with the leaves. To fill the center I used a die-cut "Birthday wishes" sentiment. I rounded the corners of the stamped panel, matted it with black card stock, and adhered it to a light green card base. To embellish the card I added a few clear droplets -- they add a fun detail without distracting from the other colors.

Thanks for stopping by!


Thursday, February 29, 2024

February Christmas cards: fractured cards

I'm getting my February Christmas cards posted in the nick of time. Thank goodness for leap year! This month I decided to try the fractured card technique using the Mittens & Mistletoe patterned papers. (These patterned papers are the same ones I used for my May 2023 Christmas cards.)

I don't have a tutorial, but if you do an online search you'll find a variety of tutorial videos and samples. The basic idea, though, is to glue a shape on your card panel and then add strips of card stock to create the look of fractures.

For my first try (the card in the lower left with the postage stamp images), I used card stock for the square and adhered it over a panel of patterned paper, so the four outer sections are the same print. For most of the other cards I used different patterned paper for the square and the other sections.

For the focal images on these cards I used mostly coordinating ephemera. I die cut words for a couple of the cards, and for that first card I cut out some of the little stamps from some scraps and adhered them with foam tape.

For these last few cards I used pre-printed images as the focal points. I placed them in the same direction as the cards instead of angling them. It's a different look, but I like how they turned out.

Thanks for stopping by!


Saturday, February 24, 2024

Cherry on top

I'm back with the final two valentines I made this year. I decided to share these cards last because they're not traditional valentines and would also make fabulous birthday cards.

I used the Coloring Layering Cupcake stamp set and coordinating die from Hero Arts. The set includes two stamps for each part of the cupcake -- the paper, the bit of cake in the middle, the frosting, and the cherry -- to create a fun, realistic image.

I used a stamp positioner to do the stamping for the cupcakes so I could align all the pieces as closely as possible. I also used the coordinating die to create a template. 

I didn't want the backgrounds to be too busy, so for the first card I used a piece of striped patterned paper matted with a layer of dark brown card stock. For the second card I embossed the card front with a polka dot embossing folder.

I kept the embellishments simple and added several red enamel dots to play off the idea of a cherry. I thought the second card needed one final detail, so I tied some red and white baker's twine around the bottom of the card.

Thanks for stopping by!


Wednesday, February 21, 2024

Mixed media valentines

For most of the valentines I sent out this year, I made mixed-media cards. To make my cards I started with a number of the prints I created in my last gel printing session as well as several foiled panels. 


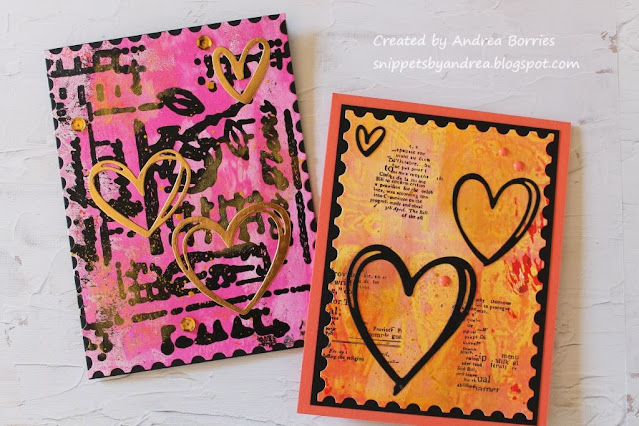
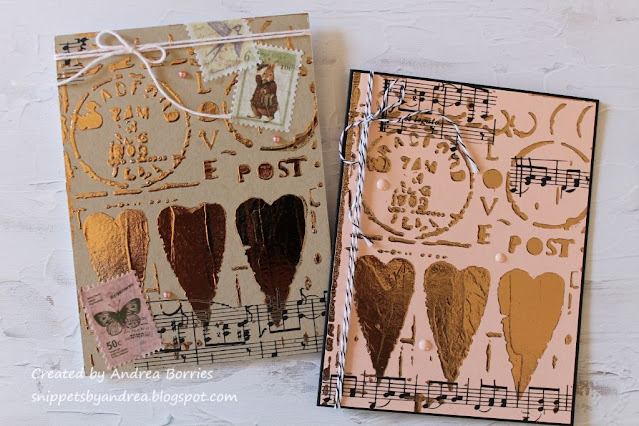
These two cards are my favorites from the gel print cards. The panels for both cards, as well as those for the rest of today's cards, were made with stencils from The Crafter's Workshop. (I purchased them in a bundle, however, so unfortunately I don't know the names of the individual stencils.) I cut these panels with the Postage Stamps Nested Frame Cuts dies (Hero Arts). I added the bits of text with the Collage Background Hero Transfers (Hero Arts). To add some sparkle, I used my finger to rub Gold Hero Paste on a few places on each card and then splattered a bit of Gold Glimmer Metallic Ink (both from Hero Arts).


These two cards use many of the same products and the same basic process as the previous cards. There was one extra step: I added texture by spreading some of the Gold Hero Paste randomly through the Script Stencil (Hero Arts). It's hard to see in the photo, but it's a fun detail. 


For these two cards, I added accents with the Sketched Hearts dies (Taylored Expressions). I used gold card stock for the hearts on the pink card and black card stock on the orange/yellow card.


I kept the postage theme for these cards but switched to the dies from Master Layouts 11 from Gina K Designs. I die cut two panels of "stamps," used a pen to doodle borders, and added the letters L-O-V-E to the stamps.


The rest of the cards in today's post were foiled using Transfer Gel Duo and Deco Foil from Therm O Web. For these first two cards I accented the foiled card fronts with musical notes transfers, twine, and a few washi tape postage stamps on the left-hand card.


I had a hard time trying to figure out how to use these two foiled card fronts. I didn't want to cover up too much of the image, but I didn't want to leave it "plain," either. For the pink card I decided to use the coordinating ink to sponge around the edges of the panel and in the center of the rose. I finished the card with some ribbon and a few pearls. For the gray card I added a few floral die cuts, a sentiment strip, and enamel dots.


These two cards are probably the least "valentine-y," but they're still cute! For the card I the left, I love the rainbow foil on the black card stock. I kept the rest of the card simple with a few silver hearts and sequins. The silver foil and yellow card stock of the right-hand card reminded me of a bumblebee, so I added a die-cut bee and punny sentiment strip in the middle of the card front over a circle of vellum. 

Thanks for stopping by!


Friday, February 16, 2024

Inspirational hearts

This year for Valentine's Day, I wanted to create a little something to share with the teachers and staff where I work. I didn't want to make more cards, though, and I wanted the gift to have some meaning. I decided on a collection of colorful hearts with inspirational words. Here are a few of my favorites:

To make the hearts I actually used the paper from cleaning off my brayer while gel printing. (Those scratch papers always look so pretty; I love finding a use for them.) I drew a few folk-style hearts on chipboard and cut them out to use as templates. I traced and cut out the colorful hearts, glued them onto coordinating card stock (a great way to use scraps!), and then trimmed off the extra card stock.

I used a variety of pens and paint markers to doodle a border on each heart then punched a hole with my Crop-A-Dile and added a loop of twine. I made a list of inspirational words and used a small alphabet stamp set to spell out the words on strips of white card stock. (Some of the words I stamped two or three times.) I trimmed the white card stock close to the letters and glued a word on each heart.

I made about 55 hearts, divided them into two containers and put one in the main office and one in the staff break room. I was nervous that no one would take one and it would end up being a silly idea, but most of them were gone by the end of the day, and there was only one left by Friday. Yay!

Thanks for stopping by!


Wednesday, February 14, 2024

2024 Meals on Wheels valentines

Happy Valentine's Day! The last couple of weeks I've been so focused on trying to get projects finished for the holiday that I haven't kept up with my blog posts (obviously). I'm finally getting everything posted this week, starting tonight with the valentines I made this year for Meals on Wheels. I created a total of seventy-five cards, many of them made with bits and pieces from card kits. There are quite a few pictures, so I'll keep the text short.

Here are all the cards together, followed by close-up photos of the different card designs:

The next group of photos are from the first card kit. The flower pot cards were one of the intended card designs. The next three photos are card designs I made using parts of the kit (patterned paper, some embellishments, circle layers) along with my own die cuts and other elements. 


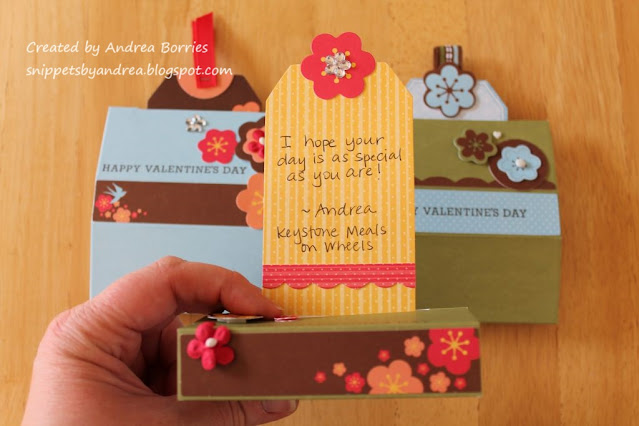
Below are cards made with the second card kit. The first cards -- pop-up box and tags -- were the designs from the kit. The cards in the third photo were ones I made with the leftover patterned paper from the kit.


The rest of the cards were all made from "scratch." The card fronts of the first two cards were actually panels I made for desk calendars. The stamped hearts were too low and didn't leave enough room for the calendar page, so I remade the panels for the calendars and saved these to use as valentines.


The next cards designs are simple layouts with colored focal images. I made five cards of each design, using the same color palette for all the coloring so I didn't have to spend time choosing which markers to use.


I finished off with nine cards made with patterned paper and die-cut hearts. I used 12" x 12" paper, which I cut into nine 3" x 4" panels. I chose four colors of card stock for the card bases and die-cut hearts and used coordinating ribbon to finish off each card.


I hope these cards offer you a bit of inspiration for next year's valentines or give you ideas that you can modify for other occasions.

Thanks for stopping by -- and stayed tuned for a couple more Valentine's Day posts!