Saturday, December 31, 2011

ABCs of 2011

I thought it would be fun to look back on my 2011 with a little twist: I thought of one thing for each letter of the alphabet (easier said than done).

A favorite new bread - Flaxseed Farmer's Wheat with Cranberries from Breadsmith
Bellydancing
Costume for Halloween. I actually dressed up this year, as a farmer.
Driver's license renewed. The next time I have to do that will be when I turn forty. Ugh. 
Energetic toddlers 
Flambards series by K.M. Peyton. Read the books (except the fourth, which I think ruins the happy ending) and watched the TV series, some parts multiple times.
Going to the Stampin' Up! regional conference in Minneapolis in February
Harry Potter and the Deathly Hallows Part 2. Finally!
Izzy's ice cream - Norwegian Chai!
Jane Eyre obsession. 'Nuff said.
Kindle. I still prefer "real" books, but I've had my Kindle for a year and am starting to read more e-books.
Ladysmith Black Mambazo concert in February and Les Miserables in December
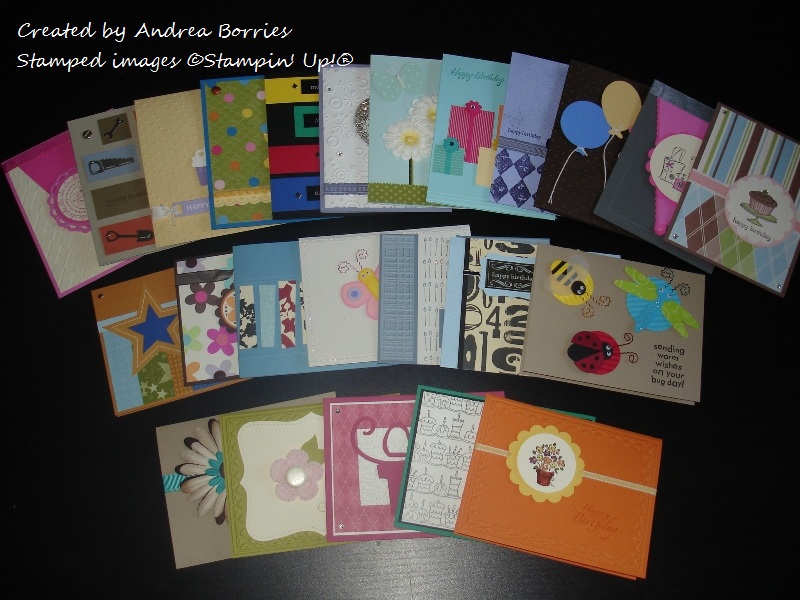
Making cards
National Novel Writing Month. I wrote 11,018 words in my (unfinished) novel.
Operation Write Home. I donated fifty-five handmade cards this year.
Pirates of the Caribbean. I was late to jump on this bandwagon, but I saw all four of the movies over the summer.
Quirky stories about my Lego Minifigure collection
Reading books. I finished forty-one this year, not quite to my goal of fifty.
Stamping!
The Hunger Games trilogy by Suzanne Collins. Can't wait for the movie next year.
Utah trip in July for my second Stampin' Up! annual convention
Ventured into the world of blogging
Watching The Big Bang Theory. Definitely my favorite sitcom, maybe even my favorite TV show.
eXhibit of King Tut at the Science Museum of Minnesota in September
Yoga
Zipper pulls and hair clips made as birthday gifts

Hope your 2011 was a great one and 2012 is even better. Have a happy, safe New Year's Eve!

Friday, December 30, 2011

A little bird for you

I didn't do any stamping today -- too busy watching Sense and Sensibility and Jane Eyre -- but I have one more card to share that I made earlier in the week. I started out with the intention of making a masculine, or at least gender-neutral, card, but I think it ended up more on the feminine side:

Supplies (all Stampin' Up!®):
Stamps: Nature Walk, Tiny Tags
Card stock: Bordering Blue, Soft Suede, Naturals Ivory
Ink: Basic Brown, Soft Suede, Bordering Blue, More Mustard
Accessories: Victoria crochet trim, Jewelry Tag punch, Log Cabin Smooch Spritz, Vintage Trinkets, Aqua Painter, bone folder, Dimensionals

I guess I didn't look too closely at the card before I took the picture; the "4 you" tag at the top should have been hanging down.  Oh, well.

I stamped the bird image in Basic Brown ink and then water colored it using an Aqua Painter and classic ink pads. I roughly tore around the image and layered it on a piece of Soft Suede torn in a similar shape.

For the rest of the card front, I cut a piece of card stock the same color as, but slightly smaller than, the card base. I lightly sprayed the piece with Log Cabin Smooch Spritz (that took a bit of trial and error; I over-sprayed the first piece I tried) and ran my bone folder along the edges to distress them. I added a piece of knotted crochet trim along the top of the card. I punched two small tags -- one plain and one stamped -- and used a small safety pin to attach them to the knot. I added three brads, adhered the bird and then used Dimensionals to attach the completed piece to the front of the card.

Thanks for stopping by!

Favorites of the bunch

A couple of weeks ago I posted the picture of all the birthday cards I made as a gift for my grandma, and I mentioned that I would show individual pictures of some of the cards. I realized this morning that I've only posted one card so far - oops! So here are pictures and supplies for a few more of the cards, some of the ones that ended up being my favorites in the bunch. Note that all the supplies are from Stampin' Up!® unless otherwise noted in the supply lists.

Brown card embossed with polka dots and three die-cut balloons (pink, yellow and blue).
Supplies:
Stamps: Create a Cupcake
Card stock: Early Espresso, Regal Rose textured, So Saffron smooth and textured, Ballet Blue textured
Ink: Early Espresso
Accessories: Perfect Polka Dots embossing folder, balloon die cuts (they are from a Sizzix Big Shot die, but I don't know which one), white baker's twine, Word Window punch, Dimensionals

This was a really quick and easy card to make. I already had the balloon shapes, so I just tied some baker's twine on them and attached the balloons to the embossed card (the strings are not glued down). I added a greeting, and that's it!
Kraft card with three dimensional bug stickers (bumblebee, dragonfly and ladybug). Each bug is layered on a coordinating punched circle.
Supplies:
Stamps: Bugs & Kisses
Card stock: Crumb Cake, Tempting Turquoise, Yoyo Yellow, Real Red
Ink: Jet Black StazOn
Accessories: Dimensional bug stickers (source unknown), circle punches, paper crimper

These cute dimensional bug stickers came premade, complete with google eyes and antennae, but I don't think they would be too hard to recreate from scratch with various punches. I decided to use a very simple layout for this card. Because there wasn't a common color among all the stickers, I used Crumb Cake to create a neutral card base and then selected one color from each sticker to use for the background circles. It's hard to tell in the picture, but I ran the punched circles through my crimper in two different directions to create a little extra texture.

White card with a glittery border and a dimensional butterfly sticker. Sentiment states "happy birthday dear you."
Supplies:
Stamps: Happiest Birthday Wishes
Card stock: Naturals White
Ink: Lovely Lilac
Accessories: Dimensional bug stickers (source unknown), Simply Scored tool, Dazzling Details

This card really used minimal supplies. This butterfly sticker was from the same pack as the stickers in the card above. (I love how the curves in the greeting make it look as if the butterfly is flying.) I made a border of two scored lines around the entire card and added a line of Dazzling Details between the lines.

Gray card with squares and rectangles of ornage, blue and green card stock. Embellished with tool-shaped charms and brads that look like screws.
Supplies:
Stamps: On Your Birthday
Card stock: Sahara Sand, Bordering Blue, Really Rust, True Thyme
Ink: True Thyme
Accessories: Tool charms (Scrap-Ease), screw-shaped brads (source unknown), silver mini brads

I've had this set of tool-shaped charms (and several other packs) forever. I thought this color-block layout would be a good way to use them on a birthday card. I filled in the empty spaces with a few brads that look like screws. I think this card is about as masculine as you could get!
Light blue card with patterned green paper as grass, a punched butterfly and three paper daisies with green ribbon stems.
Supplies:
Stamps: Happiest Birthday Wishes
Paper: Soft Sky card stock, Designer Series Paper (DSP) Patterns Stack - Brights Collection, Soft Sky DSP Prints
Ink: Soft Sky
Accessories: Paper daisies (Making Memories), yellow glitter brads (Making Memories), green ribbon (source unknown), Butterfly punch, white baker's twine, mini-pinking scissors (Fiskars), Dimensionals

On this card I love the little touches of yellow in the flowers and brads combined with the blue and green. And it's hard to tell in the picture, but the green ribbon is slightly variegated; it's dark green on one edge (here the left side) and changes to a light green on the other edge. I knew when I bought the ribbon that it would be perfect for flower stems.


All of these cards were fairly quick and easy to make -- that's what happens when you suddenly have to make a couple dozen cards in just a few days! But I think they all turned out cute, and they gave me ideas to try again another time. I hope you got a few ideas, too! Thanks for stopping by!

Thursday, December 29, 2011

Flower fest

Today I felt like stamping flowery cards, something I haven't had much chance to do lately, what with making Christmas cards and then all the hoopla of the holidays. Here are the three cards I created:

Supplies (all Stampin' Up!®):
Stamps: Array of Sunshine, It's Your Birthday
Card stock: Very Vanilla, Soft Suede
Ink: Pink Pirouette, Certainly Celery
Accessories: Framed Tulips embossing folder, Lots of Tag Sizzlits (Label 2), large oval punch, Blushing Bride stitched-poly ribbon, basic pearls, Dimensionals

I bought the Lots of Tags Sizzlits awhile ago -- I think with the intention of making Christmas tags -- but this was the first time I've used them. I love that with this particular tag, the oval inside the tag is the perfect size to be punched out with the large oval punch. It worked great for the greeting on this card.

For the flowers (which unfortunately look kind of washed out in this photo), I stamped the large bloom from the Array of Sunshine set four times on Very Vanilla card stock. Two of them I cut out around the whole flower, one I cut out around the middle circle of petals, and one I cut out around the inner circle of petals. I embossed the border on the main layer of Very Vanilla card stock, added some ribbon and pearls, and layered the flowers in the corner.

Supplies (all Stampin' Up!):
Stamps: Sweet Summer
Paper: Whisper White, Peach Parfait and Lucky Limeade card stock; DSP Patterns Pack - In Color
Ink: Jet Black StazOn; markers: Peach Parfait, Blushing Bride, Calypso Coral, Lucky Limeade
Accessories: Dotted Scallop Ribbon Border punch, Scallop Trim Border punch, Itty Bitty Shapes punch pack, basic pearls, Dimensionals

This card is pretty self-explanatory, mostly just stamping, coloring and layering. I did add some details to the flowers: I punched two small flower shapes in each color, layered them and adhered them over the stamped images. I also added a pearl in each flower and a few others around the stamped images.

Supplies (all Stampin' Up!):
Stamps: Sweet Summer, Raining Flowers
Card stock: Whisper White, Basic Black, Pool Party, Peach Parfait, Blushing Bride, Calypso Coral
Ink: Jet Black StazOn; markers: Peach Parfait, Blushing Bride, Calypso Coral, Pool Party, Basic Black
Accessories: Beautiful Wings Embosslit, Boho Blossoms punch, Itty Bitty Shapes punch pack, 1/8" Basic Black taffeta ribbon, Dazzling Details, Glue Dots, Dimensionals

To make the flowers on this card, I used the image from the Raining Flowers set that looks like half a flower. I stamped the image twice for each flower, turning the stamp so the images were back to back. I colored the flowers and added two punched shapes in the middle: the smallest flower from the Boho Blossoms punch in black and the scalloped circle from the Itty Bitty Shapes punch pack in the same color as the flower.

To fill in the space between the flowers, I stamped the small butterfly image from the Sweet Summer set and added dots of Dazzling Details (also in the center of the flowers and on the embossed design on the butterfly). I wanted to add ribbon without covering up any flowers, so I placed a piece of ribbon diagonally at two opposite corners. The butterfly adds a simple focal image without detracting from the background. I wasn't sure how this card would turn out while I was making it, but I like the end result.

Thanks for stopping by!

Wednesday, December 28, 2011

One more thank you

After I finished making my Christmas thank-you cards yesterday, I remembered I one more card. It's not really for a gift; my boss gave me some chocolate chip cookie dough that she had leftover from her holiday baking. But I firmly believe that chocolate chip cookie dough is one of the greatest inventions ever (I used about half of it for cookies, and the rest I ate raw), so I thought I'd write a thank you to put inside the container when I return it.

Because I needed a small card, I decided to use a pocket note card. I bought a package of these cards several years ago from Stampin' Up!®, and I still have quite a few of them left. Here is the quick card I made:

Supplies (all Stampin' Up!):
Stamps: Easy Events
Card stock: Pretty in Pink, Melon Mambo, Whisper White, Lucky Limeade, Pretty in Pink pocket note card
Ink: Jet Black StazOn, Lucky Limeade marker
Accessories: Itty Bitty Shapes punch pack, basic pearls, Dazzling Details

The card is about 2-1/2" x 3-1/2", so the thank-you image from the Easy Events set was the perfect size. I stamped the image on a 2" x 2-1/2" piece of Whisper White for the card and also on the outside of the envelope (without the greeting). After adding a layer of Lucky Limeade card stock, I adhered the image to the card.

I colored the flower leaves with a marker and glued punched flower shapes over the stamped flowers. For the flowers on the card, I used two punched shapes for each flower; the bottom flower shape is adhered flat on the card, and the top flower is adhered just in the middle, and the "petals" are curled up a bit. I added a small pearl in the center of each flower for a little embellishment. For the flowers on the envelope, I glued only one punched shape per flower, and I added a drop of Dazzling Details in the center of each flower. I think the finished card is pretty cute, and I might just have to make a set of similar cards with the other images from the Easy Events set.

Thanks for stopping by!

Tuesday, December 27, 2011

Christmas thank yous

While I am off work this week (yea!), one of my to dos is to write my Christmas thank-you cards. I received several thoughtful and generous gifts from the families at my childcare center, and I always make sure to give them thank-you notes when we come back after break.

A little side story: I think my favorite gift this year was from one of the two-year-olds in my toddler class. He had gone shopping with his mom, probably at a dollar store, and had picked out gifts for all the teachers at the school (there are about thirteen of us). They wrapped them up and put them in a big basket with a card, and each teacher selected one gift to open -- with the warning from his mom to "Choose wisely." They were the completely random things you would expect from a toddler: I got a container with a lid shaped like a puppy face (which actually will be useful for bringing lunches to work), and some of the other gifts were a can of pineapple rings, a package of leis, a water bottle and a package of paper cups with hearts on them. It was absolutely hysterical, and all day long the teachers asked each other what gift they had opened. (I found out later that he had also picked out gifts for his family -- bubble bath for his grandpa and a lint roller for one of his cousins. Hee.) It was a great idea, and it was nice knowing that he had helped choose the gifts.

Anyway, back to my original post ... typically I use store-bought cards for my Christmas thank yous (shocking, I know), but this year I decided I wanted to make the cards. I thought I would just make something quick and simple, but of course what I plan to make isn't always what I end up with. Here is the design I settled on:

Supplies (all Stampin' Up!®, unless otherwise noted):
Stamps: Very Versatile, Snow Much Fun
Paper: Designer Series Paper (DSP) Patterns Stack - Brights Collection; card stock: Whisper White, Real Red, Cool Caribbean; aqua card base (Gartner Studios)
Ink: Jet Black StazOn, Basic Gray, Real Red, Cool Caribbean, Old Olive, Pumpkin Pie
Accessories: Blender Pen, 1/8" Real Red taffeta ribbon, basic rhinestones, corner rounder, Word Window punch, Modern Label punch, Dimensionals

I wanted to use some pre-folded cards I've had for awhile, and the aqua color is almost a perfect match to Cool Caribbean, so I used that color, along with Real Red, Old Olive, Pumpkin Pie and Going Gray to color the snowman image. (As you can see, I still can't decide whether the snowman's boots should be red or gray; when I made them red, I thought they looked better gray, and vice versa. Maybe I'll do some of each.) I layered him on a piece of Real Red card stock, and a piece of striped DSP, some red ribbon, a greeting and a few rhinestones finish off the cards. The layout of the card is still pretty simple, but coloring the images for ten cards (I also stamped a snowman inside the cards) is a little more time-consuming than I was planning. But I've got several days to finish making them and filling them out, so nothing to stress about.

I hope you're enjoying the holidays. Thanks for stopping by!

Sunday, December 25, 2011

Merry Christmas!


And the Grinch, with his grinch-feet ice-cold in the snow,
Stood puzzling and puzzling: "How could it be so?
"It came without ribbons! It came without tags!
"It came without packages, boxes or bags!"
And he puzzled three hours, till his puzzler was sore.
Then the Grinch thought of something he hadn't before!
"Maybe Christmas," he thought, "doesn't come from a store.
"Maybe Christmas ... perhaps ... means a little bit more!"

And what happened then ...?
Well ... in Who-ville they say
That the Grinch's small heart
Grew three sizes that day!

From How the Grinch Stole Christmas! by Dr. Seuss

I hope this Christmas brings joy, peace, love and laughter to you and your loved ones!

Thursday, December 22, 2011

Birthday 'gift' card

Toward the end of my card-making session last weekend (see my Birthday card bonanza post), I was running out of original ideas for cards. I decided to try punching and cutting some squares and rectangles out of patterned paper and arranging them on the front of the card to look like wrapped gifts. Here is the result:

Supplies (all Stampin' Up!® unless otherwise noted):
Stamps: Warmest Regards
Paper: Welcome Neighbor Designer Series Paper (DSP) pad; card stock: Soft Sky, Bermuda Bay, Pumpkin Pie, Melon Mambo, Crushed Curry
Ink: Bermuda Bay
Accessories: Simply Scored tool, Itty Bitty Shapes punch pack, 1" square punch, 1-3/8" square punch, Boho Blossoms punch, basic rhinestones, primary rhinestones (me & my BIG ideas), Dimensionals

I used DSP that had subtle, small-scale patterns so it would look similar to wrapping paper. For the "ribbon" on each present, I cut a strip of coordinating card stock that was approximately 1/8" wide and adhered it to the DSP, trimming the ends as needed. For each of the "bows" I punched two shapes: the middle-sized flower from the Boho Blossoms punch and the scalloped shape from the Itty Bitty Shapes punch pack. I layered the punched shapes, added a rhinestone (some are colored, some are clear) and adhered the bow to the top of the present.

To assemble the card, I played with the arrangement of the presents until I had a layout I liked and then glued them to the card base. I overlapped the presents -- and adhered the Crushed Curry one with Dimensionals -- to add some depth. For the last little details, I added three scored lines along the bottom of the card and a greeting in the upper left corner. I'm happy with the way this card turned out, and I think this design could make a fun set of birthday cards by just changing the patterned paper, color combo and size of the presents.

Thanks for stopping by!

Monday, December 19, 2011

Decking the halls

Well, I don't have any boughs of holly, but I do finally have some of my Christmas decorations put up. (It's about time!) After work today I was on a mission to make our apartment more festive, so I turned on the "yule log" on TV and started pulling boxes out of our storage closet.

Now I have entirely too many decorations to put all of them out at the same time. And even if I could have them all out, I wouldn't have done it this year since Christmas is only six days away. But I hung the jingle bell wreath on the door, got out some of my favorite ornaments for our tree, arranged various candles and nick-knacks around the living and dining rooms and even hung our stockings. (Since we don't have a fireplace, and therefore no mantel, I attached two of the removable 3M hooks to the front edge of our TV stand and hung the stockings there. I will say it was a little odd as I was watching the yule log, because the stockings were under the fire instead of over it.) We even have a little tribute to Charlie Brown on one of our end tables, complete with a replica of his beloved scraggly tree.

It's definitely not fancy or classy. But it is bright and cheery and homey, and that's what I love about Christmas.

Now to get all those presents wrapped ...

Sunday, December 18, 2011

Birthday card bonanza

Good grief! Every year I wonder what happens to the time between Thanksgiving and Christmas. Last year I felt like I barely had time time to get everything done, but I think this year is worse. We have our little tree up, and I put the lights on it, but so far it only has a few ornaments that my sister hung up. I have a few candles out, but my Nativity sets (I have a Willow Tree set and a Play Mobil one) and the rest of my decorations are still packed away. And with just a week until Christmas, I'm not even sure how much I'll put up at this point. I do have my shopping done, but nothing wrapped except the present I gave to my friend Kay when we met for breakfast this morning. Aargh!

To top off the craziness, I had decided a couple of weeks ago that I wanted to make a bunch of birthday cards to give to my grandma as part of her birthday present. Her birthday is Dec. 23, so I figured I had plenty of time if I made a couple of cards here and there after work and a few more during the weekends. Well, I only had two cards made when last Wednesday night I found out that my grandma's birthday party was going to be today! Wrench, meet my plans. So suddenly I needed to make twenty-two more cards in just a few days. And I didn't even have a whole Saturday to work on them because my mom, sister and I went to the theater to see Les Miserables yesterday (which was wonderful, but when all was said and done, took about six hours out of my day).

Well, to make a long story short, I ended up making twenty-two cards, and then I pulled out two already-made cards from my stash and stamped birthday greetings inside of them. That makes a grand total of two dozen cards. Each of them is different, and to help speed things along, I tried to limit the number of layers on the cards and to use a lot of the embellishments I have sitting around: various flower shapes, premade tags, charms, etc. The cards still look cute, but it cut down on the amount of time I had to spend choosing the perfect stamp set and layout for each card. Here is a picture of all the cards together:


I did take individual pictures of a few of the cards I liked the best, so I'll try really hard to post those pictures this week.

I hope you're finding time to enjoy this holiday season. Thanks for stopping by!

Sunday, December 11, 2011

More Christmas goodies

This afternoon I finished making the mint patty treat bags I'm planning to give as holiday gifts (see Christmas goodies post). I decided to make just six more bags with nine mint patties, and then for the last few I made smaller bags with four candies in each. I found some 4" x 6" treat bags at Michaels this morning that were the perfect size for four mint patties. Below are pictures of the finished bags as well as the stamp set(s), colors and ribbon used for each; the rest of the supplies are listed in the previously mentioned post. (One of the bags I made was the same as the set in my previous post, so I haven't included that picture here.)

Note: All supplies listed are from Stampin' Up!®.

Stamps: Weather or Not, All-Year Cheer I
Colors: Whisper White, Vintage Violet, Purely Pomegranate, Kiwi Kiss
Ribbon: Purely Pomegranate polka dot (Sherbet Ribbon Originals)

This set has some non-traditional colors, and I really wasn't sure about it while I was making it. But I think it turned out to be one of my favorites!
Stamps: Darling Dots, Cute Converse
Colors: Whisper White, Green Galore, Taken with Teal, Poppy Parade
Ribbon: Red organdy

This color combo definitely has a retro feel.

Stamps: Merry, Circle of Friendship
Colors: Naturals Ivory, Almost Amethyst, Vintage Violet
Ribbon: Vintage Violet stitched grosgrain

For this set I stamped the snowflakes randomly on the card stock and then punched out the circles.
Stamps: Hung Up on the Holidays, Lots of Thoughts
Colors: Very Vanilla, Ruby Red, Soft Suede
Ribbon: Christmas Alpine grosgrain (Alpine Ribbon Originals)

Classic Christmas colors and images.
Stamps: Hung Up on the Holidays, All-Year Cheer I
Colors: Whisper White, Real Red, Green Galore, Glorious Green
Ribbon: Real Red polka dot grosgrain

This set has a bit of a retro feel, too. I like the red paired with two shades of green.
Left set:
Stamps: Hung Up on the Holidays
Colors: Whisper White, Chocolate Chip, Crushed Curry, Wild Wasabi, Ruby Red, Close to Cocoa
Ribbon: Chocolate grosgrain

Right set:
Stamps: All Wrapped Up Accessories
Colors: Whisper White, Real Red, Glorious Green
Ribbon: Real Red grosgrain


Left set:
Stamps: Season of Joy
Colors: Whisper White, Cool Caribbean, Soft Sky
Ribbon: Soft Sky stitched grosgrain

Right set:
Stamps: Season of Joy
Colors: Very Vanilla, Cranberry Crisp, True Thyme
Ribbon: Cranberry Crisp and True Thyme stitched grosgrain

I had a lot of fun making these (and I only ate a couple of mint patties while I was working!). But after decorating a total of 79 mint patties -- for a total of 158 pieces, counting the front and back -- my scallop circle punch is in definite need of a vacation. I wasn't sure it was going to last, but it held out. Whew!

Saturday, December 10, 2011

Christmas goodies

Every year I like to give a little handmade gift to the families in my toddler class at work. This is what I decided to make this year:

Supplies (all Stampin' Up!® unless otherwise noted):
Stamps: Cold Play, Merry, All-Year Cheer I
Card stock: Whisper White, Ballet Blue, Brilliant Blue
Ink: Basic Gray, Pumpkin Pie, Ballet Blue
Accessories: 1-1/4" circle punch, 1-3/8" circle punch, scallop circle punch, 1/4" hole punch (unknown), large flat cellophane bag, wide blue grosgrain ribbon (unknown), Scor-Tape (Scor-Pal), mint patties (Pearson's)


 I stamped the snowman's face (Basic Gray) and nose (Pumpkin Pie) on Whisper White card stock and punched it out with the 1-1/4" circle punch. Then I layered it on a 1-3/8" circle of Ballet Blue and a Brilliant Blue scalloped circle. I made eight snowman pieces and one with the greeting "merry & bright" (stamped in Ballet Blue). I also made nine pieces stamped with a snowflake. Then I adhered each snowflake piece to the back of a mint patty, and a snowman (or greeting) to the front. (Note: Be sure to use a strong adhesive so the card stock stays attached to the candy wrapper; I used Scor-Tape.) I arranged the candies in a cellophane bag, folded back the top of the bag, punched two holes and added a ribbon. I was a little worried that all the mint patties would fall down when I picked up the bag, but they seem to be staying in place pretty well.

Here is a picture of the back of the bag so you can see all the snowflakes. I could have stamped the same images for the front and back of the candies, but I thought it was fun to have the snowflakes on the back. I'm making five packs of mint patties for the toddlers in my class, and I should have enough candy left to make four more bags, so I'm also planning to give these as small holiday gifts to a few other people (my belly dance teacher, yoga instructor, etc.). I made one other snowman set like this one, but the rest will all be different with various winter and Christmas images. I've been working on the other sets today, and it's fun to pick out color combos and images; I'll post pictures of those sets when they're done.

Thanks for stopping by!

Wednesday, December 7, 2011

Birthday turtle

As I mentioned in my last post ("Stripes, circles and sparkles"), here is the "boy" birthday card I made last weekend:

Green card base stamped with presents. Focal image is a turtle wearing a birthday hat and carrying a stack of presents on his shell.
Supplies (all Stampin' Up!® unless otherwise noted):
Stamps: Turtle & Co.
Card stock: Wild Wasabi, Whisper White, Soft Suede
Ink: Ink pads - Jet Black StazOn, Wild Wasabi; markers - Wild Wasabi, Soft Suede, Tangerine Tango, Daffodil Delight, Pacific Point
Accessories: Pacific Point striped ribbon, "Just Because Cards Cricut cartridge (Provo Craft), Dimensionals

This is a fairly simple card (but, at least I think, still cute). For the focal point I stamped the turtle image first and then stamped the stack of presents and the party hat on the turtle. I managed to do a pretty decent job getting them aligned by just eyeballing it; the presents do lean a bit to the left, but I figure if there were ever a turtle carrying a pile of presents on its shell, they probably wouldn't be perfectly straight either. I colored the images and added a bit of doodling around the edge of the white card stock. Layered behind the white card stock is a shaped piece of Soft Suede that I had cut out quite a while ago with the "Just Because" Cards cartridge for my Cricut. It happened to fit perfectly with the size of my focal image, and the scallops add a fun little detail.

For the rest of the card, I repeatedly stamped the presents image on the top half of the background, stamped a greeting on the bottom and added some ribbon. Quick and easy! And you could change up the color combo to change the feel of the card, for example, pastels for a baby card or pink, purple and/or red for a more feminine card. It's always nice to have card ideas that can be flexible.

Thanks for stopping by!

Monday, December 5, 2011

Stripes, circles and sparkles

With Christmas cards finally made, it's time to get back into more everyday cards. There are only a few birthdays in my extended family this month, but two of them are for kids (one girl and one boy), and I'm still short on kid cards in my stash. So that was my Saturday project.

Gray card with pink striped paper as the background. Gray ribbon, white scalloped card stock and rhinestones go across the card. Focal image is a tag with a pink birthday cake.
Supplies (all Stampin' Up!®):
Stamps: Happiest Birthday Wishes
Paper: Regal Rose card stock, Basic Gray card stock, Whisper White card stock, Patterns Pack II DSP
Ink: Basic Gray, Regal Rose
Accessories: Basic Gray satin ribbon, Basic Rhinestones, large and extra large Tag punches, Scallop Edge Border punch, 1" circle punch, Dimensionals

This card probably turned out a little "mature" for the two-year-old for whom it's intended. But one thing I have learned as a childcare teacher is that toddlers like sparkly things. (And really, who doesn't?)

I started this card with the piece of Regal Rose striped paper layered on the Basic Gray card. I added the scalloped edge, ribbon and tag (which is adhered with Dimensionals). The rhinestones on the ribbon and in each corner added a great touch of bling.

But when I looked at the finished card, it didn't seem quite right. The stripes were too dominant, and I wished I'd used a different pattern of DSP on either the top or bottom of the card. But it was already done, and I didn't really want to rip everything apart. So instead I looked for another DSP pattern in the same pack that would compliment the stripes. The polka dot pattern was perfect: it used the same two shades of Regal Rose, and it even pulled out the polka dots in the cake on the tag. I punched a few 1" circles from the polka dot paper and glued them on the bottom half of the card. (I cut a couple of the circles in half so I could glue them right up to the edge of the striped paper.) I think this was a great solution because the circles help break up the stripes, and they add some subtle visual interest to the bottom half of the card.

Close up of the tag with pink birthday cake.
To make the tag, I stamped the image twice on Whisper White card stock, once in Basic Gray and once in Regal Rose. I used the large tag punch to punch out the Basic Gray image. From the tag stamped in Regal Rose, I cut out just the cake part of the image and glued it over the cake on the Basic Gray image. Then I layered the tag on a larger tag punched out of Regal Rose card stock.

All in all I'm pretty pleased with how this card turned out. I'll share the "boy" birthday card later this week. Thanks for stopping by!

Thursday, December 1, 2011

Thirty-one days of December

Twenty-four days until Christmas! I love the holiday season, the Christmas music on the radio, festive lights inside and out, and yummy treats. But last year (and so far this year, too) I felt stressed during what should be a joyful, festive and peaceful time of year. There's pressure to get cards made and sent out, to decorate, to find the perfect gifts. These are all things that I really enjoy doing, but at this time of year, it seems like they often become chores on a to-do list. (And don't even get me started on the whole commercial side of Christmas. I feel like I need to embrace my inner Charlie Brown and find an old scraggly tree to help everyone remember the real meaning of Christmas.)

So to help combat the stress and make the holiday season more enjoyable, I decided to create a list of thirty-one activities to do during December. They aren't listed in any particular order, and while some items are meaningful, others are very small. But I hope that by the end of the month I will have completed most (or maybe all) of these activities:
  1. Read a holiday-themed story or book. (One of my favorites is The Christmas Box by Richard Paul Evans. It's a quick read but very touching.)
  2. Send a card or letter to someone "just because."
  3. Volunteer to be a Salvation Army bell-ringer (or help with another charity).
  4. Bake cookies.
  5. Turn off the lights and TV and enjoy the lights on the Christmas tree.
  6. Listen to a favorite Christmas CD. Sing along!
  7. Catch snowflakes on my tongue.
  8. Curl up with a blanket and take a nap (without worrying that I should be doing something else).
  9. Eat a candy cane.
  10. Surprise a friend, neighbor or coworker with a small anonymous gift.
  11. Go to the movies.
  12. Give an extra donation to a favorite charity.
  13. Smile at a stranger and wish him or her "Happy holidays" or "Merry Christmas."
  14. Put together a jigsaw puzzle.
  15. Make a snowman.
  16. Make a mug of hot chocolate and watch a favorite holiday movie or cartoon. (I really like How the Grinch Stole Christmas and Miracle on 34th Street.)
  17. Make a colorful paper chain.
  18. Try a new recipe.
  19. Make footprints in fresh snow.
  20. Make at least one gift.
  21. Light a scented candle.
  22. Play Christmas carols on my flute.
  23. Try a new card-making technique.
  24. Play a game of Scrabble.
  25. Take pictures of a peaceful winter scene.
  26. Put out some crackers or bread for the birds and squirrels.
  27. Color a picture in one of  my coloring books.
  28. Make tea and cinnamon sugar toast and watch the yule log channel on TV.
  29. Make a Christmas ornament.
  30. Take an extra yoga class.
  31. Donate a toy to Toys for Tots.
I hope you have a wonderful month and take some time to really enjoy the season!

Wednesday, November 30, 2011

Not even close

Well, today is the last day of November and the end of National Novel Writing Month (NaNoWriMo) 2011. So did I get to the goal of finishing a 50,000-word novel in a month? Not even close. My total word count was 11,018. Ha.

I started out on the right foot, but then life got in the way, and there were things that had to take priority over my novel. And once I realized that there was no way I was going to write 50,000 words, I pretty much lost the motivation to keep going. A lame excuse, I know, but it is what it is.

The good news is that I did write a few thousand words more than the last time I tried NaNoWriMo. At that rate, maybe I'll succeed in another ten or fifteen tries!

Monday, November 28, 2011

Quick and easy Christmas cards

I have one more Christmas card design to share with you today:

Supplies (all Stampin' Up!® unless otherwise noted):
Stamps: Word Play
Paper: WinterSong - My Wooly Scarf and Flurry Kisses patterned papers (s.e.i.); Bazzill White, Maraschino and Horizon textured card stock (Bazzill); Shimmer White card stock
Ink: Cherry Cobbler, Baja Breeze
Accessories: Punches: Large oval, Decorative Label, Scallop Circle, 1-3/8" circle, 1/2" circle; Cherry Cobbler Baker's Twine; Accents & Elements - Little Felt Flurries; Dimensionals

These cards started with a page-layout kit I received at a stamping/scrapbooking store. I don't do a ton of scrapbooking, so when I get kits like this one I'm more likely to use them to make cards. This kit included five sheets of coordinating paper: two different double-sided patterned papers as well as textured blue, red and white card stock. I love the shimmer and sparkle in the patterned papers, so I wanted to create a simple Christmas card that really allowed those papers to stand out.

I made six cards with this design -- two of each color card base -- and they all have the same basic layout. A couple of them have snowflakes in the center, and the others have the greeting "tidings of comfort and joy." For the cards with the greeting, I punched a 1/2" circle out of the striped paper and glued it in the center of the ornament.

These cards originally had completely different focal points. I had used a set of rub-on greetings to create the focal point on each card, but the rub-ons didn't adhere to the textured card stock very well (which is odd, because I've used them on materials that had more texture without any problems), and they started rubbing off. So after I thought I was done (and after I'd gotten over my annoyance), I had to go back and redo the focal point on the cards. But it all worked out for the best, because I think liked the revised cards even better than the originals!

Except for the trouble with the rub-ons, these cards were quick and easy to make. And at this time of year, that's always a good thing. Thanks for stopping by!

Saturday, November 26, 2011

All creatures great and small

I finally finished my Christmas cards yesterday. Woo hoo! I made a total of sixty-five cards this year, which should be just about right. Now I get a break for a week or two, and then it's time to start addressing envelopes. (I still do all of my addressing and signing cards by hand because I actually like the feel of writing and I think it's more personal.)

I've always loved holiday cards that include animals, so two of the card designs I made yesterday focused on animals.

Supplies (all Stampin' Up!®):
Stamps: Zoo Review, Curly Cute
Card stock: Pool Party, Whisper White, Basic Black
Ink: Jet Black StazOn, Pumpkin Pie, Basic Gray
Accessories: Aquapainter, Snow Burst embossing folder, 1/8" Basic Black taffeta ribbon, 1-3/4" circle punch, Dazzling Details, Basic Rhinestones, Dimensionals

This is my favorite Christmas card design from this year (and I think it was subconsciously inspired by an adorable bookmark I received from the World Wildlife Fund). For the main part of the card, I embossed a 4" x 5-1/4" piece of Pool Party card stock with the Snow Burst embossing folder and layered it on a Basic Black card base. I cut pieces of white card stock freehand to make the snowdrifts, stamped the greeting and added Dazzling Details for a little sparkle.

For the penguin, I stamped the image on white card stock and used an Aquapainter brush and ink pads to fill in his beak, feet and wings. I used the 1-3/4" circle punch to punch out the penguin, and then I trimmed around the image, leaving the circular edge on the bottom intact. I used Dimensionals to adhere the penguin to a circle of Pool Party card stock and also to adhere the entire piece onto the card. When placing the penguin image on the card, I tried to match up the snow line on the stamped image with the edge of the snowdrifts, so the penguin is in a slightly different place on each card I made of this design.

For the last couple of details, I tied a piece of black ribbon around the top of the card (to balance out the black greeting on the bottom) and added a few randomly placed rhinestones to the embossed snowflakes on the background. This card just makes me smile!

Supplies (all Stampin' Up!):
Stamps: Zoo Review, Peaceful Season
Card stock: Crumb Cake, Whisper White
Ink: Jet Black StazOn, Always Artichoke, Crumb Cake, More Mustard, Soft Suede, Pumpkin Pie, Basic Gray, Not Quite Navy
Accessories: Circle punches: 3/4", 1-1/4", 1-3/8", 1-3/4"; Framed Tulips embossing folder; Aquapainter

This is a fairly simple card; it doesn't have any layers or (as I realized when I was done making it) any embellishments. But I think the simplicity works well with the message and feel of this card.

To start I stamped the greeting and dove on opposite corners of a Crumb Cake card base. Then I embossed the card with the Framed Tulips embossing folder. When I stamped the images, I tried to leave a little space on the sides to account for the embossing. Parts of the images still ended up getting embossed, but it doesn't really affect the card.

I stamped the animal images on white card stock, colored them with an Aquapainter brush and ink pads and punched them out with different sizes of circle punches. (I used all five of the animal stamps in the Zoo Review set, but they wouldn't all fit on the card. So the cards I made with this design have different combinations of animals.) I stamped the Earth image in Always Artichoke, filled it in with an Aquapainter and Not Quite Navy ink and punched it out with the 3/4" circle punch. I played with the arrangement of the circles until I liked the layout and then glued them down (the Earth image is adhered with a Dimensional).

Honestly, this card didn't turn out how I imaged. It was yet another case of something being lost in translation between my head and my hands. But I'm still pretty happy with the end product.

Now with my cards made, I just need to do my Christmas shopping, gift-making, wrapping, decorating, maybe some baking ... I'd better get busy! Thanks for stopping by!

Thursday, November 24, 2011

Thankful thoughts

Happy Thanksgiving!

Although I don't always remember it, I am thankful for many things in my life. Big things like family, a job, food and my home. And little things like books, fleece blankets, beautiful flowers and lots of crafting supplies. And today I'm also thankful for what looks like will be a beautiful warm (for November) and sunny day.

I hope you and your loved ones have a wonderful holiday filled with many things for which to be thankful.