Saturday, April 30, 2016

Card-making activity for work

I am on the human resources team at work, and one of my job responsibilities is to plan a monthly calendar for our break room with different activities for team members to do (my lesson-planning skills from childcare have been put to good use!). I try to vary the activities, and each month I like to do something creative, such as making origami, cutting coffee filters into intricate snowflakes, or creating paper flowers to decorate the break room.

When I started working on the calendar for May, I knew I wanted to do a Mother's Day card-making activity. I picked out a few supplies we had in the store -- white card stock, gold striped washi tape and twine -- added in a few of my own supplies and created this card design:

Supplies (all Stampin' Up! unless otherwise noted):
Paper: White card stock (unknown), Pistachio Pudding and Strawberry Slush card stock, All Abloom Designer Series Paper (DSP) Stack
Accessories: Fun Flower punch, Sweet Buttons Embosslits die, gold striped washi tape (Target), twine (Target), foam tape (3M), liquid glue

I knew I needed to have a relatively simple card design for a couple of reasons: 1) We have limited work space and limited time for breaks, and 2) I won't necessarily be around to help or answer questions. I also wanted a fairly generic design so the card didn't necessarily have to be for Mother's Day. (I am bringing in two different sentiments to stamp inside the card: "Happy Mother's Day" and "Thinking of You.")

I'm planning to cut the layers of card stock, punch the flowers and die cut the buttons ahead of time. I'll probably use a few different colors and DSP patterns so there's a little variety. (I have so much card stock and DSP that I'm happy to share some of it.)

In terms of providing instructions, I think I'm going to divide things up into a few basic steps and put the materials for each step into a plastic baggie with the instructions taped to the outside of the bag. (For example, "Step 1: Select a layer of colored card stock." "Step 2: Adhere a piece of washi tape along the bottom of the layer. Tie a piece of twine just above the washi tape.") Of course, everyone is welcome to design whatever card they want, but I have a feeling they'll appreciate a little direction. Either way, I just hope my coworkers try making a card and enjoy the activity.

Thanks for stopping by!

Tuesday, April 26, 2016

Pink, polka dots and a little sparkle

I needed a birthday card for a two-year-old little girl, and I thought pink, polka dots and a little sparkle was in order.

Supplies (all Stampin' Up! unless otherwise noted):
Stamps: Party Hearty, Remembering Your Birthday
Paper: 110-lb white (Recollections), Whisper White card stock; Let's Polka, Mon Amie patterned paper (Lawn Fawn)
Ink: Regal Rose, Daffodil Delight, Chocolate Chip
Accessories: Metallic foil doilies, Large Stitched Rectangle Stackables Lawn Cuts dies (Lawn Fawn), Decorative Dots embossing folder, 2" circle punch, Action Wobble Spring (Raisin Boat), gold and silver Wink of Stella glitter brush pens, Dimensionals, Mono Multi liquid glue

This was the first time I used the stitched rectangle dies I bought ages ago. The largest die is the perfect size for cutting a piece of patterned paper to attach to the front of an A2 card. And I love the little detail it adds to the background.

An extra fun part of this card is that the focal point is mounted on an Action Wobble Spring, so the cupcake and embossed circle wobble and wiggle.

I used my gold Wink of Stella glitter brush pen to add sparkle to the candle flames and a few of the sprinkles on the cupcake. The rest of the sparkles I colored in with my silver glitter brush pen.

For the banner, I stamped the sentiment on a strip of white card stock and trimmed the ends into points. To add the curves, I ran my bone folder along the back of the strip (as you would use a scissors with curling ribbon) in the middle and then along the front of the strip along the two ends. I stacked three Dimensionals together and placed them behind the "mountain" in middle of the banner and adhered it to the card. The two "valleys" on the sides are adhered directly to the card base.

Thanks for stopping by!

Saturday, April 23, 2016

First Communion cards with punch-art chalice

For the first Communion of my two cousins, I wanted to make a card that had a focal image other than a cross. I did a Google search, and after taking bits and pieces of inspiration from different projects, here is what I created:

Supplies (all Stampin' Up! unless otherwise noted):
Stamps: Autumn Days
Paper: 110-lb Whisper White (Recollections), so Saffron, Delightful Dijon, Smoky Slate, Naturals White card stock
Ink: So Saffron, Delightful Dijon, Smoky Slate
Accessories: 1-3/4" and 1" circle punches, Round Tab punch, Framed Tulips embossing folder, Corner Chomper (We R Memeory Keepers), Wink of Stella clear glitter brush pen, sponge, scoring stylus, Mono Multi liquid glue, Dimensionals

I just want to point out that the yellow panels are two different colors; it's not weird lighting or shadows. I didn't want the cards to be exactly the same, so I figured the easiest change was to use different background colors. Otherwise the cards are the same, and for the most part I think they are pretty self-explanatory. One detail that's hard to see is the clear Wink of Stella glitter that I brushed on the raised tulips along the embossed edge to add just a bit of sparkle.

I do have a few close-up photos that show how I made the chalice:

Step 1: Punch a Round Tab shape out of the desired color of card stock. Attach a small self-stick note or flag to one end so you have something to hold onto for the next step.

Step 2: Insert the shape back into the punch and position it to one side, lining up the notch in the middle and the curves on the ends. This will create the stem of the chalice, and you can decide how thick you want it to be. When you're happy with how it looks, punch again.

Step 3: Trim the ends so they are flat.

Step 4: Punch a 1-3/4" circle from the same color of card stock and then cut the circle in half. Glue half of the circle to the base of the chalice and finish as desired. For my cards I sponged Smoky Slate ink around the edges of the chalice.

I didn't get a separate photo of it, but to make the host, I punched a 1" circle from Naturals White card stock. I used a scoring stylus to deboss a cross in the white circle and then glued the circle to the back of the chalice.

I attached the chalice to the stamped background with Dimensionals and then used Dimensionals again to attach the panel to the embossed card base. Thanks for stopping by!

Tuesday, April 19, 2016

Simple prayer journals

Two of my cousins will be celebrating their First Communion at the end of this month, and I wanted to give them a small gift in addition to a check and card. After tossing around a few ideas, I settled on a very simple prayer journal/notebook with a bookmark.

Supplies:
Blank notebooks (Ikea), alphabet stickers (unknown), fabric washi tape and felt rickrack stickers (Target), jumbo clips (unknown), Basic Black card stock (Stampin' Up!), Pop-Up Posies designer kit (Stampin' Up!), jumbo brads (Stampin' Up!), 2" circle and scallop circle punches (Stampin' Up!), 3-in-1 Advanced Craft Glue (Beacon), Dimensionals (Stampin' Up!)

Originally I was going to cover the journals with patterned paper and then embellish them. But I decided to take a more practical route for the two eight-year-olds, who aren't terribly interested in "fancy" things. (And the notebooks themselves aren't very heavy duty, so I don't expect them to have a very long life anyway.) I dug through my collection of alphabet stickers, pulled out a few sheets, and personalized each notebook. To embellish them I used felt rickrack stickers for Will's and fabric washi tape and a die-cut flower with a brad center for Elizabeth's.

With the journals done, I made coordinating bookmark clips. For Will's I used a simple circle base with the leftover rickrack strips from the journal. For Elizabeth's bookmark I used a scallop circle base and added a die-cut flower like the one on the journal.

To assemble the bookmarks, I punched out two bases from Basic Black card stock for each one. I placed one base on the table, face down, and applied a line of 3-in-1 Advanced Craft Glue in the shape of the end of the paper clip. I placed the clip in the glue and let it dry. Then I placed a few Dimensionals on the card stock around the clip. I added more glue on the clip and then attached the other base. For Will's bookmark I embellished the circles before I glued everything together, but I added the flower on Elizabeth's after the bases were glued to the clip.

I still have to finish the cards that will accompany the gifts, so I hope to be able to share those soon.
Thanks for stopping by!

Tuesday, April 12, 2016

March 2016 Paper Pumpkin: Alternate projects

When I opened the March 2016 Paper Pumpkin kit, Pocketful of Cheer, I immediately loved the color combo (Soft Sky, Bermuda Bay, and Cucumber Crush), patterned paper, and versatile stamp images. The projects -- eight gift card holders, four small and four large -- were cute, too, of course. But I don't really give many gift cards as presents, so I made one holder of each style and then transformed the rest of the kit contents into other projects (with the addition of a few other supplies):

The two items on the left are the ones I made following the kit instructions. The rest of the projects are (going clockwise) a set of four note cards with lined envelopes, three A2 cards with envelopes, four treat holders (two with a coordinating mini card, two fold-open style), and a gift enclosure card with coordinating envelope.

I was really impressed with how far the kit contents went -- and I still have a few scraps of the printed paper left over. These are the additional supplies I used (all Stampin' Up!):
Stamps: Tin of Cards
Paper: Whisper White note cards and envelopes, medium white envelopes
Ink: Soft Sky, Cucumber Crush
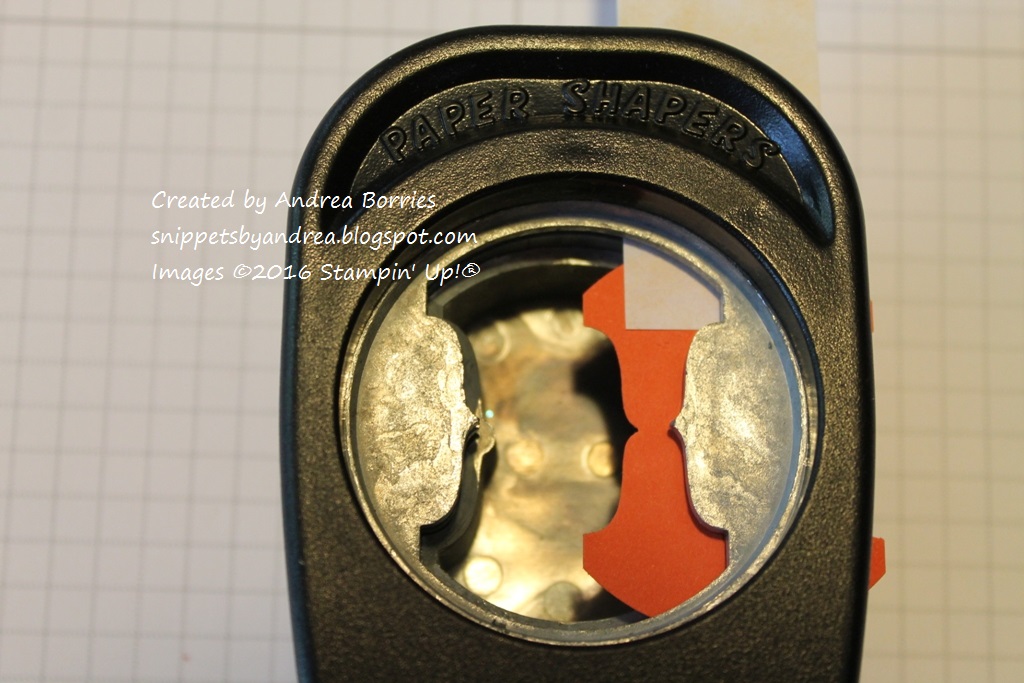
Accessories: Rhinestones; Very Vintage Designer Buttons; punches: Corner rounder, 1-1/4" scallop circle punch, 1-3/4" scallop circle punch, 1-3/8" circle punch; Simply Scored Tool and diagonal plate

Here are close-up pictures of the alternate projects as well as a few details for each:

The two pocket treat holders were the first extra projects I made. (I may or may not have had to buy a bag of Ghirardelli chocolate squares specifically to see of this idea would work. And I may or may not have had to eat the rest of the chocolates in the bag. Just sayin'.) For the striped holder I used two of the gift card pockets and adhered the flaps together. I made a belly band and added a stamped circle tag with the green and white twine.

For the kraft holder I cut apart two of the small gift card holders. Measuring from the concave end of each holder, I cut off the end about 1/4" past the score line. Then I cut off the points from the end (I think that was about 1/4" as well). I folded the flaps on the creases and adhered the two pieces together.

I stamped two of the small cards and tucked one in each holder. And there's still room to include a gift card if needed.

For these two treat holders I used the rest of the kraft gift card holders that I cut apart to make the previous project. The holder on the left is a matchbook style. The circle part of the focal image is attached to the top of the holder with Dimensionals, and the bottom part tucks behind the pennant tails.


For the second holder simply I made a belly band to keep the holder closed. To stamp the tag for this one, I used the "just for you" stamp from the kit and inked only the "for you" portion of the stamp.

I added the chocolate inside the holder with a small piece of double-stick tape (a couple of Glue Dots would also work). There's also space to hand write a note inside the holder.

I used the last mini card to make a small gift enclosure card. For the focal image I stamped "just for you" and a flower on the back of a small piece of the patterned paper and then punched it out. I was going to use Whisper White card stock, but it was too bright compared to the card base.

For the envelope, I cut a 4-1/2" square from the middle of one of the pieces of patterned paper. Using the Simply Scored Tool and diagonal plate, I scored two opposite sides at 2-5/8" and the other two sides at 1-5/8". Then I just folded on the score lines, trimmed off the point on the bottom flap and adhered the flaps to create the envelope. I'll seal the envelope with one of the self-adhesive circles from the kit.

I wanted to have a few different sentiments on my cards, so I used the Tin of Cards stamp set. For this card I turned one of the die-cut squares on an angle and then stamped the greeting and a few flowers. In hindsight, I think I should have left off the flowers or stamped just one. The focal layer is a little busy against the patterned paper.

To make a simple coordinating envelope, I adhered a strip of the patterned paper along the left edge of a medium white envelope.

To make the envelope liner for this card (and the following one) I traced the envelope flap on the back of the patterned paper. I cut it out and slipped it into the envelope so the top edge is just below the adhesive and the bottom edge is just below the opening. I partially closed the flap on the envelope to figure out where to crease the liner and then I adhered the liner to the envelope flap.

I used a large piece of patterned paper for the background on this card. Unfortunately I realized too late that the small guidelines (used for positioning the gift card pocket if following the kit instructions) were visible near the bottom of the card. I'm sure it would have been fine to leave as is, since the pattern on the paper is so busy and I don't think you'd notice the lines unless you were looking for them. But I decided to use a few rhinestones to cover the guidelines.

I used the gift card pocket, with the flaps cut off at the score lines, to make a mat for the focal image.

I think this card set is my favorite of the alternate projects, and I may use these layouts to make more card sets with other papers. To make the flowers, I snipped between the scallops after punching them out and gently curled up the petals. I used buttons with twine bows for the centers and little pennants for the leaves.

I also lined the envelopes, using the same technique as described above, to create a finished look for the card set.


Whew! That was a long post. Thanks for making it to the end. I hope you found a little inspiration for the March Paper Pumpkin kit or your card making in general. Thanks for stopping by!

Tuesday, April 5, 2016

Working well together

When I'm making cards I sometimes find that it's tricky to mix together products -- especially stamp images -- from different companies because each company has its own unique style. So I was pretty pleased when I finished this birthday shaker card last weekend using papercrafting products from eight different companies:

Supplies (all Stampin' Up! unless otherwise noted):
Stamps: Happy Birthday Background (Inkadinkadoo), Geo-Graphic (Paper Smooches), Hello Sunshine (Lawn Fawn)
Paper: Thick Whisper White, Cucumber Crush, Soft Sky card stock; Sno Cone rectangular shaker overlay (The Papercut)
Ink: Cucumber Crush, Soft Sky, Bermuda Bay, Smoky Slate
Accessories: Bermuda Bay sequin trim, white iridescent sequins (unknown), Party Punch Pack, Hello Sunshine Lawn Cuts dies (Lawn Fawn), glitter (Creatology), large rectangle shaker pouch (Impression Obsession), Bermuda Bay taffeta ribbon, rhinestones, Embossing Buddy, Dimensionals, Glue Dots

Whew! For me, that's a lot of supplies on one card. But everything works well together.

For my color scheme, I started with the pre-cut shaker overlay, which was a light blue color close to Soft Sky. (Not-quite-matching colors is another challenge when combining products from various companies.) For the other colors -- Bermuda Bay and Cucumber Crush -- I was inspired by the March Paper Pumpkin kit.

I stamped a chevron background stamp on the shaker overlay using Soft Sky ink. The stamp only consists of about four or five of the chevron lines, so I had to stamp it repeatedly to cover the whole piece. (Thank goodness it was a clear photopolymer stamp, although I still didn't get the spacing perfect.) Then I set that aside to work on the card base.

Using a base of thick Whisper White card stock, I stamped the Happy Birthday background image in the middle of the card with Bermuda Bay ink. Then I stamped a few balloons over the text. (When stamping the heart balloons in Cucumber Crush I stamped on scratch paper first so the green was lighter and didn't overpower the words. The Soft Sky ink is light enough to stamp directly on the card.) I stamped the balloon strings with Smoky Slate.

Before I decided what to put inside the shaker I wanted to figure out exactly where the shaker would go. Without removing the backing from the self-adhesive pouch, I moved the plastic piece around on the card until I was happy with the placement. I also set the overlay on top of the shaker pouch to be sure I would have a fairly even white border around the overlay. Then I held the pouch in place, removed the overlay and lightly traced around the corners of the pouch with a pencil. (The pencil lines were covered by the overlay on the finished card.)

Then came the fun part of deciding what goodies to put inside the shaker. I made a little pile of Bermuda Bay sequins, some iridescent white sequins and glitter in the middle of the focal image. I decided to continue the balloon theme, so I punched out a few little Soft Sky and Cucumber Crush balloons and added them to the pile. When I was happy with the shaker goodies, I removed the backing from the pouch and adhered it to the card front using the traced lines as a guide. (Note: The plastic shaker pouches can be static-y, so I rubbed my pouch with my Embossing Buddy dust before adhering it. But then I had to wipe off the dust from the Embossing Buddy. Next time I might try using a dryer sheet.) Then I adhered the overlay on top

I finished off the card with a few stamped and die-cut balloons, rhinestones and a Bermuda Bay ribbon and bow around the bottom of the card. What a fun, festive birthday card! Thanks for stopping by!

Sunday, April 3, 2016

Tin of Cards with a little twist

First off, I intended to write this post last night so I would have finished two posts for the week. But I quite literally could not keep my eyes open and fell asleep on the couch. Maybe I'll be able to finish three posts this week to make up for it. Maybe. But now on to the good stuff.

Several weeks ago I finally caved and bought the Tin of Cards stamp set and kit when Stampin' Up! had the kit on sale. I'd been eyeing the kit since the catalog came out last summer, but I just couldn't decide if I should get it. Why? Because even though I really liked three of the card designs, I just didn't care for the fourth one -- the one with the gold striped layer -- at all. But once it was on sale, I figured it was worth it to give it a shot.

When I assembled the kit, most of the cards I made as designed or with little changes, such as adding an embellishment from my stash or using a different stamp set. But I really changed up the fourth design by using a few of my own supplies, mainly Designer Series Paper (DSP) and metallic foil doilies.

Additional supplies (all Stampin' Up!):
Accessories: Metallic foil doilies

Instead of using the gold striped layers as one piece on each card, I cut the strips apart and used them as accents on the four cards. And layering the pre-printed circle on a gold doily made the perfect focal point. For the background on this card I trimmed down the extra sheet of DSP that was left over from making the dividers in the kit. (There are nine dividers and ten sheets of DSP, two of each of five patterns.) I added a little of the twine behind the focal image and finished off with three clear epoxy stars.

Additional supplies (all Stampin' Up!):
Paper: Leftovers from a Paper Pumpkin kit, Summer Smooches DSP
Accessories: Metallic foil doilies, Banner punch

I used a sort of DSP patchwork for the background on this card -- a great way to use up those scraps of pretty papers. (I chose this color combination based on one of the other card designs in the kit.) The polka dot strip on the right is what was left from the previous card, so it's a leftover of a leftover. Again I used the doily and twine to complete the focal image and added the epoxy stars, but this time instead of adding a whole strip of gold paper I punched a little banner from one of the strips and added it in the upper right corner.

Additional supplies (all Stampin' Up!):
Paper: Leftovers from a Paper Pumpkin kit
Accessories:Metallic foil doilies

For the background on this card I used several strips of gold paper and DSP in different widths. And those yellow strips? They were leftover after I punched out the die-cut pieces for one of the other card designs in the kit. I wrapped the twine around the card front twice and tied it off in a bow. A gold doily and epoxy stars finish off the card.

Additional supplies (all Stampin' Up!):
Stamps: Distressed Dots
Ink: Memento Tuxedo Black
Accessories: Metallic foil doilies, Banner punch

For the congratulations card I decided to stick with a more simple and elegant black, white and gold color scheme. I stamped the card base with the Distressed Dots background stamp in black ink. I mounted the focal image on a gold doily and added a small gold banner to either side of the circle. I used the twine to add a bow at the bottom of the focal image and added the three epoxy stars.

So what do you think? Redesigning the cards did take more time and energy than making them the way they were designed in the kit, but it feels good to have cards that are a little more "me." And it was a good reminder that you never have to make what a kit is "supposed" to make. So maybe we should consider the finished product of a kit more like a suggestion of what you can do with the included supplies, just like packaged food has "serving suggestions" pictured on the packaging. Hmm ... sometime I may have to buy a kit, completely toss the directions and just see what I can make. Thanks for stopping by!