Tuesday, February 26, 2019

For a fun-gi

I love mushrooms and a good pun, so this card was a lot of fun to make:

Supplies (all Stampin' Up! unless otherwise noted):
Stamps: Tree Rings, Punny Man 2 (Taylored Expressions), Snailed It (Essentials by Ellen)
Paper: Crumb Cake, Very Vanilla, textured Soft Suede card stock
Ink: Soft Suede, Crumb Cake, Poppy Parade, Pumpkin Pie
Accessories: Clear Droplets (Pretty Pink Posh), Art Glitter Glue (Art Institute Glitter)

I love how this card turned out - the neutral color pallet with a pop of color, the nature images, and of course, the witty sentiment. (I wish I had noticed that the card stand was covering up the sentiment before I took the picture, though.)

Everything is pretty straightforward with this card, but I will point out how I made the two-tone mushroom caps. I inked the whole stamp with Pumpkin Pie ink and then rolled the edges of the stamp in Poppy Parade ink before stamping it on the card stock. I got a little more red ink than I originally intended, but I think it works.

Thanks for stopping by!

Thursday, February 21, 2019

A birthday brew

Guess what? We had another blizzard yesterday. Sigh. I don't know how much snow we got this time; it doesn't really seem to matter at this point. There is just snow everywhere, and I am done shoveling. Done. I'm running out of places to throw the snow.

This winter may just drive me to drink, so here is a fitting card:

Supplies (all Stampin' Up! unless otherwise noted):
Stamps: Bubble Over, Itty Bitty Birthdays
Paper: Thick Very Vanilla, Chocolate Chip, Real Red, Crushed Curry card stock; gold foil sheets
Ink: Chocolate Chip
Accessories: Bottles & Bubbles Framelits dies, Paper coaster (Hero Arts), Itty Bitty Accents punch pack, Brights enamel shapes, sponge, Dimensionals

I actually prefer fruity, tropical drinks over beer, but this birthday card was perfect for my cousin's husband. Although if I were making this card today, I might have found a way to stamp "Have a blizzard brew."

I think my favorite part of the card is the paper coaster. Ages ago I bought a kit (on clearance!) that included twenty paper coasters, a few stamps, and a mini stamp pad. The idea of the kit is to make personalized coasters for a party. Now I'm not a big party-er, but I thought the coasters would be great for making cards, banners, or other projects. I'm glad I thought to add one to this card!

I did sponge Chocolate Chip ink around the edge of the coaster, as well as the bottles, to add some depth. And I built on the circle theme by stamping overlapping circle images on the background and adding three enamel dots in the top left corner.

Supplies (all Stampin' Up! unless otherwise noted):
Stamps: Bubble Over, Itty Bitty Birthdays
Paper: Soft Sky, Whisper White, Gorgeous Grape, Call Me Clover, Poppy Parade, Lemon Lime Twist card stock; silver foil sheets
Ink: Soft Sky, Gorgeous Grape, Call Me Clover, Poppy Parade, Lemon Lime Twist, Memento Tuxedo Black
Accessories: Bottles & Bubbles Framelits dies, clear droplets (Pretty Pink Posh), Dimensionals, Corner Chomper (We R memory Keepers)

Here is a fun card for the younger set or, really, anyone who prefers soda over beer. I chose a few bright colors, die cut the pop bottles -- think Tahitian Treat, Grape Crush, and Mountain Dew -- and created a matching label for each bottle. I added silver caps on two of the bottles and die-cut straws to the other two.

I used Soft Sky for the card base and added a strip of silver foil paper along the bottom to create the look of a metal counter top. I played around with the position of the bottles, and once I was happy with it, I glued down the two outer bottles. Then I stamped the bubbles on the card base before attaching the other two bottles with Dimensionals. A few clear droplets add to the fizzy effect, and to finish the card, I added a narrow white banner stamped with a sentiment.

Thanks for stopping by today! I'll just be sitting over here crossing my fingers that we don't get any more snow. At least not in February ...

Sunday, February 17, 2019

February Christmas card: Festive wreath

Since it definitely looks like Christmas around here, it seemed like a good weekend to make my February Christmas cards. And as a bonus, it gave me a chance to try out one of my new stamp sets.

Supplies (all Stampin' Up! unless otherwise noted):
Stamps: Wreath Turnabout (Concord & 9th), Stitched with Cheer
Paper: Lucky Limeade, Very Vanilla card stock; Candlelight Christmas Specialty Designer Series Paper (DSP); gold foil sheets
Ink: Lucky Limeade, Tip Top Taupe, Early Espresso, Real Red
Accessories: Bunch of Banners Framelits dies, gold sequins (Craft Medley), stamp positioner (Tim Holtz), Mini Turnabout Jig (Concord & 9th), Dimensionals, Art Glitter Glue (Art Institute Glitter)

The inspiration for this card was a sample card on the Concord & 9th site that featured a autumn-colored wreath on a striped card base. I love florals or leaves with stripes, so I ran with it.

The first step was to look through my paper stash to find a colors that would work with a wreath. This sheet from the Candlelight Christmas DSP was perfect. It has four colors: Early Espresso, Real Red, Lucky Limeade and Primrose Petals. For my first attempt at stamping the wreath, I tried using all those colors, but Primrose Petals was too close to Real Red, and it didn't look right. So I took that one out of the mix and substituted in a light neutral, Tip Top Taupe.

The most time-consuming part of this design was definitely the stamping. The Turnabout stamps are really fun and not hard to do with a stamp positioner. But since I was making six cards of this design, and I had to stamp each complete focal panel before moving on to the next one, I had to keep cleaning off the stamp to switch ink colors.

Once the stamping was done, the rest of the card came together pretty easily. I adhered a 3-3/4" x 5-1/2" piece of DSP to an A2-sized Lucky Limeade card base, leaving a 1/4" border on each side of the DSP. I added a strip of gold foil to the top and bottom of the focal panel and adhered that over the DSP. Using Dimensionals I attached a banner with a sentiment in the middle of the wreath, and three gold sequins are the finishing touch.

Thanks for stopping by!

Thursday, February 14, 2019

Watercolor valentines

Happy Valentine's Day! A handmade card is a great way to show your love on Valentine's Day -- or any day! -- and this year I had fun making valentines with new watercolor paints and fun heart dies.

Supplies:
Paper: Poppy Parade card stock (Stampin' Up!), gold foil sheets (Stampin' Up!), watercolor paper (Strathmore)
Ink: Gansai Tambi watercolor paints: 30, 33, 37, 42, 139 (Kuretake)
Accessories: Hearts Entwined die (My Favorite Things), sparkling clear sequins (Pretty Pink Posh), Art Glitter Glue (Art Institute Glitter), Scor-Tape (Scor-Pal)

I've tried making watercolor wash backgrounds before, and I was never really happy with the results. The last set of paints I tried -- a cheap set -- left a chalky residue that would smear across the card, even when it was dry. But I got a set of Gansai Tambi watercolor paints for Christmas, and so far I love them. They are beautiful and creamy and didn't make me frustrated -- always a good thing with my craft supplies.

Most of these cards have a very similar layout -- this first one is my favorite; it makes me so happy! -- so I'll just explain my overall approach. I cut a piece of watercolor paper to 3-3/4" x 5". With a brush I applied a light layer of water in the middle of the paper, stopping about 1/2" from the edges. That creates a space for the paint to flow.

Supplies:
Paper: Purely Pomegranate card stock (Stampin' Up!), gold foil sheets (Stampin' Up!), watercolor paper (Strathmore)
Ink: Gansai Tambi watercolor paints: 30, 33, 37, 42 (Kuretake)
Accessories: Hearts Entwined die (My Favorite Things), sparkling clear sequins (Pretty Pink Posh), Art Glitter Glue (Art Institute Glitter), Scor-Tape (Scor-Pal), Artist-tac adhesive (Grafix)

Once the paper was wet, I picked up the first color of paint and applied it in either a horizontal or diagonal stripe. Then I added the rest of the colors, rinsing the brush between colors. Once all the colors were on the paper, I used my paintbrush and a little water to blend the colors. I started with the darker colors at the top, lightly brushing back and forth (in the same direction of the colors), and moved down to the light colors at the bottom. A couple of times I had too much water on the paper, so I blotted it with a paper towel and, if needed, added a bit more paint. Then the hard part -- waiting for the paint to dry. I'm impatient, so I used my heat gun to help the process along a bit.

Supplies:
Paper: Purely Pomegranate card stock (Stampin' Up!), copper foil sheets (Stampin' Up!), watercolor paper (Strathmore)
Ink: Gansai Tambi watercolor paints: 30, 33, 37, 42 (Kuretake)
Accessories: Hearts Entwined die (My Favorite Things), Sentimental dies (Avery Elle), All Year Cheer washi tape (Stampin' Up!), sparkling clear sequins (Pretty Pink Posh), Art Glitter Glue (Art Institute Glitter), foam sheets (Taylored Expressions)

Once everything was dry, I die-cut hearts from foil sheets, adhered them to the watercolor paper and added a few clear sequins.

For this card, I trimmed down the panel of watercolor paper and adhered it across the card. I used copper foil instead of gold for the die-cut shapes (I trimmed out two of the hearts from the full die cut) and added a strip of copper washi tape across the top and bottom edges of the watercolor paper.

Supplies:
Paper: Berry Burst card stock (Stampin' Up!), gold foil sheets (Stampin' Up!), watercolor paper (Strathmore)
Ink: Gansai Tambi watercolor paints: 30, 33, 37, 42 (Kuretake)
Accessories: Hearts dies (Little B), sparkling clear sequins (Pretty Pink Posh), Art Glitter Glue (Art Institute Glitter), Scor-Tape (Scor-Pal), Dimensionals (Stampin' Up!)

For this card and the next one, I switched to a single large gold heart. This is actually made with three dies from the set: one to cut the outside edge, one to cut out the inside, and one to add the faux stitching. Before doing any die cutting, I set the three dies on the table, nested inside each other, and gently shifted them until they were lined up. Then I used a couple of small pieces of washi tape to hold the dies together. With the dies taped together, I could cut out multiple hearts without having to rearrange the dies each time I used them.

Supplies:
Paper: Poppy Parade card stock (Stampin' Up!), gold foil sheets (Stampin' Up!), watercolor paper (Strathmore)
Ink: Gansai Tambi watercolor paints: 30, 33, 37, 42, 91, 139 (Kuretake)
Accessories: Hearts dies (Little B), sparkling clear sequins (Pretty Pink Posh), Art Glitter Glue (Art Institute Glitter), Scor-Tape (Scor-Pal)

For the background panel on this card I added gold watercolor paint to the color palette. It has more shine in real life than it does in this photo, but if I were to make this one again I would leave it off. I think it makes the card seem unbalanced and bottom-heavy; that was the reason I positioned the heart a little higher on this card. Or I could have had gold paint in the upper left and lower right corners and worked through the colors to the purple in the middle (so gold, yellow, orange, red, purple, red, orange, yellow, gold). Maybe I'll try that next time.

And now for a card that's completely different ...
Supplies:
Paper: Thick Whisper White card stock (Stampin' Up!), gold foil sheets (Stampin' Up!), water color paper (Strathmore)
Ink: Black journaling pen, gold paint pen (Sharpie), Gansai Tambi watercolor paints: 30, 33, 37, 42, 139 (Kuretake)
Accessories: Hearts dies (Little B), vintage newsprint washi tape (unknown), Scripty Hello die (Lawn Fawn), Brights sequin assortment (Stampin' Up!), Art Glitter Glue (Art Institute Glitter)

While I was practicing with the watercolor paints, I used a scrap of watercolor paper for test swatches of the colors I wanted to use. The scrap ended up looking really cool and I didn't want to waste it, so I die cut it into the word "hello." I combined that with a piece of newsprint-style washi tape and a gold heart (the center of one of the hearts from the previous two cards) on a white card base. I doodled a black border with a few gold dots and added three bright sequins to finish the card. It's definitely a non-traditional valentine, but it was perfect for one of my friends.

Thanks for stopping by today. I hope your Valentine's Day is filled with love and friendship -- and a little chocolate!

Wednesday, February 13, 2019

Bright colors needed

I am ready for winter to be over. For the past week it's been snowing, and snowing, and snowing. Sure, it can be pretty. But when you have to go out and shovel every day of the week, often multiple times a day, and the snow just blows back in your face, the beauty kind of wears off. So as I sit at my craft table and look out at the expanse of white, I decided I needed to share a card with some bright colors.

Supplies (all Stampin' Up! unless otherwise noted):
Stamps: Hip Hip Hooray (Echo Park)
Paper: Thick Whisper White, Melon Mambo card stock
Ink: Melon Mambo, Lemon Lime Twist, Flirty Flamingo, Stardust Gelly Roll pen (Sakura)
Accessories: Lemon Lime Twist ombre ribbon, glitter enamel dots, Corner Chomper (We R Memory Keepers), foam tape (3M)

This color combo is a little out of my comfort zone, but I love the way this card turned out. It makes me think of flowers or berries -- summery sorts of things. Sigh.

When I started stamping the balloons on the card base I realized that it was the perfect image for a repetitive tile effect. And since it's a clear stamp, it was easy to eyeball the placement of the images. I did clean off the stamp and switch colors every few images, working down the card base, rather than trying to stamp all of the balloons in one color before switching to the next color.

For the focal image, I stamped the sentiment in the darkest color, Melon Mambo, and matted it with coordinating card stock. Along the bottom edge of the focal piece I added Lemon Lime Twist ribbon, adhering it to make a series of loops. I used foam tape to adhere the panel to the card base.

You can't have a birthday card without a little sparkle, so I added three green glitter enamel dots and colored in the white dots on the word "super" with a glitter pen.

I hope your day is filled with all kinds of color. Thanks for stopping by!

Friday, February 8, 2019

Meals on Wheels valentines

For the past several years, I've donated hand-made valentines to a local community service organization that delivers them to Meals on Wheels clients. (If you type "Meals on Wheels" in my blog search bar, you'll find several posts showing the cards I've made in previous years.) It's a project I really enjoy doing, but the timing is always a little tricky because I have to jump right in after Christmas.

This year I got a late start with my valentines, but I still managed to make 118 cards, which I delivered to the community center yesterday morning:


Supplies (all Stampin' Up! unless otherwise noted):
Stamps: Valentine's Day sentiment (Endless Creations)
Paper: Pale Plum, Mint Macaron card stock; Succulent Garden Designer Series Paper (DSP); Glimmer Paper Assortment Pack
Ink: Memento Tuxedo Black
Accessories: Heart punch, small heart punch, corner rounder, rhinestones, white polka dot tulle ribbon, Dimensionals

Normally I don't like to mass produce cards because I get bored with them. But since I had to make so many cards in a short period of time, I designed four basic layouts and then made multiples of each design, switching up the card stock colors and DSP patterns.

I have a few other time-saving tips that helped me create all these cards on time.

Whenever possible, use "easy" measurements. For instance, with this design, I cut pieces of 12" x 12" DSP into 3" x 3" pieces to use on the front of the cards. That meant I used the whole sheet and didn't have to make extra cuts to trim each piece. I also made full-size A2 cards, so I just needed to cut pieces of card stock in half to make the bases. And here's a bonus tip: If you're scoring your card bases, which I always do, score the piece of card stock before cutting it. That way you score two cards at once.

Supplies (all Stampin' Up! unless otherwise noted):
Stamps: Garden in Bloom, Wild About Ewe, Honey! (Raising Boat)
Paper: Card stock and DSP Prints in Almost Amethyst, Groovy Guava, Certainly Celery, Pear Pizzazz; Chocolate Chip card stock
Ink: Chocolate Chip
Accessories: Heart punch, corner rounder, heart border punch, heart trio punch, brown ribbon (unknown), Chocolate Chip polytwill ribbon, Sparkle Silk (Fun Stampers Journey), Mono Multi liquid glue, Dimensionals

Minimize stamping. For all of my card designs, I relied on punches or dies (punches were my first choice since they are faster than die cutting) and patterned paper. I only used stamps for the sentiments. I didn't have to worry about coloring stamped images or pulling out multiple ink colors. Minimal stamping also meant there were fewer chances to smear an image or stamp it crooked, both of which could have taken more time and/or paper to fix.

Supplies (all Stampin' Up! unless otherwise noted):
Stamps: Valentine's Day sentiment (Endless Creations)
Paper: 80-lb white card stock (Cougar); Pool Party, Rich Razzleberry, Island Indigo, Tangerine Tango card stock; Sycamore Street DSP
Ink: Rich Razzleberry, Island Indigo
Accessories: Hearts die (Sizzix), Quilt Top embossing folder, Sycamore Street ribbon pack, Rich Razzleberry velvet ribbon, gold sequins (Craft Medley), small heart punch, Dimensionals, Glue Dots, Mono Multi liquid glue

Use light-colored card bases. For all of my card designs, I used white or light-colored card bases (with dark ink), which was a huge time-saver. With dark card bases, I would have had to cut layers of white card stock to adhere inside the cards so I could stamp a sentiment.

Supplies (all Stampin' Up! unless otherwise noted):
Stamps: "Happy Valentine's Day" (Paper Source) (not pictured)
Paper: Sweet Sugarplum, Orchid Opulence, Mint Macaron, Pear Pizzazz, Crumb Cake, Pistachio Pudding, Pink Pirouette card stock; 80-lb white card stock (Cougar); Llama Love paper stack (Craft Smith)
Ink: Memento Tuxedo Black
Accessories: Glitter washi tape, heart punch, large pearls, clear faceted gems, Dimensionals

Work assembly-line style. When making multiples, it's faster to do one step for all of the cards before moving on to the next step, rather than making one card at a time from start to finish. For instance, with this batch of cards, I cut and scored all the card bases first. Then I punched out all of the hearts and "dealt" them into piles, ensuring that the hearts in each pile had four different patterns. Then I assembled the cards and stamped the sentiment inside as I finished each color group.

Well, there you have it. All of my Meals on Wheels valentines and a few simple tips for mass-producing cards. All-in-all I'm pleased with how these cards turned out, and I hope they bring a smile to the recipients' faces. But I did miss using my cute and punny Valentine's Day stamps. I'll need to get an earlier start next year so I can make some stamped cards, too.


Thanks for stopping by!


Sunday, February 3, 2019

Revisiting oldies but goodies

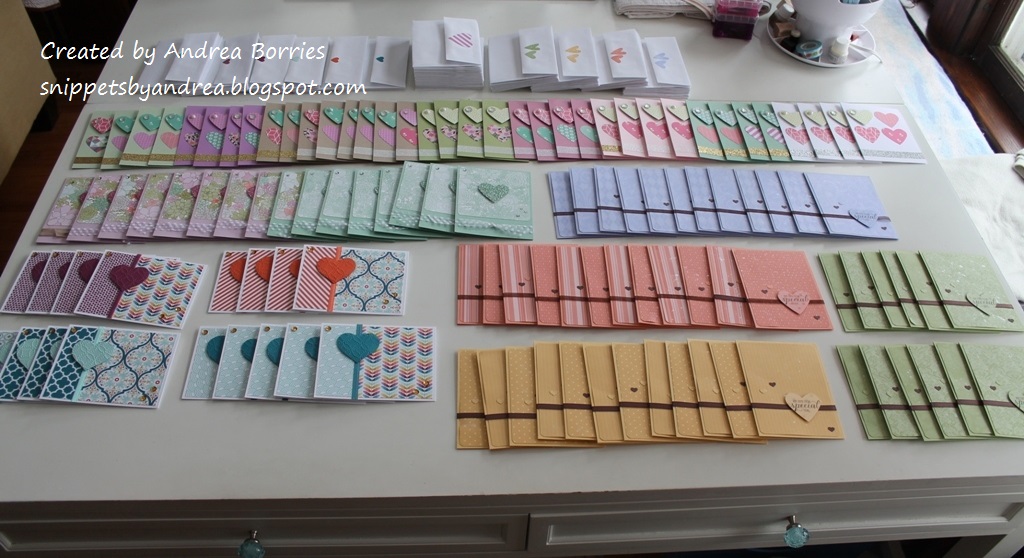
It's always fun to get new stamps -- ordering them, anticipating their arrival and then pulling them out of the package. But I have a lot (a lot, a lot) of older stamp sets that need some love, too. And it's fun to use those older sets with new colors, dies, papers, and embellishments. So that's what I did for this batch of birthday cards.

Supplies (all Stampin' Up! unless otherwise noted):
Stamps: Botanicals
Paper: Thick Very Vanilla, River Rock, Very Vanilla card stock
Ink: Memento Tuxedo Black, River Rock
Accessories: Frame-in-Frame 2 Cutting Plate (Taylored Expresisons), diamond dust sequins (The Makery), Dimensionals

This stamp set, Botanicals, is from 2004, and is great for clean and simple all-occasion cards. I also pulled out some retired card stock and ink; River Rock is a great neutral to combine with black and vanilla, and the whole effect reminds me of paging through a delicate, aged book. I think the scalloped and stitched frame works perfectly in this layout, and a few sequins add just a little sparkle.

I love the crisp look of the images in this set stamped with just black, but I need to try adding color with alcohol markers or watercolor paints.

Supplies (all Stampin' Up! unless otherwise noted):
Stamps: Plane & Simple, Essential Messages (Hero Arts)
Paper: Thick Very Vanilla, Basic Black card stock; Going Places Designer Series Paper (DSP) stack
Ink: Memento Tuxedo Black
Accessories: Braided linen trim, mini nail head stickers (unknown), Dimensionals, foam tape (3M)

I've always really liked this airplane image from the Plane & Simple stamp set -- which is the "baby" of this group since it's only from 2011 -- and it looks great with the Going Places DSP. I used the DSP, matted with black card stock, as the background and stamped the sentiment in the lower right corner. (I always forget about stamping directly on DSP, but sometimes it works perfectly.)

I added a bit of linen trim and a few mini nail head stickers as embellishment and then added the hand-cut plane with Dimensionals.

Supplies (all Stampin' Up! unless otherwise noted):
Stamps: Fishin', More Sayings and Such, Inside & OUt Birthday (Papertrey Ink)
Paper: Tranquil Tide, Gray Granite, Very Vanilla card stock
Ink: Tranquil Tide, Gray Granite, Memento Tuxedo Black; W-3 Ciao marker (Copic); Blends/Blendabilities markers: Crumb Cake, Blush, Soft Seafoam
Accessories: Small Stitched Rectangle Stackables dies (Lawn Fawn), clear droplets (Pretty Pink Posh), Dimensionals

From the "youngest" stamp set to the oldest: the Fishin' set was from 1996, and More Sayings and Such, which I used for the inside greeting, was from 1994. Oh, that makes me feel old!

I struggled a bit with this card; I just couldn't come up with a layout I really liked. I didn't want to do a lot of coloring, so I stuck with tone-on-tone stamping. I layered Gray Granite on a Tranquil Tide card base, stamping the cattails across both pieces. I added the splash image and colored, hand-cut fish to the gray panel and used a few clear droplets to add to the water effect. I wasn't sure where to add the sentiment, so I stamped it on Very Vanilla card stock and tucked it behind the gray layer to look like a little tag.

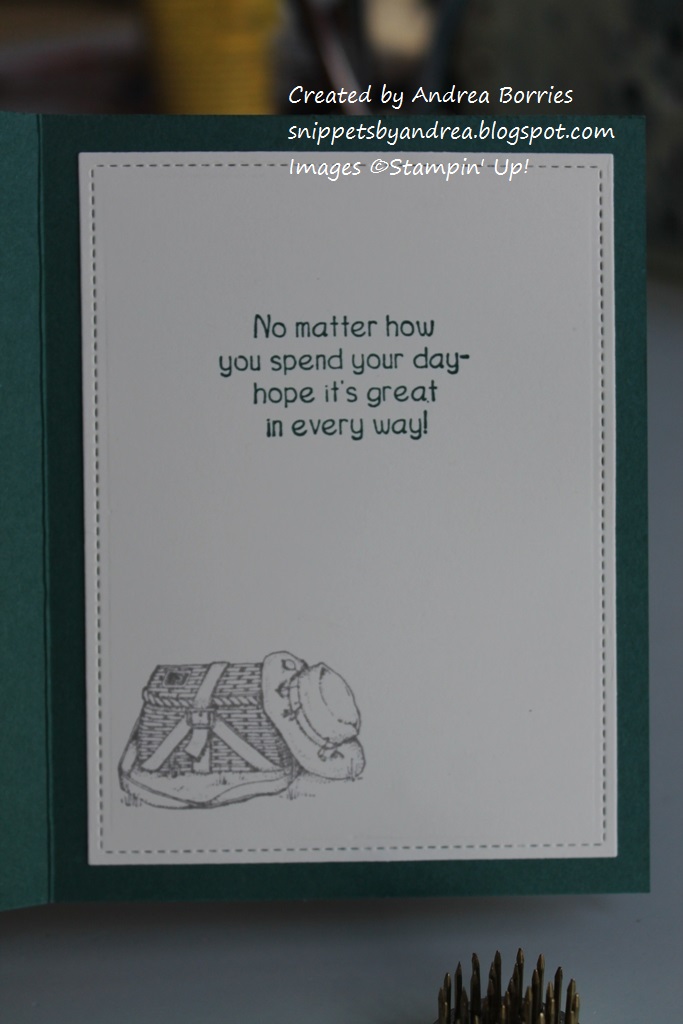
Here's a look at the inside of the card. Instead of just using a paper cutter to make a layer of Very Vanilla card stock for the inside, I used a stitched die to cut out a rectangle. I love that little repeated detail from the front of the card. I also stamped another image from the stamp set in the lower left corner to carry over the fishing theme.

Supplies (all Stampin' Up! unless otherwise noted):
Stamps: Ruff Day, Birthday Greetings (Studio Katia)
Paper: Bermuda Bay, Whisper White card stock
Ink: Memento Tuxedo Black, Bermuda Bay, Granny Apple Green; Blends/Blendabilities markers: Basic Gray, Soft Suede, Mocha, Real Red, Bermuda Bay, Granny Apple Green
Accessories: Wonky Stitched Circles dies (My Favorite Things), Brights Designer Buttons, white crochet thread (DMC), Confetti embossing folder (Taylored Expressions), Bermuda Bay sequin trim, Tiny Attacher (Tim Holtz), Dimensionals

And now for a couple of bright and festive birthday cards. I think this image from the Ruff Day set (from 2005) is adorable -- I can just picture an excited puppy leaping around. I played up the bits of confetti in the image by embossing the card base and stamping tiny dots around the sentiment. I repeated circle shapes by die cutting the focal images, adding a button and sequins, and even rounding two corners of the card.

Supplies (all Stampin' Up! unless otherwise noted):
Stamps: Bold Shapes
Paper: Whisper White, Pumpkin Pie, Daffodil Delight, Pool Party, Basic Gray card stock; Happy Day paper pad (My Mind's Eye); silver foil
Ink: Pumpkin Pie, Daffodil Delight, Pool Party, Basic Gray
Accessories: Layering Squares Framelits dies, silver sequins (unknown), clear Wink of Stella glitter brush pen, Glue Dots, Dimensionals

And we round out the collection with the Bold Shapes stamp set, from 2003. This set has a variety of images for all occasions, and I decided to use the star and balloon for this card. Choosing my color palette from the patterned paper, I stamped two of each image, cut them out, and layered them on scalloped squares of coordinating card stock.

I wanted a touch of metallic, so I added a strip of silver foil and a few silver sequins. Then to jazz up the images just a bit, I added clear Wink of Stella glitter over the colored portions (see below).

That was a pretty long post, so thanks for sticking around to the end. And if you have any of those oldie-but-goodie stamp sets (or papers or ribbons or ...) I hope you pull them out and have fun playing with them!


Thanks for stopping by!