
Stamps: Feeling Sentimental
Card stock: Naturals Ivory, Basic Black
Ink: Jet Black StazOn, Crumb Cake
Accessories: Pop-Up Posies Designer Kit, sponge, Dimensionals
I started by using one of the die-cut, embossed tags and pieces of twine from the kit to make this clean and simple birthday card. I stamped the Ferris wheel image from the Feeling Sentimental set on the tag and tied the twine around the bottom of the tag. Using Dimensionals, I mounted the tag on a 2-3/8" x 3-3/8" piece of Basic Black card stock and then adhered the piece in the middle of the card. (Note: When cutting this card base, I managed to measure it incorrectly, so it is 4-1/4" x 5-1/4" instead of 5-1/2". But it actually worked to my advantage because that created an even border around the Basic Black card stock.) I stamped the greeting in the bottom right corner of the card and then used a sponge to lightly apply Crumb Cake ink around the edges of the card to create an aged look.
Deciding what to make with the flowers took a little more effort. My first thought, of course, was to use them as an embellishment on a card. I wouldn't be able to mail said card because the flowers aren't flat, but I could always hand deliver it or tuck it in a gift bag. But I wasn't feeling too inspired with that idea, so I decided to try making bookmarks instead.
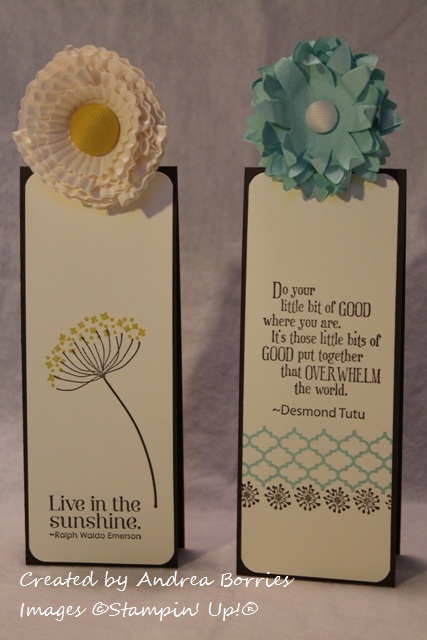
Stamps: Summer Silhouettes, Pursuit of Happiness
Card stock: Early Espresso, Very Vanilla
Ink: Early Espresso, Pool Party, Summer Starfruit
Accessories: Pop-Up Posies Designer Kit, corner rounder, extra-large oval punch
Other (unknown): Craft knife, magnet strips
Aren't they cute? I'm really happy with how they turned out. To make the bookmark bases, I started with a standard 4-1/4" x 5-1/2" card base folded on the short side. (So unfolded the card stock measured 4-1/4" x 11".) I cut the card base in half along the short side (2-1/8") to create two bookmarks, which will slip over a page in a book with the fold resting along the top of the page.
I cut two 2" x 5-3/8" pieces of Very Vanilla card stock for the decorative panels on the bookmarks. I rounded the corners of the panels, stamped them with a sentiment and floral or border images, and adhered them to the bookmarks.

The bookmarks could be done at this point, but I decided to add magnet strips inside the bookmarks. Now if your book falls open when you pick it up, your bookmark stays in place.

The one item from the Pop-Up Posies Designer Kit that I haven't used yet is the "just for you" stamp. But that's a versatile all-occasion greeting, so I'm sure I'll be putting that to good use soon.
Thanks for stopping by!

No comments:
Post a Comment