Decorative supplies (all Stampin' Up!®):
Masterpiece Ribbon Originals®, Elementary Ribbon Originals, Dress Up Ribbon Originals, Wisteria Wonder ruffled ribbon, Whisper White Baker's Twine, Sweet Pea stitched felt, Accents & Elements Fleurettes and Fleurettes II, Button Latte buttons, InColor printed brads
I've wanted to make some of these barrettes for awhile now. One of the girls in my toddler class wears barrettes like these, and I thought they would be fun gifts for my cousins' little girls. I even had most of the supplies; I just needed the clips. The problem was that I didn't know what the clips were called. I tried a few different online searches, but I wasn't coming up with what I needed. Then one day I happened to mention my idea to a coworker who used to work in a salon, and she steered me in the right direction -- they're single-pronged curl clips.
Anyway, with that problem solved I ordered the clips and started working on them today. I would say that each pair took only about five to ten minutes to make (not including the time it took me to decide which ribbon and embellishments to use!) so they're really quick, easy and cute! I've seen tutorials for making these barrettes on other blogs, but I thought I'd take a stab at creating my own tutorial.
You will need:
2 single-pronged curl clips
2 4-1/2" pieces of ribbon (the best width is 3/8"; Here I used the So Saffron ribbon from the Dress Up Ribbon Originals.)
2 desired embellishments (Here I used two large and two small buttons from the Button Latte set tied together with Whisper White Baker's Twine.)
Adhesive (I used a hot glue gun.)
Step 1
Hold the clip open and run adhesive along the inside of the top side of the clip. In this picture the top of the clip is in the back.
Because I was working with a hot glue gun, I applied the glue a little bit at a time so the glue didn't become too cool.
Step 2
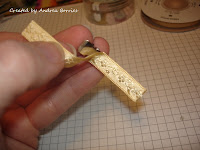
Place the end of the ribbon in the clip close to the spring and press it into the glue. Be sure to place the back side of the ribbon on the glue. In this picture the top of the clip is in the front.
Step 3
Apply glue to the top of the clip, fold the ribbon over and press it into the glue. Be sure to align the sides of the ribbon and crease the folded end. Then glue the ribbon to the top of the spring end of the clip.
Step 4
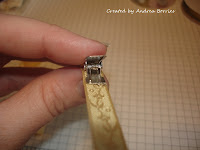
Place glue inside the spring end of the clip, but not on the spring itself. As you press the ribbon into the glue, be sure to push it down between the ends of the clip so it touches the spring.

Step 5
Glue the end of the ribbon to the back of the clip. At this point I applied the glue directly on the ribbon instead of on the clip so I didn't apply too much glue.
Step 6
Glue the desired embellishments onto the front of the clip. Repeat the process for the second barrette. Note: The childcare teacher in me needs to point out that although hot glue is strong, the embellishments could be pulled off and become a choking hazard. Keep that in mind if you have an infant/toddler who likes to put things in her mouth.
I hope that tutorial was helpful. (It's my first one, so it was a bit of trial and error. It's tricky to take pictures while trying to use a hot glue gun!) Here are a couple of close-up pictures of all four sets of barrettes that I made:

I'm already thinking about all the other types of embellishments I could use for these barrettes. (You can see some additional barrette designs in another post on my blog.) Thanks for stopping by!


No comments:
Post a Comment