Supplies (all Stampin' Up!) for this card and the next one:
Stamps: Everybunny
Card stock: Whisper White, Baja Breeze, Cherry Cobbler
Ink: Jet Black StazOn pad; markers: Crumb Cake, Blush Blossom, Basic Gray, Baja Breeze, Cherry Cobbler, Soft Suede, Pink Pirouette
Accessories: Everyday Elegance Simply Sent card kit, 2-3/8" scallop circle punch, 2-1/2" circle punch, 1/16" hole punch, basic pearls
The Everyday Elegance card kit contains eight die-cut and embossed cards, four in Baja Breeze and four in Cherry Cobbler. It also includes sixteen of the die-cut self-adhesive labels, eight in each color. The extra labels are great in case you don't get the greeting stamped quite right (which I was guilty of). And if you don't need them for the kit, you can always use them on other cards.
I decided to make a couple of quick Easter cards since the holiday is only a few weeks away, and I haven't made any cards yet. All I did was stamp, color and punch out an image, mat it with a coordinating circle of card stock, stamp the greeting on the label, add a couple of pearls and then adhere everything to the card. Quick, easy and pretty cute.
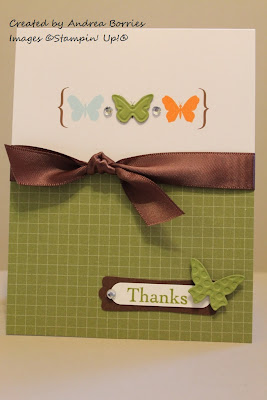
Supplies (all Stampin' Up!):
Stamps: Thank You Kindly
Card stock: Whisper White, Chocolate Chip, Old Olive
Ink: Old Olive
Accessories: Something Special Simply Sent card kit, Word Window punch, Modern Label punch, Beautiful Wings Embosslits die, Glue Dots, Dimensionals
The Something Special Simply Sent card kit came with eight pre-printed cards (all the same design), Chocolate Chip satin ribbon and rhinestones. I wanted to add a bit to it, so I stamped a greeting, punched it out with the Word Window punch, mounted it on a Modern Label shape and adhered it near the bottom of the card. Then I die cut a couple of Old Olive butterflies, glued one over the middle printed butterfly on the top of the card and added one to the right side of the greeting.
And there you have it -- three cards that were simple to make. Thanks for stopping by!


No comments:
Post a Comment