Wednesday, May 29, 2013

Secret Garden pair

I have a short blog post today as I seem to have misplaced my stamping mojo. So without further ado, here are two cards I made with the Secret Garden stamp set.

Supplies (all Stampin' Up!®):
Stamps: Secret Garden, Label Love
Card stock: Early Espresso, Whisper White, Gumball Green, Summer Starfruit
Ink: Early Espresso, Gumball Green, Summer Starfruit
Accessories: Secret Garden Framelits dies, 7/8" scallop circle punch, Artisan Label punch, Little Labels punch pack, Gumball Green stitched satin ribbon, Summer Starfruit stitched satin ribbon, large basic pearls, Dimensionals

I randomly stamped the leaves and two flower images from the Secret Garden set on Whisper White card stock with Gumball Green, Summer Starfruit and Early Espresso ink. I cut the piece of card stock in half to make two backgrounds, and I matted one piece with Gumball Green card stock and the other with Summer Starfruit. To embellish the backgrounds, I added some ribbon and stamped, punched and/or die-cut pieces. Then I adhered each panel to an Early Espresso card base.

Thanks for stopping by!

Sunday, May 26, 2013

Easy votive-candle favors

Next weekend I will be enjoying a mini-vacation with some girlfriends and family at a crafting retreat. I organized all the retreat details, and I wanted to give each of the guests a little favor as a thank-you for coming. (So if you're going on the retreat and want to be surprised, stop reading!) I had a lot of different ideas, and I wanted it to be something at least partly homemade. But I was running seriously low on time and energy, so it couldn't be anything too involved. I decided to simply decorate filled glass votive holders.

Supplies:
Paper: Pink Flamingo Designer Series Paper (DSP) and Welcome Neighbor DSP pad (Stampin' Up!®)
Accessories: Ivory filled glass votive holders, small and medium Tropical Iridescent Blossoms and Leaves (Creative Impressions), bright crystal brads (Making Memories), 3/16" Neutrals brads (Stampin' Up!), Glue Dots
Packaging supplies: 4" x 6" mini clear bags (Celebrate It), turquoise grosgrain ribbon (Stampin' Up!), large tag punch (Stampin' Up!), mini clothespins

The weather has been cool and rainy here for the past couple of weeks, so I thought some bright tropical colors would be fun for these candle holders. I wrapped a 1/2" wide strip of DSP around each candle and used two Glue Dots to secure one end of the strip over the other. The DSP is only attached to the glass with a tiny bit of adhesive, so it can be removed if the recipient wants to reuse the holder. I layered a medium and small flower and a leaf on a crystal brad and used two more Glue Dots to adhere the embellishment over the "seam" in the DSP strip. (The iridescent, color-changing quality of the flowers is really fun in person, but it's hard to capture in a picture.) And that's pretty much it!

These would be fun as-is to put at a place setting of a wedding or baby shower or maybe even a brunch or tea party. Since I will be traveling with them, I wanted to package the candle holders to keep them a little safer. I placed each holder in a plastic bag and tied the bag closed with a piece of ribbon. I punched tags out of the same DSP patterns I used for the strips and added a message and one small flower with a Very Vanilla brad to each tag. I used a mini clothespin to attach a tag to the ribbon on each bag.


This was an easy project that was easily finished in one afternoon. It's great to get something started and finished so quickly! Thanks for stopping by!

Friday, May 24, 2013

The Open Sea trio

I seem to be on a bit of a roll with masculine cards lately, which is great because I can never have too many masculine cards. And since I'm still getting the hang of using washi tape, I decided to combine the two and see what happened. I used most of the same basic cards to make three cards with The Open Sea stamp set from Stampin' Up!®.

Supplies (all Stampin' Up! unless otherwise noted):
Stamps: The Open Sea
Card stock: Sahara Sand, Naturals Ivory
Ink: Sahara Sand, Midnight Muse, Basic Gray, Cherry Cobbler
Accessories: 1" square punch (to make a mask for the "stamps"), Postage Stamp punch, This and That Epic Day washi tape, world map/red-blue stripe washi tape (Recollections), Corner Chomper (We R Memory Keepers), linen thread, pewter jumbo eyelet, Simply Scored scoring tool, Dimensionals

For all three cards I started with a Sahara Sand card base and rounded two of the corners. I stamped an image on the right side of the background and lightly tapped the Sahara Sand ink pad over the card front to add a distressed look. I adhered two strips of washi tape along the top of the card and added a piece of linen thread between them. I stamped the anchor (Basic Gray), compass (Cherry Cobbler) and ship (Midnight Muse) images on Naturals Ivory card stock and punched them out with the Postage Stamp punch. (For more details about how to make the faux postage stamps, see the post titled "Faux postage stamp tutorial.") I adhered them to the card front and added a jumbo eyelet in the lower left corner.

Supplies (all Stampin' Up! unless otherwise noted):
Stamps: The Open Sea
Card stock: Sahara Sand, Naturals Ivory, Midnight Muse
Ink: Sahara Sand, Midnight Muse, Basic Gray, Poppy Parade
Accessories: 1" square punch (to make a mask for the "stamps"), Postage Stamp punch, world map/red-blue stripe washi tape (Recollections), Corner Chomper (We R Memory Keepers), linen thread, pewter jumbo eyelet, Simply Scored scoring tool, Dimensionals

This card is essentially the same as the first one, with a few minor details. I added another stamped image to the backgroundchanged the Cherry Cobbler ink to Poppy Parade to better match the striped washi tape and added a Midnight Muse card stock flag to the upper right corner. This card is my favorite of the three.

Supplies (all Stampin' Up! unless otherwise noted):
Stamps: The Open Sea
Card stock: Sahara Sand, Naturals Ivory
Ink: Sahara Sand, Midnight Muse, Basic Gray, Poppy Parade
Accessories: 1" square punch (to make a mask for the "stamps"), Postage Stamp punch, This and That Epic Day washi tape, world map/red-blue stripe washi tape (Recollections), Corner Chomper (We R Memory Keepers), linen thread, pewter jumbo eyelet, Simply Scored scoring tool, Dimensionals

For this card, which has a simpler layout than the others, I switched to a vertical orientation and left the background clean. I applied four strips of washi tape, all different styles, to the bottom of the card. I used Dimensionals to adhere the three faux stamps along the left side and added a jumbo eyelet in the upper right corner.


Do you like one of these cards better than the others? Leave me a comment and let me know. Thanks for stopping by!


Faux postage stamp tutorial

In the post titled "The Open Sea trio," I shared three cards that included faux postage stamps. I wanted to put together a little tutorial to show you how you can use any large stamp image to create a faux postage stamp to add to a card, scrapbook page or gift item.

Supplies (all from Stampin' Up!®):
1" square punch
Postage Stamp punch
Self-stick notepaper
Card stock (I used Naturals Ivory.)
Ink (I used Midnight Muse.)
Stamp (I used an image from The Open Sea.)
Simply Scored scoring tool

1. Punch a 1" square from a piece of self-stick notepaper. Be sure there is at least 1/4" of paper on each side of the punched square. This will be your mask for stamping the images.


2. Place the self-stick note on your card stock and stamp the image on the mask so the desired part of the image is inside the punched square. If you are using a very large image that will go off the self-stick note, you may want to use scratch paper to cover the rest of your card stock and protect it from stray ink.

3. Remove the mask from the card stock. Punch out the stamped image with the Postage Stamp punch.

4. Turn the punched piece over and use the Simply Scored scoring tool to add a score line along each side of the stamp. For me it is easiest to work on the right-hand side of an item, so I scored along the right edge, turned the piece 90°, scored again and repeated two more times. This is an optional step, but I liked the extra detail.


5. Use your faux postage stamp to embellish your project.


I haven't tried it yet, but it could be fun to make several faux stamps with the same image and adhere them to a card or scrapbook page so they are lined up like a sheet of postage stamps. If you have any questions, leave me a comment below and I'll respond as soon as I can. Thanks for stopping by!

Tuesday, May 21, 2013

Ocean-inspired Father's Day card

A couple of weeks ago I wanted to make some cards using the Stampin' Up!® stamp set By the Tide. I was struggling to come up with ideas, so I went looking for some inspiration in the By the Tide gallery on SCS. I found many cards to "oooh" and "aaah" over, and I used some of the ideas to make two cards of my own. The first card, which I used as a masculine birthday card, I shared earlier this week (see the May 19, 2013, post titled "Celebrate with the guys"). Here is the second card, which will be an ocean-inspired Father's Day card for either my dad or my uncle:

Supplies (all Stampin' Up!):
Stamps: By the Tide
Card stock: Naturals White, Soft Suede
Ink: Soft Suede, Real Red, Midnight Muse
Accessories: Antique Brass jumbo eyelets, linen thread, corner rounder, Dimensionals

This card was inspired by the Nautical Blocks card by Amanda Mertz, a fellow independent Stampin' Up! demonstrator. I loved the strong images on the crisp white card stock, so I decided to make my own version. (If you click on the link to Amanda's card, you'll see that she was inspired by a card she found on Pinterest. I love how each person has a unique take on the same basic idea. And it's great that so many people are willing to share their creativity!)

I started with a Soft Suede card base and randomly stamped the coral, text and circle images all over the background in Soft Suede ink. I stamped the lobster, fish, seashell and seahorse on pieces of Naturals White card stock, trimming the blocks and playing with the layout until I had an arrangement I liked. I rounded the corners of the blocks and adhered them to the card base.

I also stamped the circle image on Naturals White card stock and cut it out by hand (none of my circle punches were quite the right size). Using Dimensionals, I adhered the circle near the bottom of the card so it overlapped two of the white blocks.

To add a little embellishment and to fill the empty space on the left side of the card I added three jumbo eyelets. I wrapped linen through the two outside eyelets a few times and then tied it in a knot.

I'm really pleased with how this card turned out. I actually ended up using all the images in this stamp set to make this card, which doesn't happen very often. Thanks for stopping by!

Sunday, May 19, 2013

Celebrate with the guys

As promised, here are the last of the birthday cards -- four masculine cards -- I made for my grandma as part of her Mother's Day present.

Supplies (all Stampin' Up!® unless otherwise noted):
Stamps: Plane & Simple
Paper: Sahara Sand, Basic Black, Very Vanilla card stock; Newsprint Designer Series Paper (DSP); vellum card stock
Ink: Jet Black StazOn, Sahara Sand
Accessories: Linen thread, metallic eyelets (unknown), paper piercer, Dimensionals

I love the map print in the Newsprint DSP, and I think it works so well with the Plane & Simple stamp set. It is a dark print, though, so to help the airplane image stand out against the map, I layered a piece of vellum card stock over the DSP. To create the look of the plane pulling the banner, I used a paper piercer to poke holes in the left corners of the stamped banner. I threaded the ends of a small piece of linen thread through the holes and adhered them to the back of the banner. I pinched the middle of the strand of linen thread and adhered that behind the tail of the plane. Both the banner and the plane are attached to the card with Dimensionals.

Supplies (all Stampin' Up!):
Stamps: By the Tide
Card stock: Glossy white, Island Indigo
Ink: Island Indigo, Coastal Cabana, Soft Sky, Basic Brown
Accessories: Antique Brass jumbo eyelet, hemp twine, sponge

I used the Triple Time Stamping technique on this card, and it was inspired by a card made by Janet Nagle. I used a sponge to apply the blue inks to the glossy card stock, moving from darkest at the bottom to lightest at the top. Then I stamped the coral and seashell images along the bottom half of the card and three fish near the top. After layering the stamped panels with Island Indigo card stock, I wrapped a piece of hemp twine around the card front and tied it to a jumbo eyelet for a nautical feel.

Supplies (all Stampin' Up!):
Stamps: Label Love
Card stock: Naturals Ivory, Close to Cocoa, Old Olive
Ink: Close to Cocoa, Old Olive
Accessories: Twill ribbon, Old Olive 1/8" taffeta ribbon, Woodgrain embossing folder, Artisan Label punch, Naturals Designer Buttons, linen thread, sponge, Dimensionals

This is a very simple card, but I love the natural look and feel of it. It's hard to tell in the picture, but I sponged Close to Cocoa ink over the embossed card stock to create some additional depth in the woodgrain texture. To make the focal image, I used markers to apply ink directly on the stamp -- Close to Cocoa for the border and Old Olive for the sentiment -- before stamping and punching out the image. I used Dimensionals to adhere the focal image over a strip of layered ribbons.

Supplies (all Stampin' Up!):
Stamps: Woo Hoo!
Card stock: Whisper White, Early Espresso, So Saffron, textured Wild Wasabi
Ink: Early Espresso, So Saffron, Wild Wasabi, Real Red, Chocolate Chip
Accessories: Early Espresso striped grosgrain ribbon, 1/2" circle punch, Perfect Polka Dots embossing folder, Glue Dots, Dimensionals

The stamped image I used for the focal point on this card actually has a scalloped edge around the border. I wanted clean straight lines for this card, so I simply cut off that part of the stamped image and used the dashed line as the outside edge. I also wanted the cake to really stand out, so I stamped the image on another piece of card stock, colored it in (yellow cake with chocolate frosting is my all-time classic favorite) and then carefully cut it out. I adhered the colored section over the image on the card with Glue Dots, so it has just a bit of dimension. I added more texture to the card by embossing a piece of Early Espresso card stock with polka dots, adhering a strip of ribbon near the bottom of the card and gluing a series of punched circles below the ribbon.

Thanks for stopping by!

Thursday, May 16, 2013

Feminine birthday cards

Without further ado it's back to the birthday cards today with three feminine cards.

Supplies (all Stampin' Up!®):
Stamps: Create a Cupcake
Card stock: Smokey Slate, Very Vanilla, Crushed Curry, Daffodil Delight, Old Olive
Ink: Smokey Slate, Crushed Curry, Old Olive
Accessories: Lattice die, Secret Garden Fraelits dies, Very Vintage Designer Buttons, Basic Gray striped grosgrain ribbon, Decorative Label punch, linen thread, sponge, Mono Multi liquid glue, Dimensionals

I love the combination of yellow and gray, and I really like how this card turned out. To make the flower I used the Secret Garden Framelits dies; the larger flower is Crushed Curry, and the smaller is Daffodil Delight. I sponged the edges of the petals on both flowers with Crushed Curry ink; it's hard to see in the photo because it's subtle, but it looks pretty in person. For the larger flower, I gently curved the sides of each petal up. The smaller flower has all the petals curved up together. An easy way for me to do this is to slightly cup my left hand, lay the flower on my palm, and gently press down in the center of the flower with my right thumb while closing my left hand a little bit. I turn the flower a couple of times to keep it evenly shaped. I layered the flowers together and added a new Very Vintage Designer Button in the middle. (I'm not always a fan of buttons, but I love these.) The leaves are Old Olive card stock sponged with Old Olive ink.

Supplies (all Stampin' Up!):
Stamps: Filigree, Tea Shoppe
Paper: Primrose Petals, Raspberry Ripple, Early Espresso, Very Vanilla card stock; Print Poetry Designer Series Paper (DSP) Stack
Ink: Primrose Petals, Early Espresso
Accessories: Dress Up Framelits dies, 1-1/4" scallop circle punch, Scallop Edge border punch, Square Lattice embossing folder, Victoria crochet trim, pearls, paper piercer, Mono Multi liquid glue, Dimensionals

When I was cutting and scoring the base for this card, I measured something incorrectly and ended up with the card front shorter than the back. Oops. Instead of starting over, I just added a piece of Early Espresso card stock punched with a scallop edge (I added the holes with a paper piercer) to make the front the same length as the back. I'm actually glad I made that mistake!

To make the cardigan for the dress, I used the Framelits die of the dress with sleeves and cut it from Very Vanilla card stock. I cut off the top part of the dress and then cut that in half. I embossed it with the Square Lattice embossing folder to add some texture and glued it on the dress. I also added three small pearls on the left side to look like buttons.

Supplies (all Stampin' Up! unless otherwise noted):
Stamps: Big Bold Birthday
Card stock: Whisper White, Chocolate Chip (sooth and textured), Regal Rose, Guball Green
Ink: Chocolate Chip, Gumball Green
Accessories: Chevron embossing folder, Polka Dots embossing folder (Cuttlebug), Chocolate Chip satin ribbon, Itty Bitty Shapes punch pack, 2-1/2" circle punch, pink and brown brads (unknown), Dimensionals

Lately I've been having fun combining different embossing folders on the same card. I like the geometric look of the polka dots with the chevrons on this card. I also added another texture: Chocolate Chip textured card stock on the focal image circle and the flag at the top of the card. This would be a very easy design to adapt to a masculine card; just change the color combination and use a circle or star punch instead of the flower on the flag. You could also remove the ribbon and use a strip of card stock instead.

In the next few days I'll be posting one more set of birthday cards (masculine ones) from the collection of cards I made my grandma for Mother's Day. Then it will be on to other things. Thanks for stopping by!

Wednesday, May 15, 2013

Gift box with flower band

Today I'm going to take a little break from birthday cards to show you the fun gift box I made for my mom's Mother's Day gift. I had chosen one of the blank cards from my stash -- a card with three bright flower buttons -- and stamped a Happy Mother's Day sentiment inside, and I wanted to decorate one of Stampin' Up!®'s kraft gift boxes to coordinate with the card. Here's the result:

Gift box supplies (all Stampin' Up! unless otherwise noted):
Paper: Brights Collection Designer Series Paper (DSP) Patterns Stack: Real Red, Pumpkin Pie, Daffodil Delight, Old Olive
Accessories: Kraft gift box, Fun Flowers die, Sweet Stitches Big Designer Buttons, Whisper White taffeta ribbon, Dimensionals, Scor-Tape (Scor-Pal)
Note: For a list of supplies for the card, see the link above.

To create the band around the box, I cut a 12" long strip of Real Red polka dot DSP. (I didn't write down the width of the strip, but I think it was about 2-1/2".) The strip wasn't quite long enough to go around the box, so I put some Scor-Tape on each end of a small scrap and adhered it to the two ends of the large strip. This part will be covered by the flower, so it doesn't need to look perfect. Just remember not to adhere the DSP strip to the box or it won't slide on and off.

I wanted a second color of DSP on the band, so I cut a 12" long (and about 1" wide) piece of striped Pumpkin Pie DSP. I put four pieces of Scor-Tape evenly spaced along the back of the DSP and adhered it directly to the Real Red DSP. (One tip: I removed the backing on the Scor-Tape one piece at a time, as I was ready to press down each section, so the strip didn't accidentally stick to anything else.)

To make the flower, I cut one of each size flower from the Fun Flowers die out of Daffodil Delight DSP (I used a different pattern for each flower). For the two larger flowers, I gently curved the sides of each petal up to create dimension. For the smallest flower, I snipped between the scallops on the petals. I layered the flowers together with Dimensionals, and in the center I added a large Chocolate Chip button tied with Whisper White taffeta ribbon.

To create the leaves, I cut the middle-sized flower out of Old Olive DSP, trimmed off two petals, curled them up, and adhered them to the back of the flower between the petals.

I used Dimensionals to adhere the finished flower to the band of DSP. I placed the Dimensionals on the strips of DSP instead of the back of the flower to make sure I didn't adhere the flower to the box. That's it! The band and flower slide on and off the box so it can be reused again and again.

Thanks for stopping by!

Tuesday, May 14, 2013

Bunnies and monkeys and bugs - oh my!

No, it's not a spinoff of The Wizard of Oz. It's the cute little critters on the three kids birthday cards I have to share with you today.

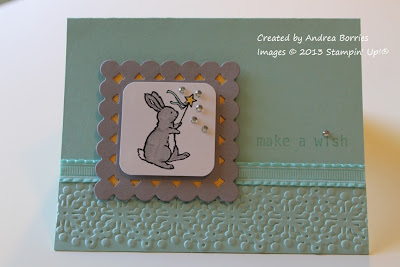
Pale blue card with image of a bunny holding a magic wand, a few rhinestones and the greeting "make a wish."
Supplies (all Stampin' Up!® unless otherwise noted):
Stamps: Storybook Friends, Big Bold Birthday
Card stock: Pool Party, Whisper White, Going Gray, Daffodil Delight
Ink: Jet Black StazOn, Pool Party, Going Gray, Daffodil Delight
Accessories: Delicate Designs embossing folder, Beaded Squares Nestabilities dies (Spellbinders), corner rounder, Pool Party ruffled ribbon, rhinestones, Dimensionals

With its starry wand, this little bunny reminds me of a fairy godmother granting wishes. That seemed very apropos for a birthday card, so I combined it with the sentiment "make a wish" and added a few rhinestones around the wand, like fairy dust, and also one for the dot in the "i" of the sentiment. (The stamp of the bunny image actually includes the word "surprise!" Although that's also fitting for a birthday, it wasn't what I wanted here. I just omitted that part when I inked and stamped the image.)

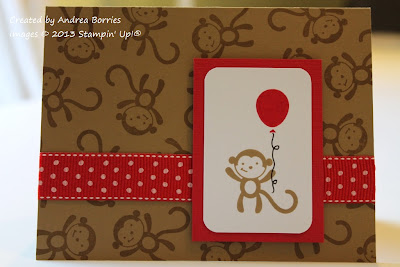
Tan birthday card with monkeys stamped on the background and red polka dot ribbon. Focal image is a monkey holding a red balloon, layered on red card stock.
Supplies (all Stampin' Up!):
Stamps: Fox & Friends, Mini Messages
Card stock: Baked Brown Sugar, Whisper White, textured Real Red
Ink: Baked Brown Sugar, Real Red, Basic Black marker
Accessories: Real Red polka dot grosgrain ribbon, corner rounder, Dimensionals

Monkeys have to make you smile, right? Especially a grinning little monkey holding a red balloon who looks like he's waving at you.

This is definitely a go-to card layout for me. (Proof: It's the same layout I used in the card above, just a mirror image.) It's quick and easy, works with any shape for the focal image -- circle, oval, group of flowers, etc. -- and can be elegant, casual or cute.

White card with different bugs stamped around the border. The focal image is the sentiment "Sending worm wishes on your bug day."
Supplies (all Stampin' Up!):
Stamps: Bugs & Slugs
Card stock: Naturals Ivory, Gumball Green
Ink: Gumball Green, Midnight Muse, Baked Brown Sugar, Summer Starfruit
Accessories: Hemp twine, Dimensionals

I love these little bug images, and I don't use them nearly enough. This is a pretty self-explanatory card: I picked four bugs and four colors and stamped them around the edges of the card in whatever arrangement they fit the best. I stamped the sentiment and a few marching ants on a separate piece of card stock, matted it and added some hemp twine. Quick and cute!


Thanks for stopping by!


Monday, May 13, 2013

Lego-inspired birthday card

I've fallen a little behind on my blog posting during the past week because I was busy trying to finish the pack of birthday cards I gave to my grandma for Mother's Day. I was stamping like mad early yesterday morning, and I managed to get all the cards made, photographed and packaged just a couple of hours before our Mother's Day dinner. Whew. It was a little stressful at the end, but now I have several posts' worth of cards to share with you! I'll start with a fun kids birthday card with a Lego theme.

Birthday card with card stock embellishments stamped and cut to look like Lego building bricks.
Supplies (all Stampin' Up!)®:
Stamps: Big Bold Birthday, Birthday Wish, It's Your Birthday
Card stock: Confetti White, Pacific Point, Real Red, Daffodil Delight, Glorious Green
Ink: Pacific Point, Real Red, Daffodil Delight, Glorious Green
Accessories: Mono Multi liquid glue, Dimensionals

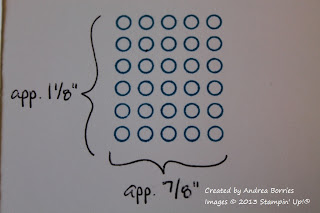
Stamped image of six rows of circles with five circles in each row.
This card was something of a happy accident. I was trying to create some masculine birthday cards using an image from the Big Bold Birthday  stamp set (see photo at right). I had stamped and cut out the image in several different colors and was playing around with a layout when I realized that if I colored in the circles and then cut the image apart, the pieces would look like Legos.

Close-up image of card stock Lego-style "bricks."

I stamped the image four times: once each on Real Red, Daffodil Delight, Glorious Green and Pacific Point card stock (using the coordinating ink). I colored the circles and cut the images into different sized blocks. I considered lining up the pieces to create a border around the card edges or to form an image or word. But to me Legos are the most fun when they're spread out on a table or all mixed together in a bucket. That's when they are full of possibilities only limited by your imagination. So in the end I decided to have a few groups of randomly scattered Legos on the card front.

Inside of card with stamped sentiment and a row of card stock Lego-style "bricks" along the bottom.
I had some pieces left over, so I added a border along the bottom of the inside of the card. (I think I may have had to cut out a few more blocks to finish the border.)

If you want to get more elaborate with your Lego card, you could recreate the green Lego base plate. Start with a Glorious Green card base and use the Stamp-a-a-jig tool to cover the card front with stamped circles. Then adhere your stamped Legos to the card front so they look like they're on the base plate.

Thanks for stopping by!

Wednesday, May 8, 2013

Cupcakes and ice cream

This year for Mother's Day I'm going to give my grandma a collection of handmade cards. (Well, cards and possibly some chocolate from Regina's Candies, because chocolate really should be part of every gift.) I'm including quite a few birthday cards in the bunch, so I've had birthday cards on the brain for the past couple of weeks. Here are a couple more:

Supplies (all Stampin' Up!® unless otherwise noted):
Stamps: Crazy for Cupcakes, Distressed Dots
Card stock: Riding Hood Red, Whisper White
Ink: Jet Black StazOn, Riding Hood Red, So Saffron, Baja Breeze, Basic Gray
Accessories: Ovals Collection Framelits dies, Riding Hood Red pleated satin ribbon, Stamp-a-ma-jig, 1/8" Scor-Tape (Scor-Pal), Dimensionals

After I stamped and colored the cupcake image for the focal point, I used my Stamp-a-ma-jig tool to center the sentiment stamp over the image, and then I die cut the images with the Ovals Collection Framelits dies. I placed 1/8" Scor-Tape all along the edge on the back of the oval and adhered the pleated ribbon along the tape. There is a stitched line down the middle of the ribbon, so as I was adhering the ribbon I just made sure to line up the stitches with the edge of the oval. I used Dimensionals to adhere the focal point to the card base; because the ribbon is a little thick, I had to use two layers of Dimensionals (one placed on top of another).

Supplies (all Stampin' Up! unless otherwise noted):
Stamps: Perfect Party, Create a Cupcake
Card stock: Riding Hood Red, Very Vanilla, Baked Brown Sugar, Pistachio Pudding
Ink: Baked Brown Sugar, Pistachio Pudding, Chocolate Chip
Accessories: Argyle embossing folder, Glitter Buttons - Earth Tones (American Crafts), Cherry Cobbler baker's twine

This almost looks yummy enough to eat! To make the ice cream, I stamped the image with Pistachio Pudding, one of Stampin' Up!'s new In Colors. For the chocolate chips, I used the image of sprinkles from the Create a Cupcake set and stamped it multiple times with Chocolate Chip ink. I cut out the scoops by hand, adhered them to the cone and added a button for a little cherry on top. I adhered the finished ice cream cone to a piece of embossed Very Vanilla card stock, layered that on a piece of Baked Brown Sugar card stock and adhered the whole piece to the card base.

Thanks for stopping by!

Monday, May 6, 2013

Single-layer birthday cards

Although my cards often have a clean and simple style, they generally have more than one layer. So it was a fun little challenge to make the single-layer birthday cards I'm going to share today.

Supplies (all Stampin' Up!®):
Stamps: Sketch a Party, On Your Birthday
Card stock: Whisper White
Ink: Daffodil Delight, Lucky Limeade, Island Indigo, Basic Gray
Accessories: Corner rounder, Island Indigo baker's twine

This balloon image is probably one of my favorite birthday stamps. (The stamp set is more than ten years old, and I sill use it!) The balloons are actually two-step stamps: one image for the inside and one for the outline. I wanted to use the same ink color for the inside and outside of each balloon, so after I inked up the inner stamp, I stamped it on scratch paper first and then on the card. Then I inked and stamped the outline for each balloon directly on the card for the two-tone colors.

I didn't want to add much embellishment to this clean and simple card, so to finish it off I rounded the two bottom corners and added a strand of baker's twine tied in a bow. I also stamped a couple of balloons inside the card with the rest of the sentiment.

Supplies (all Stampin' Up! unless otherwise noted):
Stamps: Sketch a Party, It's Your Birthday
Card stock: Whisper White
Ink: Tempting Turquoise, Real Red, Pumpkin Pie
Accessories: White crochet thread (DMC)

I think the "scariest" thing about making one-layer cards is that there really isn't any leeway to make a mistake. You can't hide a boo-boo; you just have to start over. Thankfully, I didn't have any major mistakes on my three cards, although I was probably least happy with this card. I think the sentiment is a little too far to the left, but it's not very noticeable, so I decided to just go with it.

This party hat image is from the same set as the balloon in the previous card, and I used the same stamping technique. I also added a simple bow for embellishment.

Supplies (all Stampin' Up!):
Stamps: Create a Cupcake
Card stock: Whisper White, Strawberry Slush
Ink: Baked Brown Sugar, Strawberry Slush, Chocolate Chip, Daffodil Delight
Accessories: Cupcake Builder punch, Itty Bitty Shapes punch pack, pearls, corner rounder, Mono Multi liquid glue, Dimensionals

This card is my favorite of the group, although it's technically not a single layer, since the cupcake and sentiment are on separate card stock. But because the rest of the card is one layer, I decided I could include it anyway.

I stamped and punched out the top and bottom of the cupcake, but I cut out the stamped candle by hand because I wanted the candle base and flame to be one piece. I added a simple embellishment of a punched flower and a pearl, trimmed the strip of card stock with the greeting into a banner, and rounded the corners of the card.


Thanks for stopping by!