Yesterday I shared a
tutorial for a gift bag made with Stampin' Up!'s Thankful Tablescape Simply Created kit. As promised, today I'm going to share the coordinating Thanksgiving card, which was my last November project for the Creative Crew challenges.
Supplies (all Stampin' Up!):
Stamps:
Teeny Tiny Wishes, Thoroughly Thankful
Cardstock: Chocolate Chip, Very Vanilla
Ink: Chocolate Chip
Accessories: Thankful Tablescape Simply Created kit, Autumn Accents die, corner rounder, Scallop Edge Border punch, Dimensionals, Mono Multi liquid glue
I made this card with the following kit components: one napkin holder, one
belly band, one table tent card, a 6" piece of Chocolate Chip paper
ribbon and half of one piece of linen thread. I added the
Autumn Accents die, Chocolate Chip and Very Vanilla cardstock, Chocolate
Chip ink, stamps, adhesive and a couple of punches. Here is a step-by-step tutorial with photos (click on any of the photos to view a larger image):
Step 1: Cut a 4" x 5-1/4" piece of Very Vanilla cardstock and a 3-1/2" x 4-1/4" piece of Chocolate Chip cardstock. Round all corners of both pieces. Set cardstock aside.
Step 2: Cut the two side flaps off the napkin holder. Save pieces for making diecuts or layers. Cut the remaining long piece to 4-1/4" high.
Step 3: On the long side of the napkin holder (the left side in this photo), create a score line 5-1/2" from the pre-made score line and cut 1/4" off the end. (Note: The 1/4" cut is not shown in the photo.)
Step 4: Pu
nch both short sides with the Scallop Edge Border punch. Close the card with the shorter flap inside and the longer flap on the outside.
Step 5: Use the Autumn Accents die to create diecuts with one of the table tent cards, a 6" piece of Chocolate Chip paper ribbon, a piece of one of the belly bands and one of the flaps cut off the napkin holder in Step 2.
Step 6: Sponge the edges of all the leaves and the scalloped edges of the card base with Chocolate Chip ink. (I used an ink spot, but you could also use a full-size ink pad and a sponge.)
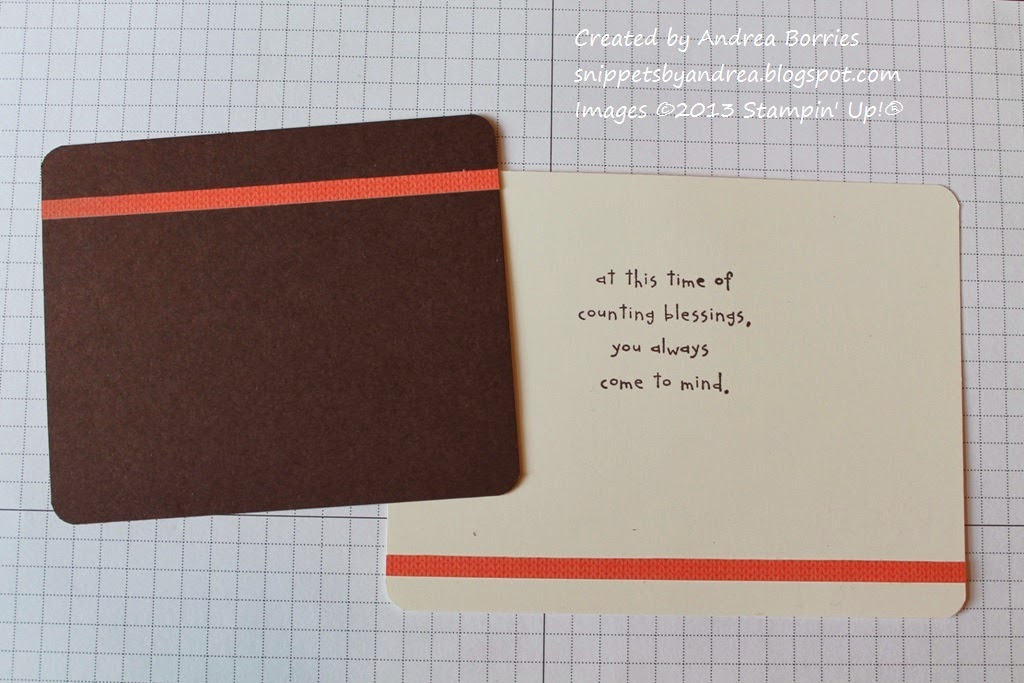
Step 7: Cut a 1/2" high strip from one of the pieces cut off the napkin holder in Step 2. Stamp "Happy Thanksgiving" in Chocolate Chip ink on the back (non-patterned side) and trim the right end of the strip into a "V." Stamp a greeting on the Very Vanilla cardstock.
Step 8: Cut a narrow strip of paper from the belly band. (You can use the same belly band from Step 5 or the strip leftover from Step 9 of the
gift bag tutorial.) Adhere a piece of the strip near the top of the Chocolate Chip cardstock and bottom of the Very Vanilla cardstock.
Step 9: Adhere the Very Vanilla cardstock and two or three diecuts to the middle panel inside the card.
Step 10: Adhere two diecuts to the short flap (the right side in the photo). If desired, check the placement before adhering the leaves to be sure they aren't visible when the card is closed. (Note: I had one leaf leftover when I finished the card, so I added it to the inside of the left flap.)
Step 11: Adhere the Chocolate Chip cardstock to the card front. Add the tag on the lower right side.
Step 12: Cut in half one of the pieces of linen thread included with the kit (or use the piece left from Step 14 of the
gift bag tutorial). Cut one of the pieces in half again. Holding the two short pieces together, tie a
bow around the leaf stems. It may be helpful to adhere the stems together first with a few drops of Mono Multi liquid glue. Adhere the pair of leaves to the upper left corner of the Chocolate Chip cardstock.
Step 13: Use Dimensionals to adhere the last two diecuts to the card front.
Your card is done! The finished size is 4-1/4" x 5-1/2" so it will fit in a standard A2-size envelope.
I hope you enjoyed these tutorials. If you have any questions, leave me a comment and I will respond as soon as I can. And remember to check out the
November Creative Crew gallery on SCS for more fun projects using Stampin' Up! kits. Thanks for stopping by!


No comments:
Post a Comment