This afternoon I was playing with the new
Designer Typeset photopolymer stamp set from Stampin' Up!
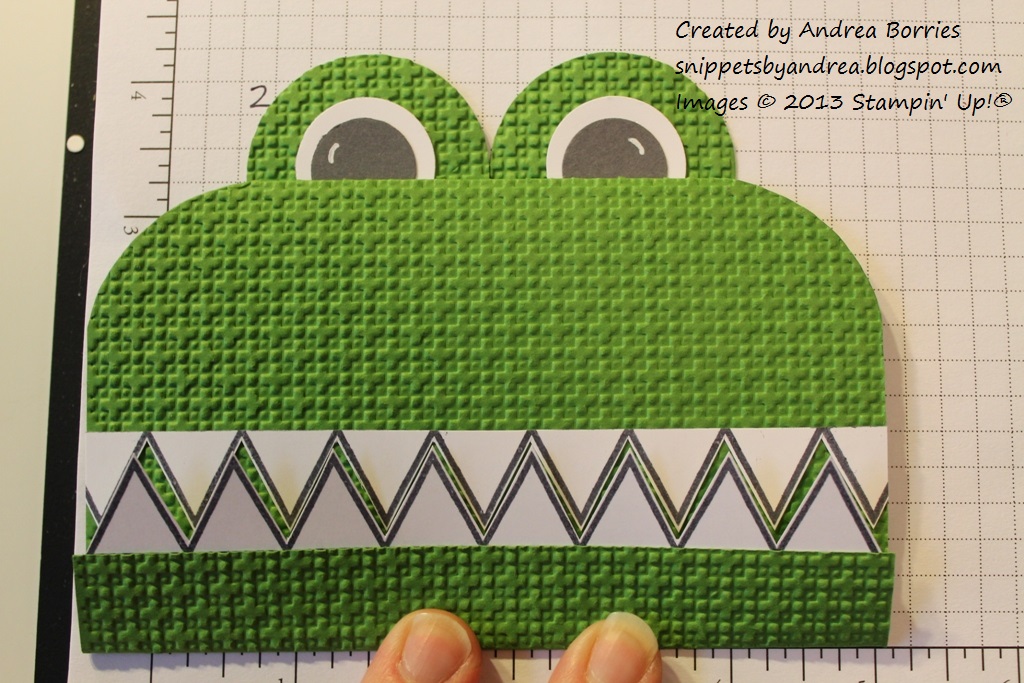
®. I wanted to make a card with the banner image -- I've seen some adorable birthday cards made with that stamp -- but my ideas just weren't coming together. The banner was reminding me of teeth, so I switched directions and created a crocodile card instead. And if I do say so myself, I think it may be one of the cutest cards I've made.
Supplies (all Stampin' Up!):
Stamps: Designer Typeset
Card stock: Gumball Green, Whisper White, Basic Gray
Ink: Basic Gray, Uni-Ball Signo white gel pen
Accessories: 1-3/4" circle punch, 1" circle punch, 3/4" circle punch, Square Lattice embossing folder, Mono Multi liquid glue, Sticky Strip
Isn't he a cutie? He even fits in a standard A2-sized envelope. And really, he wasn't that hard to make. Here is a step-by-step tutorial:
Step 1. Cut a 5-1/2" by 7" piece of Gumball Green card stock. Measuring along the longer side, score at 3/4" and 4".
Step 2a. Emboss the two end panels with the Square Lattice embossing folder. Leave the middle panel smooth because that will be where you write or stamp your greeting. Note: My Square Lattice embossing folder is one of the smaller folders, so I am able to put it through my Big Shot sideways. If you have a longer folder, you could emboss separate pieces of card stock and then adhere them directly to the end panels.
Step 2b. Fold down the large end panel and then fold up the small end panel.
Step 3a. Turn the folded card over so the smooth panel is face up. (The fold for the large panel should be on the top.) With a pencil, trace something circular to mark rounded corners along the top edge. I used an embellishment container, but you also could use a punched card stock circle or whatever else is handy.
Step 3b. Cut off the corners along the traced lines.
Step 4. Stamp the banner image from the Designer Typeset stamp set for the teeth. The banner is eight triangles long, which is enough for the bottom row of teeth. You will need nine triangles for the top teeth, so stamp the image once and then line it up and stamp again to add one more triangle. (Don't worry about extra stamp or ink marks since the teeth will be cut out.)
Step 5. Cut out the teeth. For the bottom teeth, you can leave the straight connecting line as well as a little card stock below the line. This is where you will put the glue. For the top teeth, carefully cut off the connecting line, but don't cut the triangles apart. (You could leave the connecting line with the teeth if you prefer; I liked the look better without it.)
Step 6a. Put a thin line of Mono Multi liquid glue along the bottom edge of the bottom teeth. Glue them to the inside of the small embossed panel.
Step 6b. The straight connecting line along the bottom of the teeth should be just below the edge of the Gumball Green card stock, so it isn't visible on the front of the card.
Step 7. Place a drop of glue on the back of each of the top teeth. Holding the card closed, adhere the teeth to the top panel so they line up with the bottom teeth. Trim off the points of the end triangles so they are even with the edges of the card.
Step 8. Punch out the following circles for the eyes: 2 1-3/4" circles of Gumball Green, 2 1" circles of Whisper White (shown here on Basic Gray card stock so they are easier to see) and 2 3/4" circles of Basic Gray. Emboss the Gumball Green circles with the Square Lattice embossing folder.
Step 9. Assemble the eyes with Mono Multi liquid glue. Use a white gel pen to add accents to the Basic Gray circles. Add pieces of Sticky Strip to the bottom of each eye.
Step 10. Adhere the eyes to the back of the card just below the top fold. Be sure that the card is no taller than 4-1/4" so it will fit in an A2-sized envelope.
That's it! You just need to stamp or write a greeting inside the card and then send this croc on his merry way. I like to use "I'm wild about you!" with animal-themed cards, and I think that would perfectly here.
I have to say I'm pretty tickled with the way this card turned out, and I hope you like it, too. Thanks for stopping by!


1 comment:
He is absolutely the cutest thing!! Thanks for the tutorial. You did a great job!
Post a Comment