Thursday, June 19, 2014

A break from unpacking

Moving to a new house has slid down on my list of favorite things. It wasn't exactly at the top of the list to start with, but now it's a few notches lower. So I've decided to take a break from the unpacking, organizing and furniture arranging to share a set of cards I made a few weeks ago.

Supplies (all Stampin' Up!):
Stamps: A Little Bit of Happiness
Card stock: Whisper White, note cards and envelopes
Ink: Jet Black Stazon pad; Blushing Bride, Calypso Coral, So Saffron, Wild Wasabi, Soft Sky, Wisteria Wonder, Basic Black markers
Accessories: Color spritzer tool, Subtles Candy Dots, Dimensionals, Mono Multi liquid glue

The four stamps in the A Little Bit of Happiness set contain a horizontal line of images (see the card in my last post for an example). For this eight-card set (two of each design pictured) I stamped each long image twice, colored them and cut apart the smaller pictures. I arranged the small pieces in a square and adhered them to the lower right corner of a card base, which I had spritzed with Soft Sky ink. I added one Candy Dot on each card and then, to coordinate with the border around each small image, I doodled a Basic Black border around the card base.

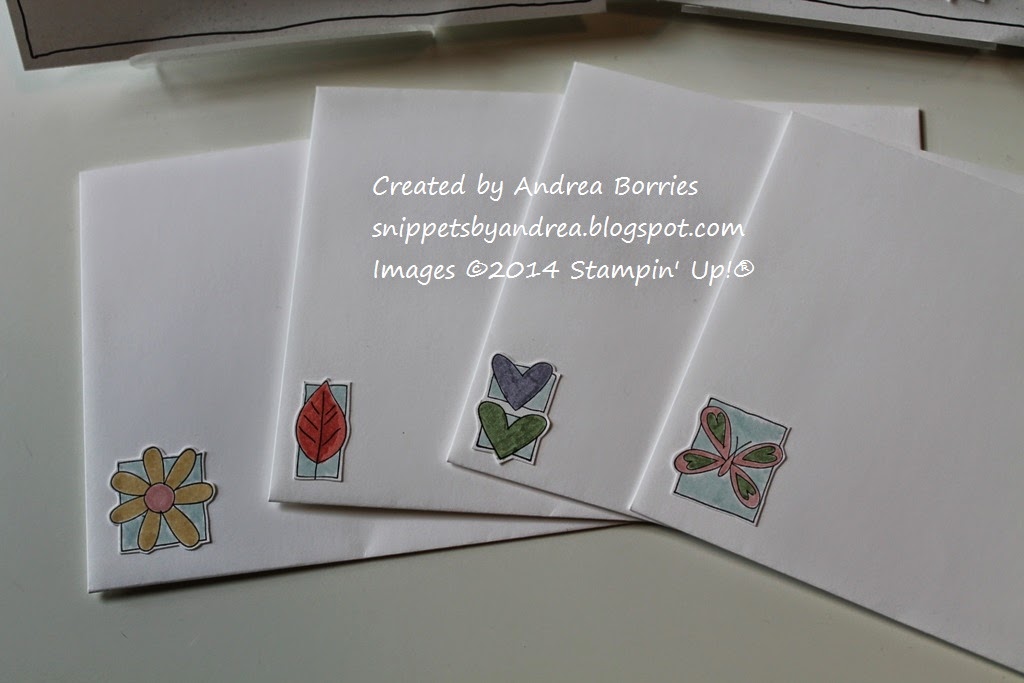
I had at least one small image leftover from each card, so I added them to the lower left corner of the envelopes. I don't usually spend time decorating envelopes because they just get ripped open and tossed, but this was very quick and easy, and I really like how they coordinate with the cards.


Well, my craft "zone," as my sister has dubbed it, is probably the most organized place in the house right now. Yay! I'm hoping I'll be able to get back to stamping and card-making soon so I'll have new creations to share with you. Until then, thanks for stopping by!

Saturday, June 7, 2014

A day brightener

We're having a cool, wet and dreary day here -- a day that really needs a few bright flowers:

Supplies (all Stampin' Up):
Stamps: A Little Bit of Happiness
Card stock: Whisper White, Old Olive, textured Rich Razzleberry
Ink: Jet Black StazOn, Real Red, Pumpkin Pie, Daffodil Delight, Old Olive, Soft Sky, Elegant Eggplant, Melon Mambo
Accessories: Pearls, Dotted Scallop Ribbon border punch

These flowers make me happy, and coloring them was a nice break from packing. But can you find the little goof-up in my coloring? The two dark purple flowers were supposed to be Rich Razzleberry, and they ended up Elegant Eggplant. Oops. I'd grabbed the marker from that spot in the case and started coloring without checking the name. I thought it looked too dark, but it wasn't until I held the focal image up to the card base that I realized the mistake. Oh, well. I do think that even though there isn't any Rich Razzleberry in the focal image, it still works with that color card base.

I wanted to keep the card layout clean and simple, so I punched a scalloped border of Old Olive card stock and adhered it to the bottom of the focal image. To add a little dimension to the card, I placed small pearls on a few of the flowers.

I hope that made your day a little brighter. Thanks for stopping by!

Sunday, June 1, 2014

I backed Reading Rainbow

Raise your hand if you or your children grew up watching Reading Rainbow on public television. Me, me, me! I can still hear the opening theme and picture some of the different segments. So I was very interested when my sister sent me a link to the "Bring Reading Rainbow Back for Every Child, Everywhere" project on Kickstarter last week.

Right now, one in four kids in the U.S. will grow up illiterate. Through the Kickstarter project, LeVar Burton and the Reading Rainbow team are working to change that by putting Reading Rainbow on the Web, creating a specialized classroom version, and delivering it free to schools in need.

I'm proud to be a backer for this project, and I hope it instills a love of reading in millions of children. For more information or to make a pledge, click on the link above.

By the way, did you know that June 1 is International Children's Day? Celebrate by reading with a child.

Thanks for stopping by!

Saturday, May 31, 2014

One must have a little flower

Last weekend I took the time to make a few cards before I packed up the craft room. (Sniff, sniff.) I happened to have two very old retired stamp sets sitting on the table, so I just grabbed those and worked as efficiently as I could in an already chaotic space. The first card I made was a patriotic one that I shared in my Memorial Day post. I used the same stamp set, Love Is a Circle, for today's card.

Supplies (all Stampin' Up!):
Stamps: Love Is a Circle, Distressed Dots
Card stock: Pear Pizzazz, Calypso Coral, Whisper White
Ink: Pear Pizzazz, Calypso Coral, So Saffron
Accessories: Bitty Buttons, Calypso Coral baker's twine, Scallop Edge border punch, 2-1/2" circle punch, Essentials paper-piercing pack, paper-piercing tool and mat, Dimensionals, Glue Dots

I have rescued this stamp set -- which contains four large images outlined by a quote and two small images (a leaf and a star) -- out of my donate/sell pile several times over the years; I just can't seem to part with it. It happened again a few weeks ago when I had a sale to thin out my supply of stamping and crafting supplies. I gathered up what was left after the sale and packed a box to send to a friend for her daughter's Girl Scout troop (I had also given her three bags of other kid-friendly craft supplies) and two boxes for a fellow Stampin' Up! demonstrator who works with our local Ronald McDonald House. But before I sealed the boxes I pulled out a few stamp sets I decided to keep, and Love Is a Circle was one of them. For some reason I'm drawn to this set, even though I couldn't tell you when I last used it. I should probably just stop trying to get rid of it.


Anyway, back to the card. I stamped the flower image on Whisper White card stock using Calypso Coral ink. I punched out the image with the 2-1/2" circle punch and pierced a border along the edge of the circle. I stamped the image again using So Saffron ink, cut out the center of the flower and adhered it to the focal image. For embellishment I added a Bitty Button tied with Calypso Coral baker's twine and three stamped and cut-out leaves.

For the card base, I stamped the Distressed Dots background stamp using Pear Pizzazz ink on Pear Pizzazz card stock. I trimmed about 1/4" off the bottom of the card front and added a Calypso Coral scalloped border. Then I adhered the focal point to the card with Dimensionals.

The other cards I made last weekend feature the stamp set A Little Bit of Happiness. I'll post those pictures over the next couple of weeks. I hope it won't be too long before I'm able to get back to stamping and more regular blog posts. But tomorrow we get the keys for our new place, so we're making progress!

Thanks for stopping by!

Monday, May 26, 2014

Happy Memorial Day

On this day of remembrance, I would like to express a simple but heartfelt thank you to all the men and women who have served our country overseas or at home.

"Our nation owes a debt to its fallen heroes that we can never fully repay, but we can honor their sacrifice."
- President Barack Obama

Supplies (all Stampin' Up!):
Stamps: Love Is a Circle
Card stock: Riding Hood Red, Night of Navy, Whisper White
Ink: Riding Hood Red, Night of Navy
Accessories: Chevron embossing folder, white baker's twine, striped Riding Hood Red ribbon, Dimensionals, Glue Dots

Thanks for stopping by!