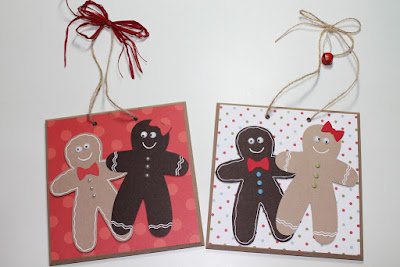
During my birthday craft weekend in October, I bought twelve pressed-wood tiles. They were slightly smaller than 6" x 6", and they had two holes pre-drilled in the top to add string or ribbon for hanging. I knew I wanted to use them to make Christmas decorations, and somehow I managed to get them all done during the holiday hoopla. I was a bad blogger, though, and didn't keep a list of the supplies I used. I pulled out all kinds of products -- new and retired, from many different companies -- and had them scattered all around my craft room, so I wasn't quite organized enough to keep a supply list. But as always, if you have a question about anything specific, leave me a comment and I will do my best to remember or figure out what I used!
In no particular order, here are the different tiles I made. (The only one I duplicated exactly was the gingerbread house, so that’s why there are only eleven pictured.) Click on any of the pictures to enlarge it.


I do have a few general tips for how I made my tiles:
* The tiles have a slight beveled edge, so I made sure to measure the dimensions of the top surface before cutting the paper to layer on the top.
* When the paper was cut, I lined it up on the surface of the tile without adhering it. Then I carefully flipped the tile and paper over and laid them down on the table. I placed a sharpened pencil through the holes and traced the circle openings on the back of the paper. Then I used a Crop-A-Dile to line up the traced circles and punch the holes in the paper.
* I used Scor-Tape to adhere the base layer of paper to the tiles. I made sure to place the tape right along the edge of the paper so there wouldn't be any loose corners or edges.
* On the back of each tile was a large label that I couldn't peel off. (I tried and tried with the first one and was just pulling off tiny little pieces. It would have taken me forever to completely get the labels off all the tiles.) So instead I just covered up the labels. For each tile I cut a piece of patterned paper (sometimes the same print as on the front, sometimes a different coordinating print) to about 4" x 5" and adhered it over the label on the back of the tile. Then I stamped "Merry Christmas" on a die-cut tag, signed my name and the year, and added it over the patterned paper.
Thanks for stopping by!


4 comments:
These are great Andrea! I couldn't pick a favourite one because I like ALL of them! I bought some big wooden stars to decorate in a similar way, but never got round to decorating them because I was unwell. Oh well, I can do them for NEXT Christmas! I bet your Christmas tree looks pretty with all it;s lights at night! Middle of a stinking hot.humid Summer here!
Have a great day!
Sunshine.
ihearttostamp.blogspot.com
Beautiful! I like the last one shown (moose) and the two with the villages the best - I think I like the idea of a peaceful, snowy winter scene. I've slowly been taking down Christmas decorations. The tree itself is still up and there is one decoration that stays out year-around. It is a dreary time of year and taking down the decorations is a bit sad.
Judy
Thanks, Sunshine! You're very creative, so I'm sure your wooden stars will look wonderful whenever you get around to decorating them!
Thanks, Judy! Those are a few of my favorites, too. I ended up keeping the one with the red background and large snowflake. I used a pearly Nuvo Embellishment Mousse on the snowflake, and I sponged it on so it has kind of a rough texture but is also shimmery, if that makes sense. It's much prettier in person!
Post a Comment