
Card stock: Midnight Muse, Basic Gray, Smoky Slate, Pear Pizzazz, Old Olive, Sahara Sand, Chocolate Chip (smooth and textured), Basic Black, Green Galore, Whisper White
Ink: Old Olive, Memento Tuxedo Black, Whisper White craft, chalk marker
Punches: 1-1/4" circle, large tag, Word Window, Boho Blossoms, Bird Builder, Build a Blossom, Itty Bitty Shapes pack, 1/4" circle, Crop-A-Dile (We R Memory Keepers)
Other accessories: Circles Collection Framelits dies, Frost White Shimmer Paint, Ice White Pearl Pen (Viva Decor), scoring stylus, foam mat, sponge, bone folder, Mono Multi liquid glue, Dimensionals, free Star Wars font from fontspace.com
I've seen Star Wars plenty of times, but I wouldn't consider myself an expert. And I'm definitely not a pro with punch art, so I turned to the old reliable Internet for some ideas. I did a few online searches for Star Wars-themed cards and found a fun punch-art yoda card by a fellow Stampin' Up! demonstrator. I used her card as my main inspiration and also studied several online images of Yoda and the Death Star.
Unfortunately, I didn't have time to take step-by-step pictures (I made the card the day of the party), but here is a quick run-down of the punches I used and additional tips:

Face and head
Head - 1-1/4" circle (Pear Pizzazz)
Ears - Wing from Bird Builder (Pear Pizzazz) and smallest leaf/petal shape from Build a Blossom (Old Olive)
Eyes - 1/4" circle (Whisper White); Crop-A-Dile : 3/16" (smooth Chocolate Chip), 1/8" (Basic Black)
Eyelids and mouth - Circle from Itty Bitty Shapes punch pack (Pear Pizzazz), trimmed
Nose - Mini scalloped circle from Itty Bitty Shapes punch pack (Pear Pizzazz), trimmed
I used a sponge to apply Old Olive ink to all the pieces (except the eyes) to add depth. I rubbed my bone folder around the edges of the head and ear shapes to distress them a bit, and I added in a few of Yoda's wrinkles with a stylus.
Body
Robe - Large tag (textured Chocolate Chip and Sahara Sand)
Arms - Word Window (Sahara Sand), trimmed
Hands - Smallest flower from Boho Blossoms (Pear Pizzazz), trimmed
Feet - Largest flower from Boho Blossoms (Pear Pizzazz), trimmed
I cut the Sahara Sand tag shape in half vertically and then folded back the inside edge on each piece. To add texture to Yoda's robe I spritzed the Sahara Sand pieces with water, crumpled them, then unfolded them and let them dry.
Light saber
I made the strips for the light saber with my paper trimmer (Basic Black, Green Galore) and then hand-cut them to the appropriate lengths. To give the light saber a little glow, I applied Frost White Shimmer Paint to the Green Galore card stock.
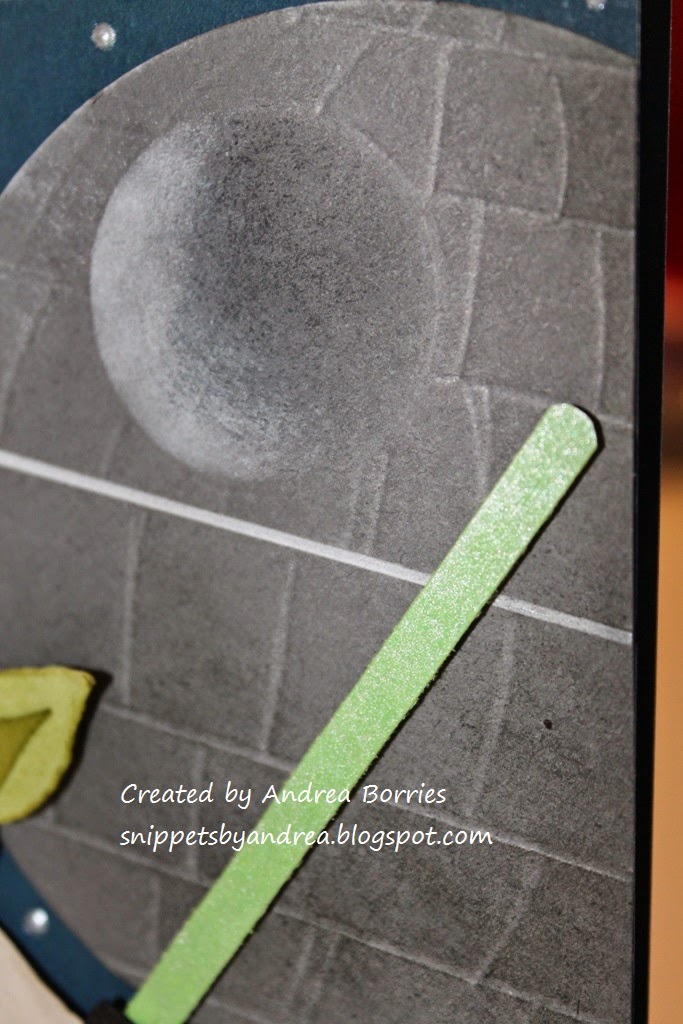
For the sentiment I downloaded a free Star Wars font from fontspace.com and printed "May the Force be with you" and "Have a happy birthday you will" on a piece of Smoky Slate card stock. I spaced them far enough apart that I could cut out the birthday sentiment in a 3-3/4" x 5" piece to layer inside the card. Then I trimmed down the first sentiment and adhered it to the bottom of the card, added the Death Star in the upper right corner and used Dimensionals to adhere Yoda over the sentiment.
I was really pleased with the way this card turned out, and my cousin loved it, too. May the Force be with you! Thanks for stopping by!

1 comment:
Love this - it is amazing.
Post a Comment