Monday, July 24, 2023

Birthday fishes

Happy Monday! I hope your week is off to a good start. I'm trying to catch up on some blog posts today. I intended to finish this post over the weekend, but then I decided to rearrange and reorganize my craft room. Uff da. It was a big project, but I'd been wanting to do it for awhile. I like the new arrangement so far, but I haven't had a chance to do any crafting yet; that will be the true test. 

But back to today's post. Here are some cute birthday fishes:

I'm really pleased with how these cards turned out. To make the fish, I used the School of Fish die (Memory Box) and an old gel print. I wasn't crazy about the gel print itself, but I love how it worked for these die-cut fish. I did have to layer the fish, because the gel print paper was light-weight; I just cut another round of fish out of card stock (I used a light orange to coordinate) and glued the pieces together. If I'd thought about it ahead of time, I probably would have adhered the gel print to card stock first and then die cut the fish.

For the card bases I used blue card stock embossed with the Seabed embossing folder. I love all the fun underwater details. To make the sand, I cut strips of Crumb Cake card stock, tore along the top edge, and repeatedly stamped a speckle- or splatter-style image to add texture. I finished the scenes with a few die-cut pieces of seaweed and coral, a small wooden seashell on each card, and a few clear droplets. I added the punny sentiment "birthday fishes" on a small strip of card stock near the upper right corner of each card.

"Fishing" you a great day! Thanks for stopping by!


Monday, July 17, 2023

A creative stretch

The card I'm sharing today is not my usual clean-and-simple style. Lately I've been watching videos related to mixed media, art journaling, making collage fodder, etc., so I wanted to try making a card that was a little more eclectic and “artsy.”

I’m not really sure what to call this style, but it was fun to make — and a good stretch for my creativity. I started with a panel of Crumb Cake card stock and stamped the architectural images and “imagine” text (all from Lost Coast Designs) using Soft Suede ink. Then I stamped the small butterfly and flower images from the retired Butterfly Basics stamp set (Stampin' Up!) randomly across the panel. I used Soft Suede ink, but I stamped the images multiple times before re-inking to get variations in the color. I used the honeycomb image from the Butterfly Basics set, stamped with Crumb Cake ink, to fill in some of the empty spots.

With a blending brush, I applied Crumb Cake ink to parts of the panel and around the edges to add more depth and an aged look. I created the white splatters with pigment ink mixed with a few drops of water. When I was done splattering, I rubbed the panel into the remaining ink to create a few patchy white spots.

The "happy birthday" sentiment and frame are from the retired Postage Collection stamp set (Stampin' Up!). (I also stamped the tiny bumblebee image from that set on the main panel using Crumb Cake ink, but they're hard to see.) I blended some Crumb Cake ink onto the sentiment square, adhered a bit of hemp twine behind it, and then used foam tape to attach it to the main panel. The gold die-cut flower was sitting on my table, so I added it on for a little bit of shine.

Using a bone folder, I distressed the edges of the Crumb Cake panel and adhered it to a Soft Suede card base. I finished the card with a few colored pearls.

I need to practice making cards/projects like this more often so I can get better at working freely and not thinking and planning so much. Sometimes it's hard to get the left side of my brain to take a break!

Thanks for stopping by!


Wednesday, July 12, 2023

July Christmas cards: Cheery snowman

Looking back over the Christmas cards I've made so far this year, I realized I haven't done a lot of actual stamping, other than sentiments. I have a lot of cute holiday stamps, so I decided to use one of my favorite snowman images for my July Christmas cards.


This snowman is from Endless Creations, and one of the best parts of the stamp is that you get two images: one with the scarf on the left, which I used here, and one that is the mirror image, with the scarf on the right. (The company has a lot of stamps with that feature, and I think it's great.) The sentiment, from Simon Says Stamp, is one that I would normally use on the inside of a Christmas card. But I thought the size and shape of it was perfect with the snowman, so I decided to use it on the front of these cards.


It took me a long time to get to a layout I liked, but the effort was worth it because I love how these cards turned out. And they're pretty simple in the end -- a couple of stamps, a little coloring, one die, and a strip of patterned paper. For embellishment I added a few silver sequins and a bit of red pompom trim and tinsel in the upper right corner (attached with a mini stapler). With the pompoms, these cards aren’t easy to mail, so I only made four of them to be hand delivered.


I did have a couple of leftover snowmen that didn't make the layout cut, so I trimmed them down and made them into their own cards. I matted them with black cardstock, embossed the card bases, and wrapped tinsel trim around the card fronts. And of course they needed a few sequins.


I used Frost White Shimmer Paint for the snowflakes on this card. (I use a sponge dauber to apply the paint to the stamp and then clean it off when I'm done.) I also painted some along the bottom of the panel to look like a snowbank.

I should be done with my Christmas cards now. Yippee! I may still make a few here and there if the mood strikes, but I don’t think I need to mass produce anymore. I might try to start working on my calendar pages next month because I always feel like I have to scramble to get those done in December.

Thanks for stopping by!
Friday, July 7, 2023

Scrappy cards

After I finished making the floral card sets I shared last month, I had a lot of small pieces of patterned paper left over. I wanted to put them to use, so I created a few simple "scrappy" cards.


For the top two cards, I used two different circle punches. I punched six circles of patterned paper with each punch and then arranged the circles on two card bases. I kept the circles on each card the same size, but you also could try combining the different sizes. I added a sentiment strip to each card and finished them with a little butterfly and pearl embellishments.

To make the bottom two cards I used a variety of patterned paper strips. Each strip is 4" long, but they are a variety of widths. I adhered the strips horizontally on one card and vertically on the other and added gold flower silhouettes. (I had die cut the flowers when I made the original card sets, but I decided not to use them then. I think they work pretty well here.) I finished both of these cards with sentiment strips and sequins.

Thanks for stopping by!


Wednesday, July 5, 2023

Watercolor in the backyard

Over the weekend I wanted to do something crafty, but I wasn’t in the mood to make cards. I know some crafters use those days to make a stack of ink-blended backgrounds, die cut a bunch of sentiments, or other tasks like that. Those ideas have never really worked for me, so instead I gathered a few supplies and did some art in my backyard.

Here are the supplies I used: two small pieces of watercolor paper, two Micron pens, a paintbrush, a container of water (I love the empty containers from Talenti gelato because they are clear and have a screw-on lid), a travel card of paint samples from Beam Paints, and a plastic mat.

I was inspired by an artist named Andrea Nelson. She has wonderful videos of fun, doable art projects for all ages, and I highly recommend checking her out on Instagram or YouTube. For my projects, I used a Micron pen to make squiggly lines across each piece of watercolor paper. Then I used another Micron pen with a slightly smaller tip to round off each place where the lines intersected. (The photo above shows the pieces at this stage.) You could use Sharpie markers or other pens instead; you just want to make sure that the ink is waterproof if you plan to add watercolor paint.

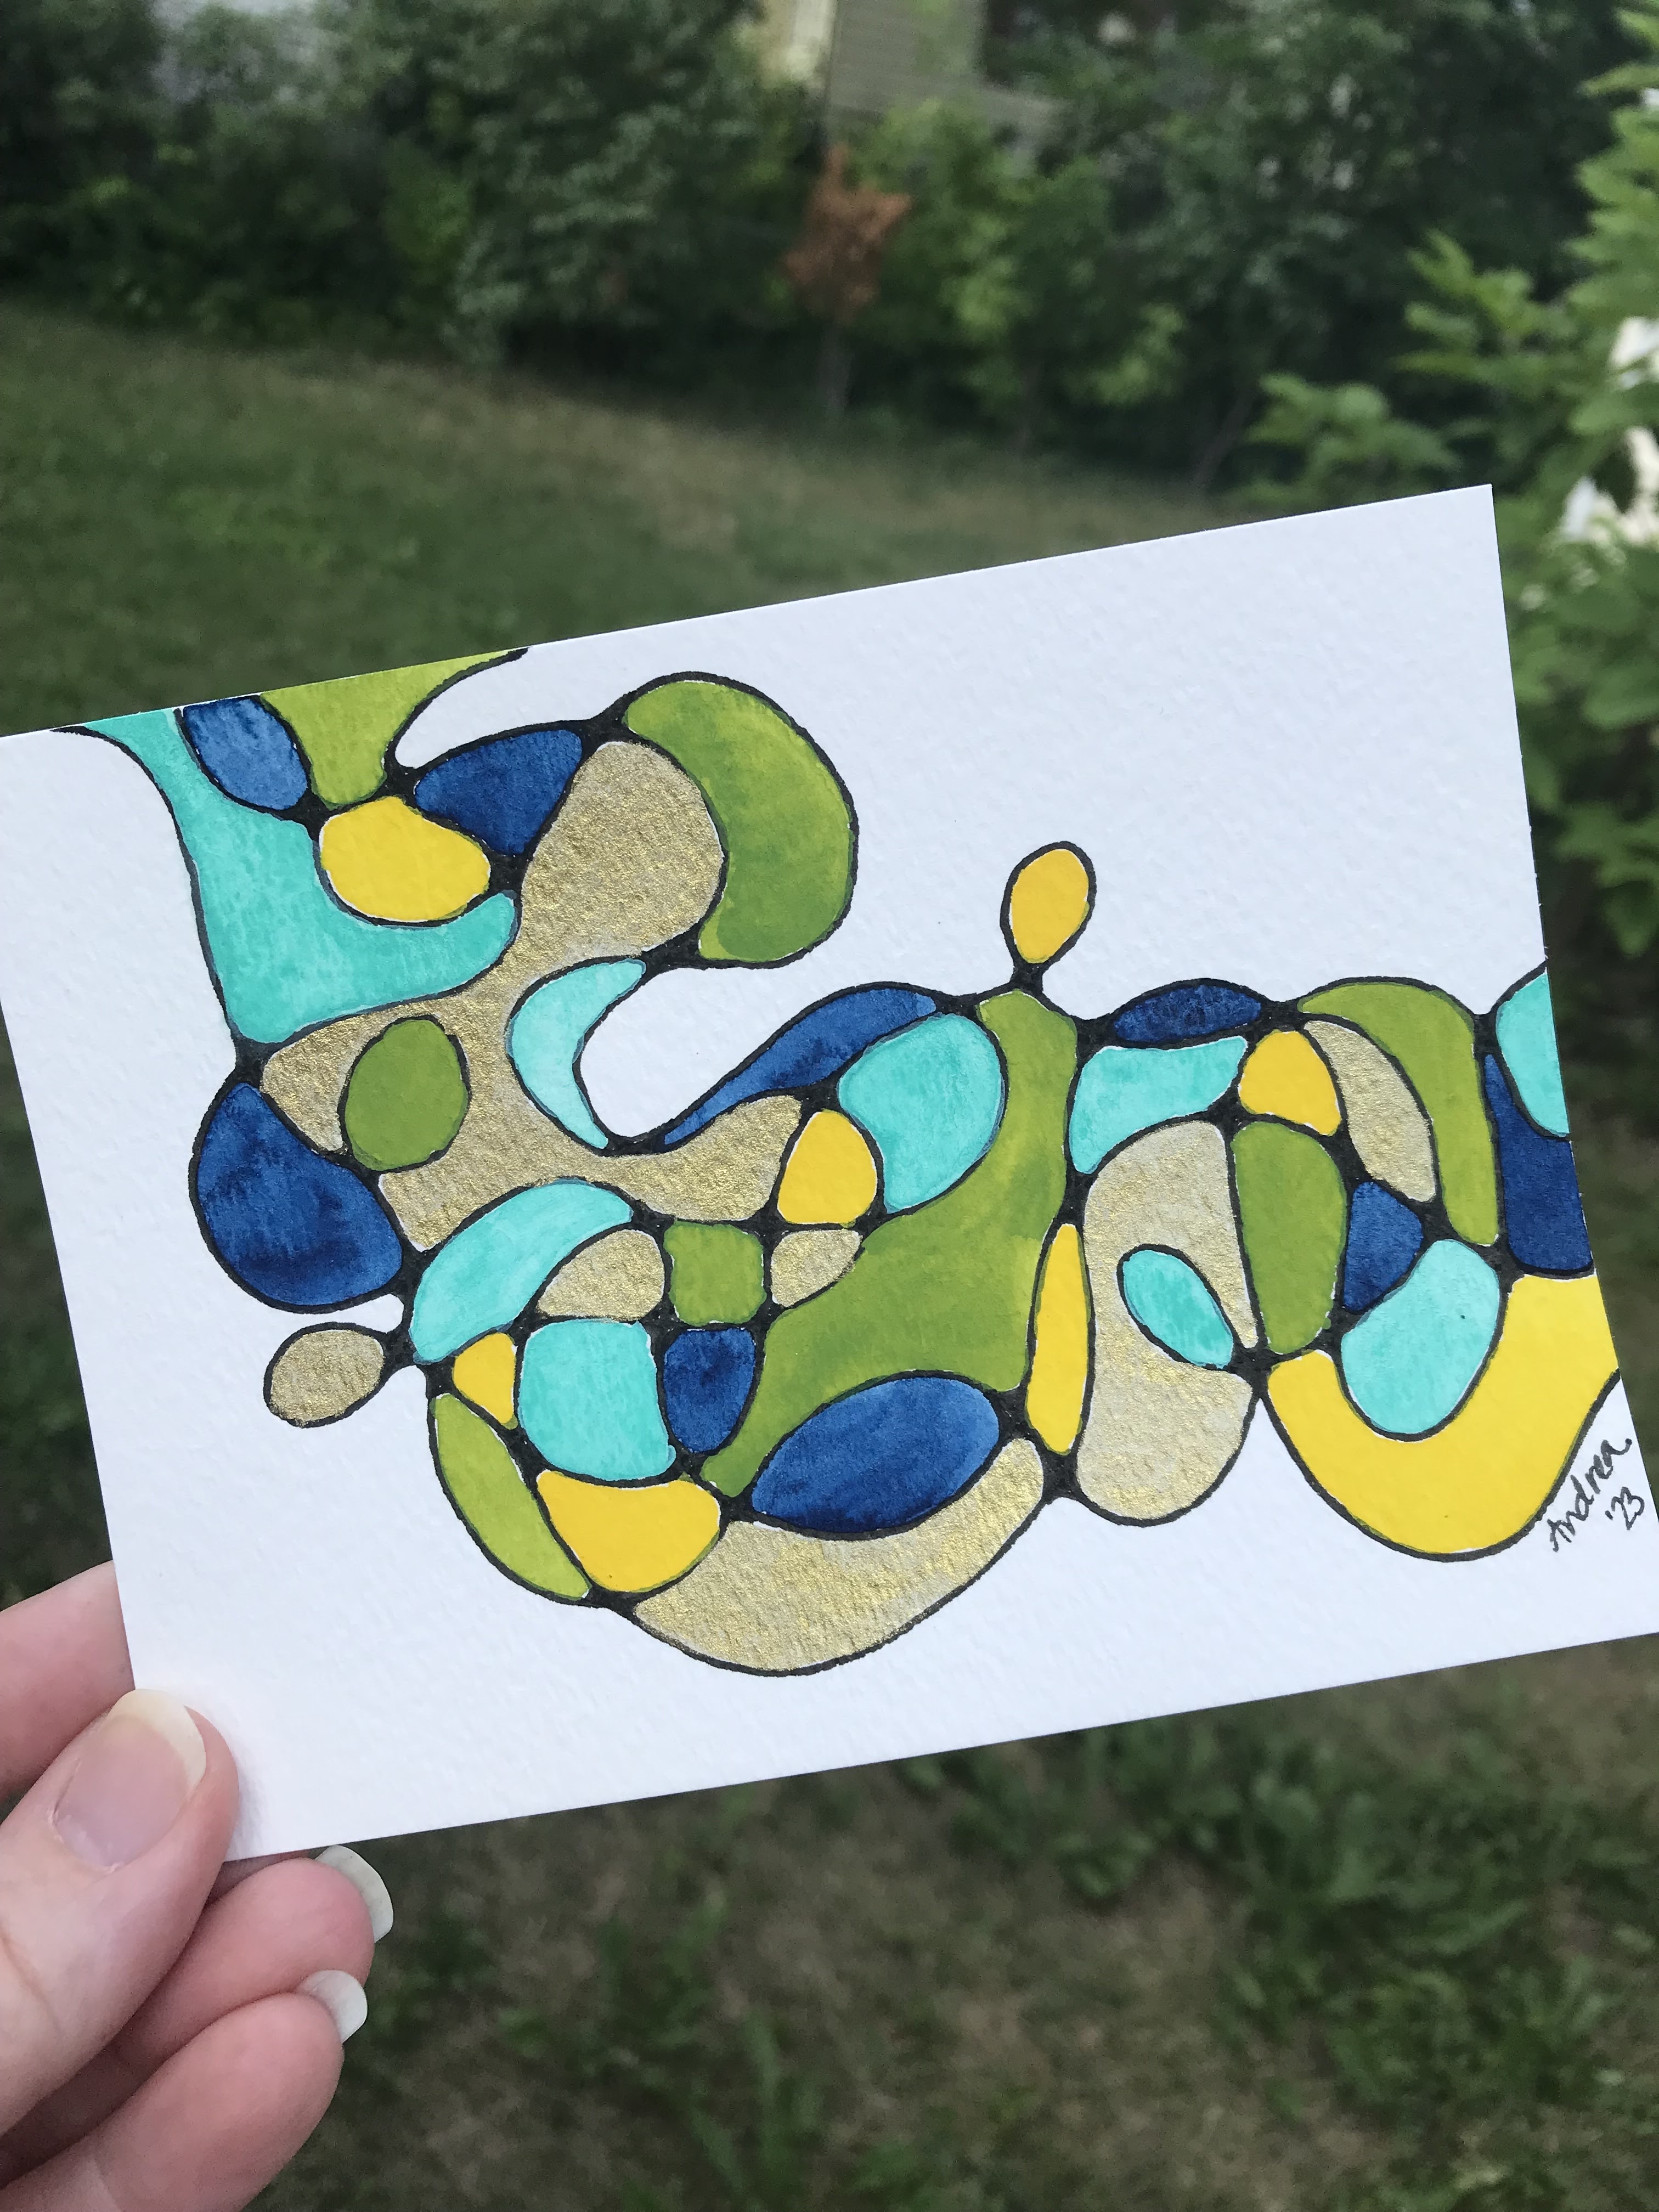
The next step was to add paint. For one of the pieces I decided to make a rainbow with the colors blending into each other across the squiggly lines. For the second piece I used a limited color palette (four colors and gold) and just filled in the different sections created by the lines.

Once I was done painting I wanted to add more detail to the rainbow card. I used the Micron pen with the smaller tip and filled all the white space on the paper with little circles. My hand definitely got tired, but having to concentrate on all those circles did help block out all the other random thoughts in my brain.

I decided to turn this piece into a postcard and send it to my local art supply store, Wet Paint, for their annual Summer Postcard Program. This is the third year I’ve sent in postcards for this program, and it’s a fun, low-key project for the summer. To turn this into a postcard I just added a few lines on the back: one vertical line in the middle and a few horizontal lines on the right side to write the address. I also sprayed a light coat of sealant on the front so the paint wouldn’t run if the card got wet in the mail.

Although I liked the look of the circles on the rainbow card, I didn’t think my hand could fill in another card. So I decided to leave the second piece as is. I tried to capture the sparkle of the gold paint in the picture, but it’s tricky. It really has so much shine.

My plan for this piece is to turn it into a greeting card. I’ve trimmed it down just a bit so I can add it onto a 5” by 7” card base. The card base is a neutral stone color (similar to kraft), which is perfect. I haven’t finished the card yet because I’m still debating whether I want to add a mat of black card stock and possibly a sentiment strip. What would you do?

I really enjoyed taking a little time to make these two projects, and I’m looking forward to making more in the future. Do you have a go-to art/craft technique or project that you turn to when you’re not sure what you want to make? If so, let me know what it is in the comments!

Thanks for stopping by!