It’s been a couple of years since I made valentines for my local Meals on Wheels chapter. But this year I made a group of cards for a different organization — one that supports senior citizens throughout Minnesota. I wanted to share them before Valentine’s Day, but better late than never.
Monday, February 16, 2026
Valentines for seniors
Saturday, November 15, 2025
Winter cards for seniors
I’ve been sloooowly making progress on my craft room. Today we moved the furniture downstairs. I need to get a few more shelves for storage, and then I’ll be able to start reorganizing everything. I’m hoping to have it set up by Thanksgiving; I have so much Christmas stuff to work on!
For now I have some winter cards to share. Most of these are the cards I created during my craft weekend a few weeks ago. I posted group photos at the time, but I also wanted to share pictures where you can see the individual cards. These cards, which are for the Cards Connect program at the Friends and Co. organization, will be sent to senior citizens around the state. (See my Sept. 20, 2025, post for fall cards I made for this same cause.) I was able to create 71 cards this time.
I have quite a few pictures, so I won’t share individual details of cards. My main supplies were the Simple Vintage Flannel Season paper pad and ephemera (Simple Stories) and the Chilling with My Snowmies paper pad and coordinating dies (Echo Park). Embellishments are minimal, as the organization requests that cards be fairly flat for mailing. If you have a question about a specific card, leave a comment and I’ll do my best to answer it.
Whew! I still need to write a message in each card, and then I have to drop them off by Dec. 5. How are we halfway through November already?!
Thanks for stopping by!
Saturday, September 20, 2025
Fall cards for seniors
For many years I've made financial donations to a local organization that works to promote connection and meaningful relationships for older adults. Recently I learned that they have a program called Cards Connect -- individuals make cards and send/bring them to the organization, which then mails them to seniors around the state. They collect cards four times per year, and the donation deadline for fall cards happened to be a few weeks away. I pulled out some autumn-themed stamps, dies, and patterned paper and started creating.
The organization requested that the cards be fairly flat for mailing purposes, so I didn't add the dimension I usually would. I limited my embellishments to flat sequins and tried to add interest with textured or shimmery paper or a bit of splatter.
I created a total of twenty cards to donate this time. I made multiples of a few designs, but I also created some unique cards by using up bits and pieces that I've had sitting around for years (like the die-cut frames and the panel with the Emily Bronte quote).
Inside the cards I wrote a simple uplifting message with a couple of sentences about autumn. I also included a seasonal "dad joke" in each card for a little fun.
I'm hoping to make many more cards for the next round, which will be winter (not holiday-specific). I've already bought some cute patterned paper and coordinating ephemera so I can get a head start. Maybe I'll be able to finish some for my September Christmas cards.
Thanks for stopping by!
Saturday, May 3, 2025
For the animals
Today I participated in a Walk for Animals, a fundraiser for our local Animal Humane Society. I only registered for the Walk last month, so I didn't have a lot of time to collect donations. But I did have a few friends and family sponsor me, and I wanted to make a little something to thank them for their donations. So I started with (obviously) thank-you cards:
Of course I needed to make the cards pet-themed. (I have to thank my online stamping friend Sunshine for sharing some cards she made for her vet's office and inspiring the idea.) I used the Speech Bubble Backdrop die, Critter Chatter stamp set, and Say What? Pets stamp set, all from Lawn Fawn, to create eight cards. They're all the same basic layout with different background colors.
I used alcohol markers to color the animals very simply -- the only detail I added was stripes on the cats. On each card I gave the middle animal a speech bubble and then stamped the "translation" inside.
With the thank-you cards done, I decided to make some small gifts -- sets of four notecards and simple bookmarks -- continuing the animal theme.
To create the notecards I used the Storybook Friends stamp set and Pretty Petals Designer Series Paper (DSP) Stack (both Stampin' Up!). I chose four images from the stamp set and paired each with two DSP patterns. I colored the images with alcohol markers and punched them out with a scalloped circle punch. I covered the seam between the patterned papers with a strip of card stock punched with the Dotted Scallop Ribbon Border punch and finished each card with a trio of cream sequins.
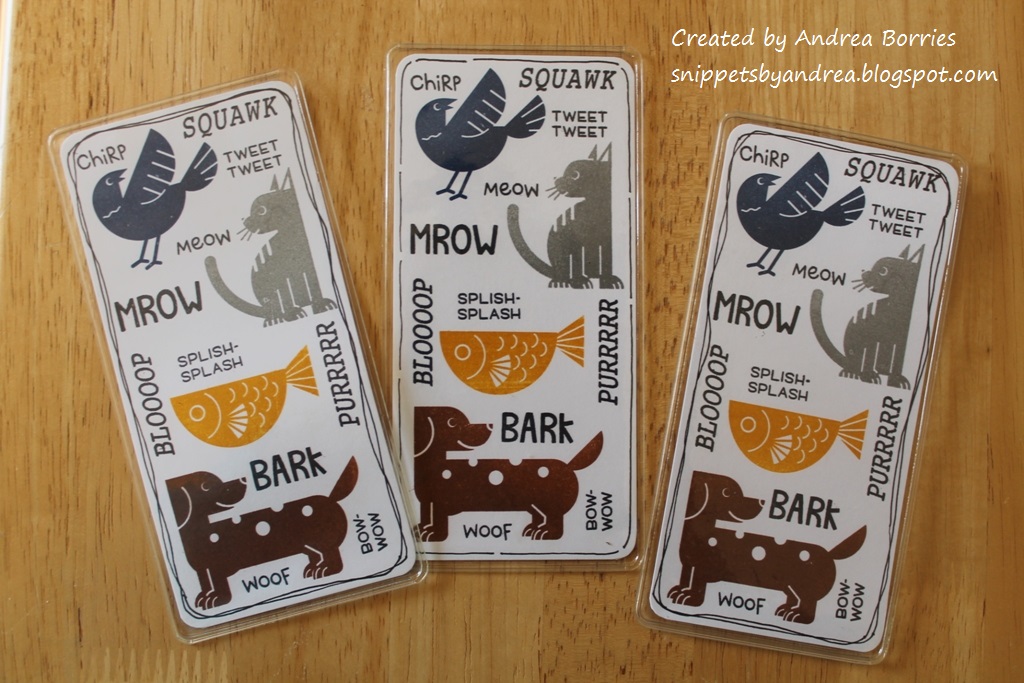
Finally, the bookmarks. I used the Critter Chatter stamp set again, but for the animals I pulled out a set from a past My Monthly Hero kit from Hero Arts. I stamped a dog, fish, cat, and bird -- each in a different color -- then filled in with the words and finished with a doodled border.
I had a great time at the Walk for Animals, and I think I'll sign up again next year. Thanks for stopping by!
Wednesday, February 14, 2024
2024 Meals on Wheels valentines
Happy Valentine's Day! The last couple of weeks I've been so focused on trying to get projects finished for the holiday that I haven't kept up with my blog posts (obviously). I'm finally getting everything posted this week, starting tonight with the valentines I made this year for Meals on Wheels. I created a total of seventy-five cards, many of them made with bits and pieces from card kits. There are quite a few pictures, so I'll keep the text short.
Here are all the cards together, followed by close-up photos of the different card designs:
The next group of photos are from the first card kit. The flower pot cards were one of the intended card designs. The next three photos are card designs I made using parts of the kit (patterned paper, some embellishments, circle layers) along with my own die cuts and other elements.
The next cards designs are simple layouts with colored focal images. I made five cards of each design, using the same color palette for all the coloring so I didn't have to spend time choosing which markers to use.
Saturday, October 28, 2023
Personalizing a card kit
When I assemble a card kit, it’s never as quick or easy as I think it will be. Mainly because I usually want to change up the designs or add details to make the cards more “me.” And that’s exactly what I did when I sat down to put together a birthday card kit I received recently.
The kit included five square card bases, five circle card bases, two sheets of patterned paper, pre-printed images, woven labels, and some other goodies. I used all of the square card bases for actual cards, but I ended up using two of the circle cards to die cut some stitched circles (on the pink card above and the two cards below) and the “happy birthday” sentiment on the orange card above. I could have used my own card stock, but this way I didn’t have to worry about finding a matching color.
I trimmed some of the pre-printed pieces to better fit my card designs. For instance, the cake slices had the sentiment “Make a wish” at the bottom, and the “Enjoy” piece (top photo) was originally a tag. I also swapped out most of the embellishments included in the kit for my own rhinestones and sequins. And I used some sequins, glitter, and a piece of acetate to create a shaker for one of the cards (below). It’s a pretty simple shaker because I don’t make them often, but I still think it’s cute.
I’m planning to donate the cards from this kit to a charitable organization, although I’m not sure which one yet. I received a few other kits along with this one, so when I have all the cards done I’ll figure out where I should send the cards based on the organizations’ needs at the time.
I did have some patterned paper and other bits left after I finished the pre-cut card bases, so I decided to make two cards for my own stash:
You can’t tell in the photo, but the black background in the right-hand card is embossed with a streamer/confetti embossing folder. That panel has been sitting in a scraps envelope for ages, and I finally had the right card for it!
I still have some leftovers from the kit, but I’m not sure if I’ll end up using them. For now I’m hanging onto them, just in case. Thanks for stopping by!
Saturday, March 25, 2023
Brilliant Butterflies card set
Later this spring, the school where I work is having a carnival, complete with silent auction, to raise money for different school programs. I asked if they would like a set of handmade cards for the auction, and the answer was "yes," so I got to work.
I wanted to make a set of cards that was fairly versatile, so after much debate I settled on a clean and simple layout with bright butterflies. I made ten cards total, two each of five designs. Four of the designs have sentiments ("happy birthday," "thinking of you," "thanks," and "happy thoughts"), and the fifth is blank.
I love these images, but they do take a little time to stamp because each butterfly is actually four stamps: the top wings, the bottom wings, the detail wings, and the body/antennae. I used my MISTI and stamped each layer on a scratch paper first to make sure everything was lined up before I stamped the card bases. For the teal butterfly I used Taylored Expressions inks (Confetti Cake and Cookie Monster); the other ink colors are Color Fuse inks from Rubbernecker Stamps -- they're perfect because each set includes four shades of the same color.
Once all the stamping was done I added a very narrow strip of glossy black card stock along the bottom of each card. (It's difficult to see it in the picture, but I think it's a nice detail.) I finished the cards with several sequins, which I tried to arrange in a pathway going up each card.
I'm happy with how these cards turned out, and I hope they do well in the silent auction. Thanks for stopping by!
Saturday, February 4, 2023
2023 Meals on Wheels valentines
Earlier this week I dropped off my box of valentines for my local Meals on Wheels organization. I made a total of 102 cards in thirteen designs. Here is the whole batch:
For the card on the left I cut four coordinating pieces of 6" x 6" patterned paper into nine 2" x 2" squares. I adhered one square of each pattern to the card base at different angles and added a large heart with a stitched border in the middle of the card. To make the mushroom design, I first determined what size heart I wanted and then cut them out of white card stock. I placed one of the hearts on my work surface and placed my largest clear block on top of it. I arranged all of the mushroom stamps on the block and then I was able to stamp each heart just one time instead of having to stamp each mushroom individually. You also could do this technique with a stamp positioner, but my acrylic block was easier to grab. :)