Showing posts with label fall / Halloween / Thanksgiving. Show all posts

Wednesday, August 19, 2026

Halloween cards with collage cutouts

As I mentioned in my last post, I made some Halloween while on a recent crafty road trip. I didn’t have anything planned out, unlike my Christmas cards, so I brought a few coordinating supplies to play with: card bases, twine, sequins, two small ink pads, and a package of Photoplay Collage Cutouts for Halloween.

Here are all the pieces I cut out. I love the variety of images in the pack, as well as words and accents like banners and strips. The package had sixteen sheets — two each of eight designs — so I cut up one sheet of each design. Now, I don’t mind fussy cutting, and the images had cutting lines to follow, but my fingers were definitely sore by the time I was done!

With all that work finished, it was time to start creating. In addition to the supplies I brought from home, I also used the 8” x 8” Charcoal Palette Collection papers (Tim Holtz Idea-ology). I’d wanted to get some of Palette Collection papers, so when we hit the scrapbook store during our trip, I couldn’t resist. I picked up a few packs, and the Charcoal one worked perfectly with these images.


Here are the cards I created:


I’m pretty pleased with how these cards turned out. I only brought eight card bases with me, but I probably could have made another eight with all the collage cutouts I had left. Not to mention the rest of the package that I haven’t cut out yet. I guess that means more Halloween cards to come!

Thanks for stopping by!


Saturday, September 20, 2025

Fall cards for seniors

For many years I've made financial donations to a local organization that works to promote connection and meaningful relationships for older adults. Recently I learned that they have a program called Cards Connect -- individuals make cards and send/bring them to the organization, which then mails them to seniors around the state. They collect cards four times per year, and the donation deadline for fall cards happened to be a few weeks away. I pulled out some autumn-themed stamps, dies, and patterned paper and started creating.

The organization requested that the cards be fairly flat for mailing purposes, so I didn't add the dimension I usually would. I limited my embellishments to flat sequins and tried to add interest with textured or shimmery paper or a bit of splatter.

I created a total of twenty cards to donate this time. I made multiples of a few designs, but I also created some unique cards by using up bits and pieces that I've had sitting around for years (like the die-cut frames and the panel with the Emily Bronte quote).

Inside the cards I wrote a simple uplifting message with a couple of sentences about autumn. I also included a seasonal "dad joke" in each card for a little fun.

I'm hoping to make many more cards for the next round, which will be winter (not holiday-specific). I've already bought some cute patterned paper and coordinating ephemera so I can get a head start. Maybe I'll be able to finish some for my September Christmas cards.

Thanks for stopping by!


Friday, November 8, 2024

Mixed media autumn cards

Well, election day has come and gone, and I'm so disappointed with the results of the presidential race. I'm also fearful and anxious about what the next four years will hold. So it's been a stressful week, and crafting seems like such an insignificant thing. But it does help me feel a little less anxious. And I hope that by sharing my work -- sending cards or gifting hand-crafted items -- I can put a little joy out into the world. So I'll keep making cards and sharing them here (hopefully a little more often than I did last month).

Today I'm sharing two autumn-themed mixed media cards. In September I ordered a few of the Paper Glaze sampler sets from Picket Fence Studios, and the Colors of Herbs set was perfect for some fall leaves.


I chose a leaf stencil for each card and applied the Paper Glaze to the card stock using a pallet knife. Starting with the yellow, I applied the glaze to random places of the stencils. Then I did the same with the orange and green pastes, blending the colors together in some places, and let the panels dry.

For the first card, I stamped a sentiment from Lighthearted Leaves (Stampin' Up!) on white card stock, die cut it with a stitched circle die, and adhered the circle to the leaf panel. Using the Autumn Leaves dies (Gina K Designs) and card stock that coordinated with the paste colors, I die cut three leaves and attached them to the panel (using foam tape) so they look like they're falling from a tree. I rounded two corners of the panel, adhered it to a dark brown card base, and finished the card with gold sequins.

For the second card, I used the Collage Backgrounds Hero Transfers (Hero Arts) to fill in the open spaces around the stenciled leaves. I die cut the Happy Birthday die (Simon Says Stamp) out of black and gold card stock and attached the sentiment toward the top of the card. For embellishment, I used my finger to apply Gold Hero Paste (Hero Arts) around the edges of the panel, added bits of coordinating ribbon with a tiny stapler, and finished with gold sequins.

I love the texture that the paste adds, and I'm really happy with these finished cards. I also made a few more backgrounds with the other Paper Glaze sampler sets I ordered, but I haven't turned those into cards yet. 

Thanks for stopping by!


Wednesday, October 23, 2024

Halloween greetings

I think it's fun to make Halloween cards, so I try to make at least a few every year. This year, though, I went a little crazy. I had a pack of 6" x 6" patterned paper I wanted to use up, so I just kept making cards until it was gone -- I ended up with 26 cards.

Below are pictures of each of the different card designs. Since there are quite a few photos, I'm going to skip writing out details; if you have a question, feel free to leave a comment and I'll respond as soon as I can. Here are the main supplies I used for these cards:

  • Build-a-Scene Halloween paper (Taylored Expressions)
  • Stayin' Alive stamp set (Taylored Expressions)
  • Pumpkin to Talk About stamp set (Ellen Hutson)
  • Happy Haunting stamps and dies (Ellen Hutson)
  • Haunts and Harvest stamps and dies (Gina K Designs)
  • Dressed to Scare stamp (Penny Black)
  • Brown-Bag Monster stamp (Penny Black)
  • Various sentiment stamps, dies, and punches


And there you have it! I tried to pick a favorite, but I couldn't. The next task is to get all these cards in the mail before Halloween!

Thanks for stopping by!


Tuesday, October 24, 2023

Quick and easy Halloween cards

As promised in my last post, here is my second (and last) batch of Halloween cards. These are pretty clean and simple note cards -- great layouts if you still want to make some Halloween cards before next week.


(I apologize that the lighting on these photos is not good. It was getting late in the day, and the mostly white backgrounds were not cooperating.)

My starting point for all of these cards was the Simple Strips - Halloween stamp from Taylored Expressions. I stamped and die cut the strips and then chose images based on the sentiments. For "merry scary season," I chose a haunted house. I stamped the card base with the Halloween Scene background stamp (Hero Arts) and then stamped the moon over the background. I stamped the house on separate card stock then used a very small blending brush to add a little glow in a few windows. I cut out the house and attached it to the card with foam tape. I added the sentiment strip and a few gold stars to finish the card.

The "happy meow-loween" sentiment obviously needed a cat image, so I pulled out this old stamp with the shape of a cat made up of different Halloween words. I blended a bit of yellow ink on the background to give the cat a glow and added rhinestones for the eyes and a bow near it's collar. I added the sentiment strip and finished by drawing a border around the card front.


For these friendly ghosts, I went really simple. I stamped the card bases with the Halloween Scene Background and used foam tape to attach two ghosts and a sentiment strip to each card. I finished them with a few sequins for a pop of color.


For the last two cards I blended some light green ink on two white note cards. I stamped three small images that coordinated with each sentiment and punched them out with a circle punch. Then I added a little color with alcohol markers and matted them with black circles. Using foam tape, I adhered three circles and a sentiment strip to each card and finished them with sequins and a hand-drawn border.

Thanks for stopping by!


Friday, October 20, 2023

Have a Dinomite Halloween

Halloween is right around the corner, so I thought I'd better share the Halloween cards I made this year. For today's post I have three cards made with the Dinomite Halloween set from Ellen Hutson.


For this group of cards I used the same basic layout with three different color combinations. I used alcohol markers to color the images, die cut them, and then adhered them to panels of white card stock (the dinos are popped up with foam tape). I scribbled a light gray marker to ground the dinosaurs, stamped a sentiment at the bottom of each panel and adhered the panels to layers of black card stock.


I selected coordinating green card bases and stamped a few bats and spiderwebs directly on the card bases and focal panels. I tied black-and-white baker's twine around each card base and attached the panels over the twine. I finished each card front with a few silver sequins.


Inside the cards I added white card stock stamped with "Happy Halloween" and a few more bats.

In my next post I'll share my second batch of Halloween cards -- a few clean and simple designs if you're still looking for quick and easy card ideas. Thanks for stopping by!

Thursday, October 5, 2023

Harvest Silhouettes

Our temperature dropped about forty degrees this week, so I think we are finally into autumn. Thank goodness! The beginning of this week was entirely too warm for early October (although I may change my opinion in a few months when we're in the throes of winter). So it seems fitting to share two more fall cards, this time made with the Harvest Silhouettes stamp set from Gina K Designs.

I love the look of an ink blended sunset, so that's what I wanted to try for my first card. I started by stamping the mountains and ground at the bottom of a white panel. I stamped the mountains again on masking paper, cut it out, and adhered it over the mountains on the panel. I blended five colors for the sunset: peach, pinkish red, lavender, medium blue, and just a tiny bit of dark blue along the top edge. I used dark brown ink to stamp the flowers and sentiment, then added a few gold sequins, and adhered the panel to a card base.


For a different look with the same stamp set, I used the three leaf images to create a simple stamping card. I stamped each leaf with a different color (they are the same colors I used in the first card; it's funny how different they look when stamped compared to blending) and then used a splatter stamp from my stash to fill in some of the empty spaces. I left one small area clear for a simple "happy fall" sentiment (from a different Gina K Designs set) and added three gold sequins. The card still felt like it needed something, so I finished it off with a length of hemp twine wrapped around the card front and tied in a bow near the card fold.

Thanks for stopping by!


Friday, September 29, 2023

Sunflowers and leaves

It's back to autumn cards for me. And, as you may have guessed from the title of this post, today's cards feature sunflowers and leaves. The main products I used for these cards are from Gina K Designs.


I think the two-step sunflowers in the Breath of Sunshine stamp set are pretty cute, and I also love the bushel basket image. I started by stamping and die cutting a bunch of sunflowers. I divided the flowers into two groups and arranged each bunch with a basket and a few leaves to create two cards. (My favorite detail on each card is the flower that has fallen out of the basket.) I made the card on the right first, and with the mustard card base and dark brown frame it has a definite fall-ish feel. For the second card, I used a light-blue card base and a green die-cut hill, so it also would be a great summer card. (Although I think I should have added some stenciled clouds or something in the sky to add some interest.)


For the second pair of cards I used the detail dies from the Autumn Leaves die set. I wanted to try some non-traditional colors for the leaves but make sure it still had an autumn feel. I decided to go with Fresh Fig, Island Indigo, and Really Rust (Stampin' Up!), and I think they work well.


I knew these would be simple cards, so before I glued down the die-cut leaves I splattered the card bases with metallic gold watercolor paint. I die cut two "hello" sentiments from gold card stock and added one to each card. I opted to skip any other embellishments, so these will be nice and easy cards to mail - always a plus!

Thanks for stopping by!

Thursday, September 21, 2023

Seasonal Snapshot cards

For my second batch of autumn cards, I decided to use something I've had in my stash for awhile: the Seasonal Snapshot 2015 Project Life Accessory Pack. I used some of the items from the pack to create a scrapbook page years ago, but it's been tucked away since then. Time to see what else I could create!


I started by deciding on a basic layout. I used three die-cut squares -- two patterned and one with an image -- for each card. I matted the image card with gold, silver, or black card stock. That card stock and the card bases are the only items on these cards that weren't part of the accessory kit (and the stamps, ink, and adhesive, of course).


These cards would be really easy to reproduce with squares cut from various patterned papers, small stamped or die-cut focal images, and any embellishments. A great way to use up scraps of patterned paper!


I also made two Christmas cards with the Seasonal Snapshot accessory kit. I know they're simple cards, but I really like how they turned out. That brings my total of Christmas cards up to 100 (some are left over from last year). Yippee!


Inside the cards I added white panels stamped with sentiments. I also used a few elements from the kit to make them a little more festive.

I still have several elements left in the accessory kit, particularly some laser-cut wood pieces that I haven’t decided how to use yet. More projects for another day. Thanks for stopping by!


Saturday, September 16, 2023

Fall is in the air

I think (or at least I hope) we're finally past all the hot weather, and I love having a little chill in the air in the morning. Autumn is my favorite season, so I decided it was time to start making some fall-themed cards.


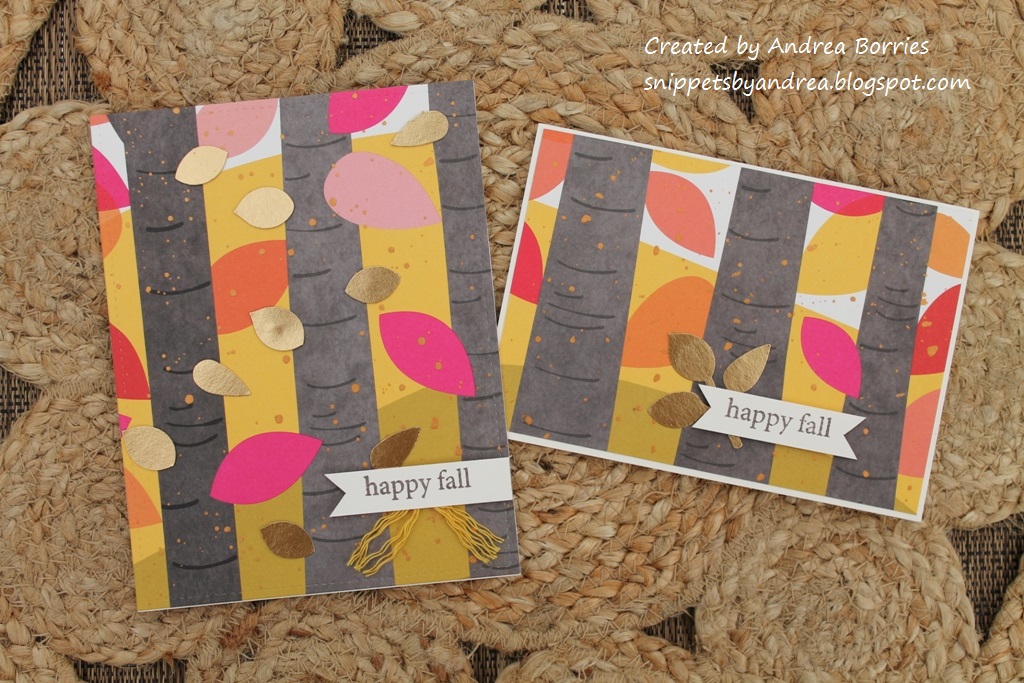
For these two cards I kept it pretty simple. I started with two panels of leaf-patterned card stock (upcycled from an old calendar page) and layered both of them on gold card stock. I adhered each panel to a coordinating card base and then added a sentiment/focal image and a few gold sequins.


The patterned card stock on the next two cards was also an old calendar page. I splattered both panels with some metallic watercolor paint and then added gold leaves. (I used a punch to create the leaves. The card on the right uses the entire sprig of leaves; for the card on the left I trimmed the leaves apart.) As with the previous cards, I added sentiments on strips of card stock with the ends cut into a V. Two more easy cards done!


For the last two cards, I started from scratch. I used kraft card bases and stamped the backgrounds -- one with a background image and one by repeatedly stamping the "happy fall" sentiment. I cut a large scalloped circle in half, embossed the pieces with a wood plank embossing folder, and adhered each piece to the left side of the card front. For the focal images I created a cluster of leaves and added a twine bow. I wanted to add metallic accents, so on one of the cards I splattered some metallic paint on the scalloped half-circle and painted a border around the edges of the card base. I decided I wasn't crazy about how the paint looked, so I skipped it on the second card. The finishing touch on both cards was metallic sequins.

Thanks for stopping by!


Wednesday, August 31, 2022

Autumn bouquet

The last two cards I have to share this month are both for the August challenge at Stay Crafty with a Blog Named Hero, but I'm going to post them separately. The theme for the challenge is "It's Hip to Be Square," and projects need to include a square or squares in some way. I've been into fall-themed crafting the past couple of weeks, so for this first challenge card I created a bouquet with an autumn feel.

Supplies:
Stamps: You're So Lovely (Hero Arts)
Paper: Plum card stock (Hero Arts), Basic White card stock (Stampin' Up!)
Ink: Lime Green, Moss, Lemon Drop, Raspberry Jam, Grape Juice, Tangerine, Cup O' Joe (Hero Arts); gold Glimmer Metallic ink (Hero Arts)
Accessories: You're So Lovely dies (Hero Arts), Nested Squares Cross-Stitch dies (Rubbernecker Stamps), gold confetti (Pretty Pink Posh), hemp twine (May Arts Ribbon), foam tape (3M)

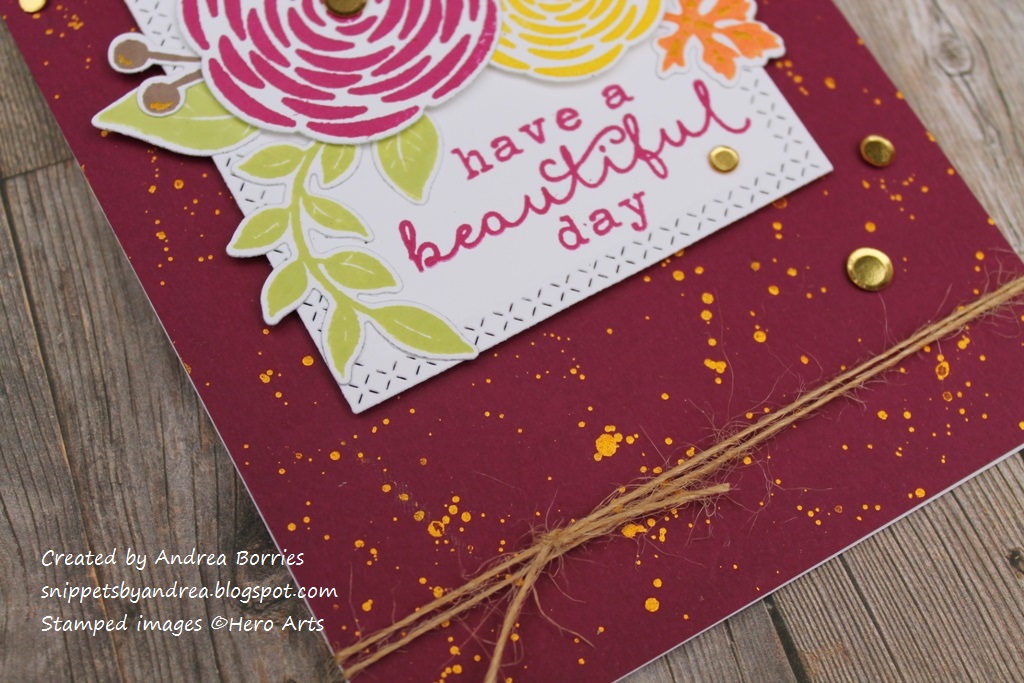
I started out by stamping and die cutting all of the flowers and leaves (I cut several of each piece so I could make a few cards at the same time) and the white square with the stitched border. I stamped the sentiment on the square and arranged the flowers and leaves around it, letting some of the pieces go past the edges of the square. I used foam tape to pop up the two flowers and add a little dimension.

For the background panel, I used a 4-1/4" x 5-1/2" piece of Plum card stock and splattered it with gold Glimmer Metallic ink. When using the metallic ink, I put a little bit on a clear block (most any nonporous surface would work; clear blocks are just handy while stamping) and add a drop or two of water. I mix it up with a small paintbrush and then use the brush to make the splatter. I may have overdone the splatter a little bit on this card, but I love the sparkle! I also wanted to tie in the metallic ink to the flowery focal panel, so I painted just a little bit onto the brown berries, the purple sprig, and the orange leaf.

Once the gold ink was dry, I used foam tape to attach the focal panel to the card base, leaving a border of about 5/8" on either side and 3/4" on the top. I added some gold confetti pieces around the focal panel and in the center of each flower. I adhered the whole card front to a white card base and finished off the card by wrapping a piece of help twine twice around the front of the card and tying it in a knot.

I love how this card turned out, and since I added a birthday sentiment inside, I've got another birthday card for my stash! Stay tuned for my second "square" card in my next post.

Thanks for stopping by!


Monday, August 29, 2022

Autumn wreath

The second card in my series of challenge entries is for Art Impressions' Dynamic Duo challenge, where the requirement was to create something using at least two stamp or die sets. I used four watercolor sets to create a pretty autumn wreath.

Supplies:
Stamps: 4701 - Clay Pot, 4052 - Flower Set, 4868 - Watercolor Flower Set 2, 4607 - Flowering Mailbox (Art Impressions)
Paper: Watercolor paper (Strathmore); Soft Suede, Crumb Cake card stock (Stampin' Up!)
Ink: Soft Suede, Old Olive, Crushed Curry, Cajun Craze (Stampin' Up!); Metallic Accents paint (Art Philosophy)
Accessories: Hello die (Lawn Fawn), Brushed Metallic Adhesive Backed Dots (Stampin' Up!), hemp twine (May Arts Ribbon), Art Glitter Glue (Art Institute Glitter)

I haven't done any watercolor stamping in quite awhile, and I've gotten a little rusty. When I sat down to work on this card, I originally tried to create a whole little scene. That turned out to be too overwhelming (and too much pressure since I was trying to work quickly), so I switched gears and decided to try a stamped wreath instead.

I started by using a pencil to lightly trace a circle on a piece of watercolor paper. I inked the branch image with brown ink and stamped it three times, overlapping each branch with the one before, before re-inking the stamp. This helps create depth and color variation. I repeated the process until I had worked my way all around the circle. Using a barely damp paint brush, I lightly tapped/dabbed the branches so the color spread a little and created a watercolor look.

I gave the branches a little time to dry and then moved on to the rust-colored flowers. (Or leaves. It is an autumn wreath, so they could be leaves, too.) I inked up the image and then stamped two or three times in a little cluster, re-inked the stamp and stamped another cluster, repeating until I was happy with the color distribution. Again, I used a slightly damp brush to dab at the images and spread the color. I let it dry a bit, then repeated with the green leaves and finished with the yellow flowers.

For a little sparkle I splattered the panel with some gold paint and added three gold enamel dots. I glued a twine bow on the wreath and added a die-cut sentiment at the bottom of the card. I layered the panel on a mat of Soft Suede card stock and then adhered it to a Crumb Cake card base.

I really love the way this card turned out (even though I still wish my watercolor stamping was a little better) and I may have to try some other seasonal wreaths.

Thanks for stopping by!