Sunday, July 15, 2012

Moving Forward

This weekend I took a little break from Christmas cards to make some bright, cheery cards with the new Stampin' Up!® set Moving Forward. This stamp set, which is only available in the 2012 - 2013 catalog, is not only adorable, but it also helps support Ronald McDonald House Charities (RMHC). For every Moving Forward stamp set purchased, Stampin' Up! will donate $3 to RMHC. What a fun and easy way to make a difference!

Turquoise card with orange, purple, green and turquoise ribbon. Colorful focal image of a frog riding a tricycle with the sentiment "hello, dear friend."
Supplies (all Stampin' Up! unless otherwise noted):
Stamps: Moving Forward
Card stock: Whisper White, Tempting Turquoise, Rich Razzleberry
Ink: Tempting Turquoise, Rich Razzleberry, Old Olive, Pumpkin Pie, Basic Black
Accessories: Labels Collection Framelits dies, Festive Paper-Piercing Pack, paper-piercing tool and mat, Brights Collection glimmer brads, Pumpkin Pie and Rich Razzleberry 3/8" taffeta ribbon, Old Olive 1/8" taffeta ribbon, Tempting Turquoise grosgrain ribbon, Old Olive polytwill ribbon, Pumpkin Pie striped grosgrain ribbon, Polka Dots embossing folder (Cuttlebug), Dimensionals

This image is actually three separate stamps: the bicycle, the flowers and the frog. I colored directly on the rubber stamps with markers to make the multicolored images, and cut out the image with a die from the Labels Collection Framelits. I matted it with another die-cut and pierced a border around the mat. I added a glimmer brad to the larger bicycle wheel for a little bling and then adhered a few pieces of ribbon to the bottom for some extra color and texture. (This is a great way to use up those ribbon odds and ends.)

Green card with three banners (orange, yellow and purple) ebossed with chevrons. Focal image is a bird walking on a blimp with the saying "happy birthday."
Supplies (all Stampin' Up!):
Stamps: Moving Forward
Card stock: Whisper White, Old Olive, Daffodil Delight, Pumpkin Pie, Rich Razzleberry
Ink: Old Olive, Daffodil Delight, Pumpkin Pie, Rich Razzleberry
Accessories: Labels Collection Framelits dies, Chevron embossing folder, 1-1/4" square punch, Dazzling Details, Daffodil Delight stitched grosgrain ribbon, Dimensionals, Tombow multipurpose liquid glue

To create the different colors on this focal point, I stamped the blimp image separately in Old Olive, Rich Razzleberry and Pumpkin Pie (and the bird in Daffodil Delight and Pumpkin Pie). I cut out a few different parts of the Rich Razzleberry and Pumpkin Pie images and adhered them to the Old Olive image. I again used the Labels Collection Framelits dies to cut out the image, and I added a little sparkle with Dazzling Details around the edge of the die-cut and on the banner on the blimp (it's hard to see that on the picture). For the banners in the background, I used the 1-1/4" square punch to create the points.

Ocean themed card with layers of scalloped blue card stock layered to look like waves, a sailing ship, a few clouds in the sky and the sentiment "celebrate.".
Supplies (all Stampin' Up!):
Stamps: Moving Forward, Perfect Party
Card stock: Pacific Point, Tempting Turquoise, Whisper White
Ink: Pacific Point, Tempting Turquoise, Real Red, Chocolate Chip
Accessories: Adorning Accents Edgelits dies, Cupcake Builder punch, Pacific Point stitched grosgrain ribbon, Real Red 1/8" taffeta ribbon, Paper-Piercing Pack Essentials, paper-piercing tools and mat, Dimensionals

I had fun creating a little scene with this boat image. To make the waves, I cut three pieces of Pacific Point card stock with the scalloped die from the Adorning Accents Edgelits. I adhered the first piece directly to the Tempting Turquoise card front and then used Dimensionals to adhere the other two layers. I stamped and cut out the boat image and placed it between two of the waves. I also added a few clouds made with the Cupcake Builder punch.
Close-up view of the stamped and cut-out ship sailing in the card stock waves.

To finish the bottom of the card, I added a greeting on a piece of Whisper White card stock and then tied two pieces of ribbon around the card front. Here's a little confession: I first tried to stamp the "celebrate" greeting directly on the Pacific Point card stock after I'd already layered the waves. Not a good idea. I only got about half the image to stamp. Instead of scrapping the whole card, I stamped the greeting again on Whisper White card stock, pierced holes around the edges and adhered the card stock to the card front. And honestly? I think I like this better. It really helps to break up all the dark blue on the bottom of the card. So there really are no mistakes -- just opportunities for embellishment!

Well, there you have it. On these three cards I used all seven images from the Moving Forward stamp set. And, with the exception of a few neutral colors, I used only the colors in the Brights Collection, which I think work perfectly with this set. Thanks for stopping by!

Thursday, July 12, 2012

'Ornamental' flower

I'm not always the most creative person when it comes to finding "out-of-the-box" ways to use my stamping supplies. But when I was looking at the new Merry Minis stamps set and coordinating punches, I kept seeing the ornament as flower petals. I wasn't sure how it would work, but I gave it a try:

Supplies (all Stampin' Up!®):
Stamps: Merry Minis, Sweet Essentials
Card stock: Whisper White, Basic Gray, Gumball Green, Raspberry Ripple
Ink: Basic Gray, Primrose Petals
Accessories: Apothecary Accents Framelits dies, Chevron embossing folder, Paper-Piercing Pack Essentials, paper piercer and mat, Merry Minis punch pack, Itty Bitty Shapes punch pack, Bitty Buttons, Green Gumball stitched satin ribbon, Whisper White baker's twine, 1/2" circle punch, Tombow multipurpose glue, Glue Dots, Dimensionals

I wanted to keep this a clean and simple card, so I used a Whisper White card base. I added a strip of embossed card stock along the bottom and topped it off with a strip of Gumball Green ribbon.

To make the flower I started by stamping five of the ornament images with Primrose Petals ink and punching them out. Then I punched out a 1/2" circle of Whisper White card stock, coated it with Tombow multipurpose glue and glued the ornaments to the circle in a star shape. I stamped and punched out five more ornaments and gently curled them around my paper piercer to create some dimension. I glued the tops of the ornaments to the 1/2" circle, making sure to center each of the curled ornaments between two of the flat ones. For the middle of the flower I punched a mini scallop circle out of Raspberry Ripple card stock, tied it to a Bitty Button with baker's twine and adhered it to the flower with a Glue Dot.

I punched two more ornaments out of Gumball Green card stock for leaves and glued them to the back of the flower. I die cut a piece of Basic Gray card stock, pierced the border and used Dimensionals to adhere the flower to the die-cut. I stamped a greeting on a strip of white card stock, trimmed it into a banner, gently curled it around my paper piercer and glued it to the back of the die-cut. Then I adhered the whole piece to the card front with Dimensionals.


I'm really pleased with how this card turned out, and I hope you like it, too. Thanks for stopping by!
Wednesday, July 11, 2012

Frosty Friends

Today I'm going to share the final two Christmas cards I made last weekend. I'm a sucker for snowman stamps, so for these cards I used another one of the new a la carte stamps from Stampin' Up!®, Frosty Friends.

Supplies (all Stampin' Up!):
Stamps: Frosty Friends, Sweet Essentials (inside card)
Card stock: Whisper White, Pool Party
Ink: Jet Black StazOn, Pool Party, Riding Hood Red, Pumpkin Pie, Lucky Limeade, Sahara Sand, Soft Suede
Accessories: Apothecary Accents Framelits dies, Paper-Piercing Pack - Essentials, paper piercer and mat, In Color printed brads, Snow Burst embossing folder, Dimensionals

This was a fun card to make, and it was pretty quick and easy. Basically stamp, color and embellish. The part that took the most time was probably piercing the holes around the edge of the die-cut layer. But at least with the paper-piercing template the holes are all evenly spaced. For the background I embossed a piece of Pool Party card stock with the Snow Burst embossing folder, which adds a great texture.

One of the things I like about this stamp is that there is enough space between some of the snow people to stamp them separately. That's what I decided to do for the inside of the card; I masked the ends of the stamp and inked up just the two snowmen in the middle. Then I just colored them and stamped a greeting.

Supplies (all Stampin' Up!):
Stamps: Frosty Friends, Petite Pairs, Northern Hearts
Card stock: Whisper White, Midnight Muse, Gumball Green, Marina Mist
Ink: Jet Black StazOn, Midnight Muse, Gumball Green, Marina Mist, Tangerine Tango
Accessories: Large oval punch, 1-3/4" circle punch, 2-3/8" scallop circle punch, 1/16" hole punch, rhinestones, Gumball Green stitched satin ribbon, Dimensionals

Speaking of stamping the snow people separately, that's what I decided to do for the second card. I inked and stamped the left, middle and right parts of the stamp then punched out the images with either an oval or circle punch. I added a scallop circle punch as a frame for the center image and punched a hole in each of the scallops.

Inside the card I stamped several snowflakes around the edges of a Whisper White layer and added the greeting in the middle. It's simple, but I like how it sort of mirrors the front of the card.

 I hope you've enjoyed my little parade of Christmas cards the last few days. Now I just have to get back to my stamps and make some more! Thanks for stopping by!

Tuesday, July 10, 2012

Clean and simple Christmas cards

As promised, I have two more Christmas cards to share with you today. These cards, which use the new Stampin' Up!® set Merry Minis, are clean and simple cards with minimal embellishments and layers.

Supplies (all Stampin' Up!):
Stamps: Merry Minis, Sweet Essentials
Card stock: Whisper White, Raspberry Ripple, More Mustard, Wild Wasabi
Ink: Raspberry Ripple, More Mustard, Wild Wasabi
Accessories: Merry Minis punch pack, 1" square punch, Postage Stamp punch, rhinestones, Dimensionals

This was a very quick and easy card to make, and although it's simple, I think it's still eye-catching. I love having the punches that match these little Christmas images.

For this card I started with the same layout I used for two of the cards in my Single-Layer Simplicity post. The main difference is that I didn't add any embossing or die-cutting around the edges of this card. I thought about it, but I was really happy with the card as-is, so I decided I should leave well enough alone. I also kept the inside of the card clean and simple by just stamping a greeting.

Supplies (all Stampin' Up!):
Stamps: Merry Minis, Season of Friendship, Petite Pairs
Card stock: Whisper White
Ink: Chocolate Chip, Daffodil Delight, Gumball Green, Real Red, Tempting Turquoise, Basic Black marker
Accessories: Rhinestones, corner rounder

This is definitely not your average Christmas tree, but I like it. I knew I wanted to have these little ornaments hanging from a tree, so I went searching through my stamp sets and came across this one from the Season of Friendship set. The straight, unfussy branches left plenty of room to add the ornaments. I used a marker to add hangers for the ornaments, embellished the card with some rhinestones and rounded the corners. (This card was so clean and simple I didn't even need any adhesive!) For the inside of this card, I stamped the second half of the Petite Pairs greeting with one of the Merry Minis trees above it.

Tomorrow I'll share the final two Christmas cards I made last weekend. Thanks for stopping by!

Monday, July 9, 2012

Holiday snowflakes

I was busy stamping again yesterday and managed to make six Christmas cards. (I wanted to make more, but the last two were giving me fits, so I had to walk away.) I create about sixty Christmas cards each year; I usually decide on six to ten designs and then make eight to twelve cards of each design. A couple of years ago I decided to make each card unique. The positive: I was able to use a bigger variety of stamps and embellishments, which is fun. The negatives: It took more time, effort and brain power (which I don't always have to spare), and it was harder to decide who should receive which card. (Note to self: Consider spending less of my limited brain power deciding things like which card is the perfect one for each person/family.) But it's looking as if I might be heading in that direction again this year since I've made eight Christmas cards so far, and they're all different.

I'll share my cards over the next few days in groups of two since they pair up nicely. The two I'm going to share today are more winter or holiday themed, not necessarily just for Christmas.

Supplies (all Stampin' Up!® unless otherwise noted):
Stamps: Warmest Regards (inside card)
Paper: Very Vanilla, Island Indigo, vellum card stock; Festival of Prints Designer Series Paper (DSP) stack
Ink: Early Espresso
Accessories: Snow Flurry die, Top Note die, Island Indigo and Early Espresso baker's twine, Designer Naturals buttons, 1/8" hole punch (Fiskars), 1-1/4" scallop circle punch, Tombow multipurpose glue, Dimensionals, Glue Dots

OK, I admit it. These two cards are the ones that were causing me trouble, especially this one. I knew I wanted to use the new Festival of Prints DSP and the Snow Flurry die together, but it took me forever to come up with a design I liked. I also had serious problems adhering the DSP to the card front so it was straight (I think the diagonal stripes were throwing me off) -- this was actually my third attempt after two ruined card bases.

Anyway, I decided to add the vellum overlay to soften the background because the snowflakes just didn't "work" directly on the stripes. To attach the vellum, I punched a 1/8" hole in the top and bottom of the left side and then used the baker's twine to tie it to the DSP. After adhering the large snowflake to the vellum, I also placed a couple of Glue Dots behind the center of the snowflake so you can't see any adhesive through the vellum.

The Festival of Prints DSP stack is just a bit bigger than a traditional A2-size card, so I only had to trim one small strip off the bottom and one off the side to get the right size for the card front. I adhered one of the leftover strips to a piece of Very Vanilla card stock, cut it out with the Top Note die and adhered it to the inside of the card to stamp and write a holiday greeting. The other leftover strip I used on my second card ...

Supplies (all Stampin' Up!):
Stamps: Small Script, Many Merry Messages (inside card)
Paper: Very Vanilla, Island Indigo card stock; Festival of Prints DSP stack
Ink: Island Indigo
Accessories: Snow Flurry die, Island Indigo baker's twine, 1-1/4" scallop circle punch, large oval punch, scallop oval punch, Scallop Edge Border punch (inside card), rhinestones, Tombow multipurpose glue, Dimensionals


I thought that little bit of striped DSP added a nice contrast to the more subtle print on the background of this card.

For the snowflakes on both cards, I cut one piece of Very Vanilla card stock and one piece of Island Indigo card stock with the Snow Flurry die. Then I used two of the blue snowflakes with one vanilla on the first card and two vanilla snowflakes with one blue on the other. On both cards I added an 1-1/4" scallop circle in Island Indigo to the largest snowflake. When I adhered the snowflakes I didn't put any glue on the ends of the larger snowflake. I liked having them "loose" to create just a bit of dimension.

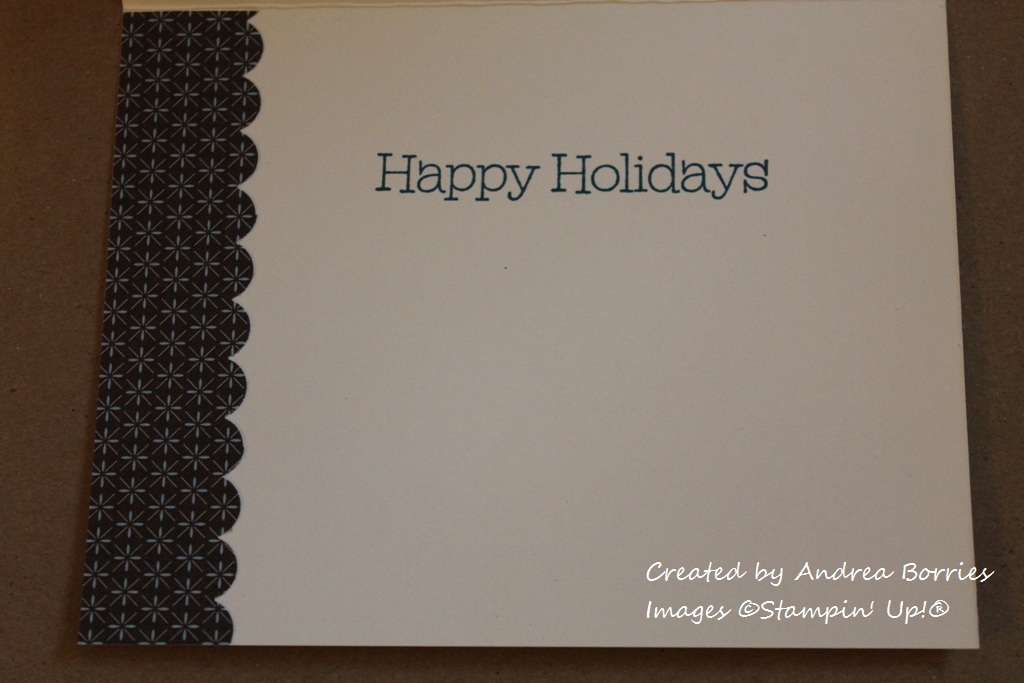
For the inside of this card, I again used one of the leftover strips from the piece of DSP on the front of the card. Because this card base is Very Vanilla I didn't need to add an extra layer for the greeting. So I punched the strip of DSP with the Scallop Edge Border punch and then adhered it directly to the inside of the card.

For as much trouble as I had with these cards, I'm pretty pleased with the finished product (or maybe I'm just happy they're done!). I'll post a couple more Christmas cards tomorrow.

Thanks for stopping by!