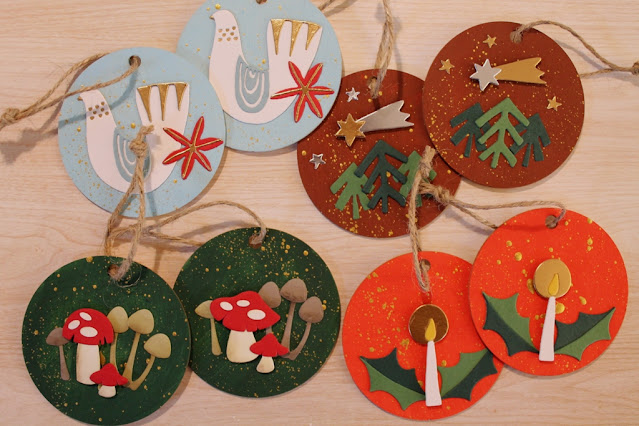
Happy holidays! I've clearly fallen behind on my blog posting this month. The couple of weeks before Christmas felt crazy, school was in session until Dec. 22, and I couldn't seem to get anything done. Now this week I've been lazy and doing as little as possible: lounging in my pajamas, reading, napping, etc. Maybe next week, with the new year, I'll start to get back into more of a "normal" routine. But for now, here is a quick post to share some Christmas ornaments I made.
Thursday, December 28, 2023
Christmas ornaments
Sunday, December 10, 2023
Scrap bookmarks
A couple of weeks ago, I shared some crazy quilt scrap papers I made with leftover pieces from gel press prints. I decided to cut up one of the pages to make some bookmarks, and here are the results:
Friday, December 8, 2023
Happy Hanukkah
I kindled my eight little candles,
My Hanukkah candles, and lo!
Fair visions and dreams half-forgotten
Were rising of years long ago.
- Philip M. Raskin, "Hanukkah Lights"
I created this menorah using the Essentials Arches dies from Ellen Hutson. I taped several of the dies together so there was even spacing between them and then ran them through my Big Shot with shimmery white card stock. I ended up with several skinny arch outlines that I trimmed and glued together to make the menorah. Each arch die also cuts out a very narrow frame, which I used for the candles. I used alcohol markers to color the candles two different shades of blue.
In addition to the shimmery white card stock, I added sparkle to the background by splattering metallic watercolor paint over a blue ink-blended rectangle and used a gold gel pen to draw the candle flames. I finished the card with a simple sentiment strip.
Wishing everyone who celebrates a holiday filled with peace, love, and light. Happy Hanukkah!
Saturday, December 2, 2023
2023 Christmas card recap
Saturday, November 25, 2023
Crazy quilt scrap papers
I’m popping in with a quick blog post tonight so you don’t think I disappeared. Christmas is coming way too fast, and I’ve been realizing how much stuff I have left to do. And worrying that I won’t get it all done. Sigh. It happens every year.
Lately I’ve been focused on making the desk calendars I will be gifting. I can’t share those until after holidays — but I can share some fun papers I’ve made with the scraps left over from the calendars.
For the three calendars I’m working on now, I used some of my gel prints for the backgrounds. When I trimmed down the gel prints, I had all these colorful strips left. I didn’t want to toss them, but I also didn’t want to tuck them away for later (because later never seems to come). So I pulled out some sheets of double-sided adhesive and started adding the strips. I did two full sheets and four smaller pieces.
These papers remind me of crazy quilts, and it was easy to put them together while I watched TV in the evening. I don’t have any definite plans for them yet, but I think they will be great for background panels on cards or to use for die cutting. If you have any ideas, let me know in the comments. I’ll be sure to share whatever I make.
Thanks for stopping by!
Friday, November 17, 2023
November Christmas cards: Woodland magic
I didn't plan to make any more holiday cards this year, but then a couple of weeks ago I won an Instagram contest from Lavinia Stamps, and my prize was the all the stamps in their latest release. I was so surprised -- and excited! And since I had a whole bunch of new amazing wintery stamps, I had to make a small batch of woodland magic Christmas cards.
Sunday, November 12, 2023
P.S. You're the Best note card set
As promised in my last blog post, I'm back to share the final set of notecards I made during craft weekend. For this set, instead of making four coordinating card layouts, I settled on one basic design (using the retired Stampin' Up! set P.S. You're the Best) and then changed the color and sentiment for each card.
To embellish the cards I glued a small linen thread bow on each typewriter and finished with three sequins to coordinate with the color of the typewriter.
Friday, November 10, 2023
Barnyard friends note card sets
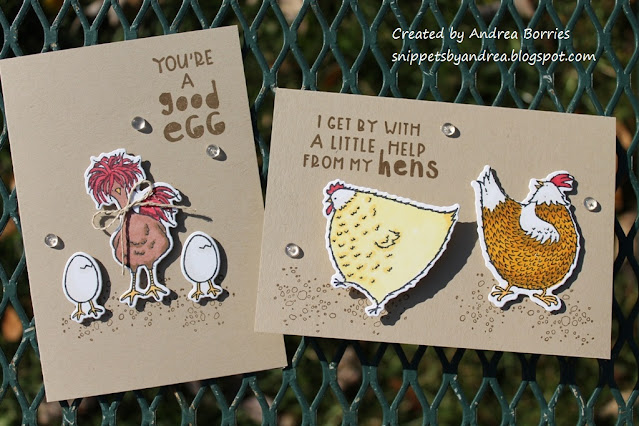
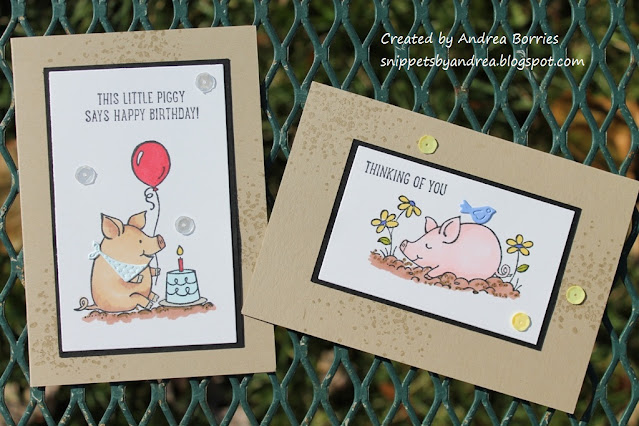
A couple of weeks ago I was lucky enough to spend a few days at a friend's house for the first craft weekend we've had in years. Yay! It was a lot of fun, and pretty productive, too: I made five sets of note cards and one 2024 desk calendar gift. I'm going to share two of the card set designs today, and they both feature some cute barnyard animals.
I'll share the final set of note cards in my next post, but I'm going to save the calendar until after Christmas. Thanks for stopping by!
Monday, November 6, 2023
Patterned paper and greenery
Saturday, October 28, 2023
Personalizing a card kit
When I assemble a card kit, it’s never as quick or easy as I think it will be. Mainly because I usually want to change up the designs or add details to make the cards more “me.” And that’s exactly what I did when I sat down to put together a birthday card kit I received recently.
The kit included five square card bases, five circle card bases, two sheets of patterned paper, pre-printed images, woven labels, and some other goodies. I used all of the square card bases for actual cards, but I ended up using two of the circle cards to die cut some stitched circles (on the pink card above and the two cards below) and the “happy birthday” sentiment on the orange card above. I could have used my own card stock, but this way I didn’t have to worry about finding a matching color.
I trimmed some of the pre-printed pieces to better fit my card designs. For instance, the cake slices had the sentiment “Make a wish” at the bottom, and the “Enjoy” piece (top photo) was originally a tag. I also swapped out most of the embellishments included in the kit for my own rhinestones and sequins. And I used some sequins, glitter, and a piece of acetate to create a shaker for one of the cards (below). It’s a pretty simple shaker because I don’t make them often, but I still think it’s cute.
I’m planning to donate the cards from this kit to a charitable organization, although I’m not sure which one yet. I received a few other kits along with this one, so when I have all the cards done I’ll figure out where I should send the cards based on the organizations’ needs at the time.
I did have some patterned paper and other bits left after I finished the pre-cut card bases, so I decided to make two cards for my own stash:
You can’t tell in the photo, but the black background in the right-hand card is embossed with a streamer/confetti embossing folder. That panel has been sitting in a scraps envelope for ages, and I finally had the right card for it!
I still have some leftovers from the kit, but I’m not sure if I’ll end up using them. For now I’m hanging onto them, just in case. Thanks for stopping by!
Tuesday, October 24, 2023
Quick and easy Halloween cards
As promised in my last post, here is my second (and last) batch of Halloween cards. These are pretty clean and simple note cards -- great layouts if you still want to make some Halloween cards before next week.
Thanks for stopping by!


