Wednesday, May 9, 2012

Floral five

Today I'm going to share the second group of cards I made at my craft retreat last weekend. Now I couldn't possibly go an entire weekend without making a floral card, right? Well, here are five of them, made with the Stampin' Up!® set Sweet Summer.

Supplies (all Stampin' Up!):
Stamps: Sweet Summer
Paper: Whisper White, Pacific Point card stock; Brights Collection Patterns Designer Series Paper (DSP)
Ink: Jet Black StazOn pad; Old Olive, Pacific Point, Marina Mist markers
Accessories: Basic pearls, Old Olive scallop polka dot ribbon, Itty Bitty Shapes punch pack, Tombow Mono Multi liquid glue, Dimensionals

This is my favorite card from the weekend. Blue is one of my favorite colors, but I don't make blue floral cards very often; I guess it's more natural to reach for red, pink or yellow. I like that this card has a clean and simple feel to it with just a few details: the small punched flowers, pearls, ribbon and piece of DSP along the bottom of the card.

Supplies (all Stampin' Up! unless otherwise noted):
Stamps: Sweet Summer
Card stock: Pumpkin Pie, Whisper White, Daffodil Delight
Ink: Basic Black StazOn, VersaMark pads; Pumpkin Pie, Daffodil Delight, Old Olive markers
Accessories: Pumpkin Pie taffeta ribbon, paper piercer and mat pack, Baby Girl assortment mini pearls (Doodlebug Design), Mini Glue Dots, Dimensionals

In contrast to the previous card, this one is actually my least favorite. It's not that I dislike it necessarily; it's just the one I like the least (which one of them has to be, right?). For the focal image, I stamped and colored the swirly vine (which I also stamped on the card base for the background). I stamped the two flowers on a separate piece of card stock, cut them out and adhered them by the vine. After I put the card together it looked as if it needed something, so I added the paper piercing around the border.

Supplies (all Stampin' Up! unless otherwise noted):
Stamps: Sweet Summer
Card stock: Whisper White, Crumb Cake, Early Espresso
Ink: Early Espresso pad; Early Espresso, Crumb Cake, Pear Pizzazz markers
Accessories: Pear Pizzazz seam binding ribbon, corner rounder (unknown), embossing folder (Cuttlebug; I don't know the specific name), Dimensionals

This card and the next two are basically variations on a theme: a single stemmed flower with a card stock mat on the left side of the card over a textured or stamped background. I really like the calm, neutral colors in this version. (It makes me think of the decor in a spa.) And by embossing the entire background, it was a very quick and easy card to make. The only embellishment here is the ribbon. I could have added something else, such as brads or pearls, but I really wanted the embossing to stand out.

Supplies (all Stampin' Up! unless otherwise noted):
Stamps: Sweet Summer
Card stock: Crumb Cake, Whisper White, Melon Mambo, Regal Rose
Ink: Jet Black StazOn pad; Regal Rose, Melon Mambo, Old Olive markers
Accessories: Old Olive scallop polka dot ribbon, white crochet thread (DMC), Itty Bitty Shapes punch pack, Bitty Buttons, Perfect Polka Dots embossing folder, Dimensionals, Mini Glue Dots

This card starts out with the same Crumb Cake card base and a layout very similar to the previous card. But changing the colors and embellishments really changes the feel of the card.

Supplies (all Stampin' Up!):
Stamps: Sweet Summer
Card stock: Whisper White, Rich Razzleberry, textured Old Olive
Ink: Jet Black StazOn, VersaMark pads; Rich Razzleberry, Perfect Plum, Old Olive markers
Accessories: Basic pearls, Itty Bitty Shapes punch pack, Rich Razzleberry taffeta ribbon, Tombow Mono Multi liquid glue

This card has the boldest color combination of the three. And I didn't do any embossing here; instead, I repeatedly stamped the blossom image across the background. For each of the flowers, I punched out two pieces: one was glued flat to the card stock, and the second was glued just in the middle, while the "petals" were gently pulled up. I added a pearl in the center of each flower for an extra little detail.

I have one more group of cards to post this week. Thanks for stopping by!

Tuesday, May 8, 2012

A couple of punny cards

Two of the cards I made on the craft retreat last weekend used the Stampin' Up!® set called Very Punny. It's an older set, but I still love the cute images and sayings. (A while back I posted a card set made with this stamp set so you can see all the images in the set.)

Supplies (all Stampin' Up! unless otherwise noted):
Stamps: Very Punny
Card stock: Rich Razzleberry, Basic Black, Whisper White
Ink: Jet Black StazOn pad; Basic Black, Rich Razzleberry, Creamy Caramel, Blush Blossom markers
Accessories: 1/8" Basic Black taffeta ribbon, 1" and 3/4" circle punches, Brights Collection buttons, white crochet thread (DMC), Zots large adhesive dots (therm-o-web), Stamp-a-Ma-Jig, 1/8" Scor-Tape (Scor-Pal), Dimensionals

In this set, each stamp has an image together with a saying. I only wanted to have the greeting stamped once, so when I stamped the other cows, I just didn't apply any ink to the saying portion of the stamp. I used the Stamp-a-Ma-Jig tool to line up the cows and then colored them with markers. For the Rich Razzleberry cow, I stamped an extra image, cut it out and adhered it to the card with Dimensionals. I actually ended up using this card before I even came home; I used it to write a note to Patty and Paul, the owners of The Meadows Craft Retreat, and had everyone sign it. This seemed like an appropriate card for the occasion since we enjoyed visiting with their cows.

Supplies (all Stampin' Up! unless otherwise noted):
Stamps: Very Punny
Card stock: Whisper White, Basic Black, Melon Mambo
Ink: Jet Black StazOn pad, Melon Mambo and Creamy Caramel markers
Accessories: 1-3/8" and 1-3/4" circle punches, large scallop circle punch, paper piercer, mat pack, polka dot embossing folder (Cuttlebug), Melon mambo pom-pom trim, Dimensionals, 1/8" Scor-Tape (Scor-Pal)

This card is pretty self-explanatory, but I really like the combination of the embossed polka dots and the pom-pom trim. I don't use Melon Mambo too often, but it looks striking with the black and white. I stamped a birthday greeting inside the card, but this could be a fun, girly card for many different occasions.

Stay tuned this week for the rest of the cards I made at the craft retreat. Thanks for stopping by!

Monday, May 7, 2012

A weekend to remember

I think I've just about recovered from my craft retreat/girls' weekend. We stayed at The Meadows Craft Retreat near Northfield, MN, and I would highly recommend it if you're ever looking for a retreat location. The house and grounds were beautiful, and the owners also have a hobby farm, so we spent a fair amount of time visiting with the resident cows, chickens, cats and the dog, Daisy. Everyone had a wonderful time and worked on a variety of projects: quilting, card-making, jewelry-making, embroidery, knitting and even putting together jigsaw puzzles for the people who didn't feel like being crafty. Here are a few pictures of our memorable weekend.

There was a beautiful porch that was a perfect place to sit and read or just listen to the birds. On the day we arrived I sat on the porch swing to read for a bit and ended up taking a nap. We had beautiful weather the first day and a half and then it cooled off and was overcast and rainy. The rain was probably a good thing; otherwise I don't think I would have left this porch. It was so relaxing!
This birdhouse was on the patio just outside the kitchen/dining room (another fabulous outdoor space!). We spent a lot of time watching this industrious little wren (sitting on top the birdhouse) bring twigs to the house and try to get them in the hole. A few times she was determined to carry up a twig that was clearly too heavy, and even though she frantically flapped her wings, she could only get it about halfway up to the house. I think she worked harder than I did during the weekend!
Moooo! Here I am feeding the cows. My sister and I went out at least once each day and picked grass to feed them. There were six cows, and they all wanted their fair share (plus a little bit more ...).
Some of the ladies hard at work. Later in the evenings a few of us ended up hardly working, but we had a lot of laughs.
One evening I found the chickens roosting in the barn. The rooster is there, too, and he was a character. I never actually heard him crow at dawn, but whenever we went to see the chickens, he would strut around and crow for all he was worth.
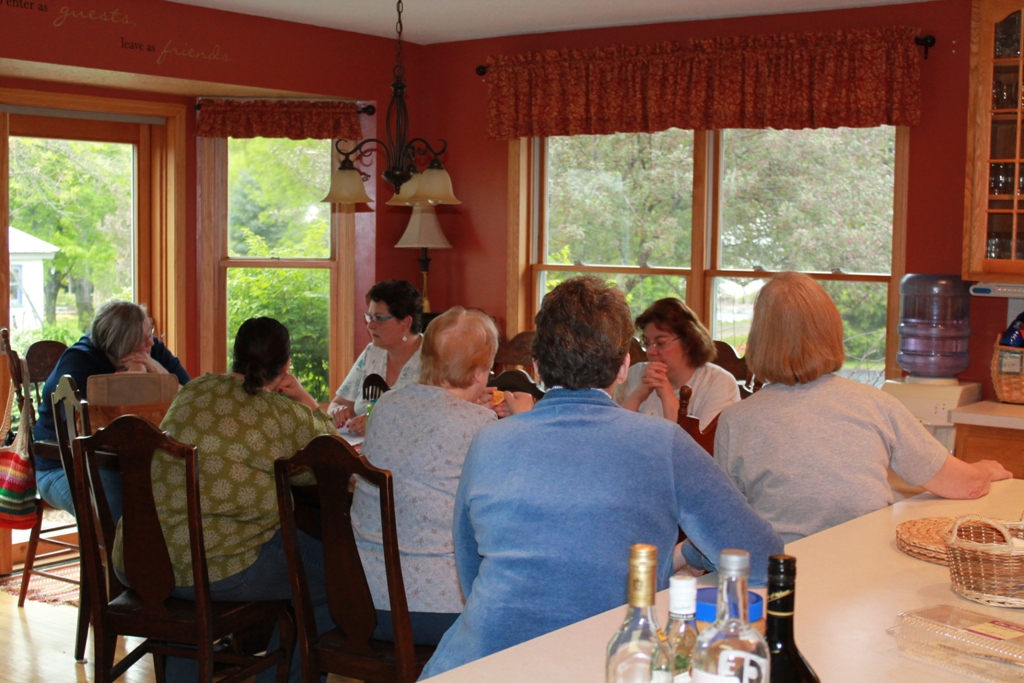
Gathered for breakfast on our last morning. I was definitely sad to see it come to an end. Everyone was talking about going back next year, and I think that would be great. I'd love to go one weekend a month if I could.
Here are the fifteen cards I finished during the weekend. I only brought four stamp sets, a few neutral ink pads and coordinating card stock, my markers, Brights Collection card stock and Designer Series Paper, and a tools and embellishments. So compared to my usual choices, I was working with pretty "limited" supplies. I could have finished more cards, but I wanted to have fun and relax instead of stressing about the number of cards I made.

Later this week I'll post individual pictures of the cards. Thanks for stopping by!

Thursday, May 3, 2012

Framed butterflies

I just have a quick post today -- I'm heading out this morning for my craft retreat/girls' weekend, and I'm still not all packed and organized. (That's unusual for me, but it's been a crazy week for various reasons.) I'm not sure if I'll be posting while I'm on the retreat, but I'll share some pictures when I'm back next week. Before I go, I thought I'd post a picture of a frame I made a few weeks ago.

Supplies:
Stamps: Picture Perfect (Unity Stamp Company)
Card stock: On the Bright Side - One card stock pad (My Mind's Eye)
Ink: Dark brown chalk ink (ColorBox)
Accessories: Solo white shadowbox tray (7 Gypsies), Beautiful Wings Embosslits die (Stampin' Up!), basic pearls (Stampin' Up!), Daffodil Delight 1/8" taffeta ribbon (Stampin' Up!), 1/4" Scor-Tape (Scor-Pal), Mono Multi liquid glue (Tombow), Dimensionals (Stampin' Up!), Mini Glue Dots

I trimmed the blue card stock to fit the three openings and stamped a sentiment on the largest piece. With the Beautiful Wings Embosslits die, I cut several butterflies from polka-dot red, yellow and green card stock. I added pearls as the butterflies' bodies, gently folded up their wings and adhered them to the background with Dimensionals or Mini Glue Dots. To make the bow, I wrapped a piece of ribbon several times around my first two fingers (while holding my fingers about 1" apart). Then I wrapped a smaller piece of ribbon around the loops between my fingers, tied it in a knot and slid the loops of my fingers. I added a pearl in the middle of the bow and adhered it to the edge of the frame with Mini Glue Dots.

Have a wonderful weekend. Thanks for stopping by!

Tuesday, May 1, 2012

Adventure ahead

With the end of the school year in view, graduation season is nearly upon us. So today I thought I would share a fun card that would be perfect for a graduate.

Supplies:
Stamps: Essential Messages (Hero Arts)
Card stock: Patriot Blue (The Paper Company), Papaya Puree Dark (Bazzill), Ash (American Crafts), Core'dinations Color Core Cardstock - Nostalgia Collection (Liberty Scrapbook Supply)
Ink: Midnight pigment ink (Color Box)
Accessories: Star punch (Stampin' Up!), Clear Cut Travel Shapes (Deja Views), Plaid Textured Impressions embossing folder (Sizzix), sandpaper, 1/16" hole punch, linen thread (Stampin' Up!), Mono Multi liquid glue (Tombow), vintage metal brads (Making Memories)

I really like the saying on this card; it seemed like the perfect sentiment for a graduate heading off to college or getting ready to face the "real world." And I think the saying works perfectly with the clear "adventure ahead" die cut, which is actually from a travel-themed pack of scrapbooking embellishments. (I love when I find an unexpected way to use something!) Actually, this card would be perfect for anyone embarking on a new adventure in life, maybe starting a new job or moving to a different city, state or even country. For the right couple, this could even be a fun wedding card (you can't deny that marriage is an adventure!).

I love how all the elements on this card came together, but I think one of my favorite things is the textured background. I used an embossing folder to create the plaid texture and then rubbed sandpaper over the embossed card stock to expose the lighter colored core.

I kept the inside of the card pretty simple. I stamped a basic "congrats" sentiment and added a few punched stars to coordinate with the front of the card.


Thanks for stopping by! And Happy May Day!