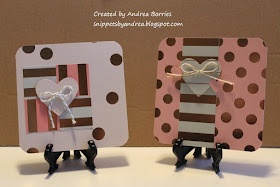
The heavy card stock was perfect for card bases, so I cut the top part of each page into two card bases, some 4-1/2" x 4-1/2" and the rest 3-1/2" x 5". I used the leftovers to punch out hearts and to cut strips and pieces for layering.
The only downside to the calendar was that the backs of the pages were lined, which meant I would have lines inside the cards. I thought about pulling out plain card stock for the card bases and using the calendar pages just for layers, but I wanted to keep the supplies to a minimum. So I'll turn the lines into a positive and use them for writing or stamping my message inside the cards.
So here is the collection of twenty-two cards. (It ended up that I couldn't use every page of the calendar. February just had a giant gold heart on the page, so I used that page for a lot of punches instead of card bases. And December was adhered to the calendar backing.)
Here are the general supplies I used for all the cards (all Stampin' Up! unless otherwise noted):
Embellishments: Blushing Bride baker's twine, gold baker's twine, baker's twine trio pack, mint twine (leftover from a kit), gold thread
Tools: 1-1/4" circle, 1-3/8" square, large and small heart punches; Essentials Paper-Piercing Pack; paper-piercing mat and tool; Corner Chomper (We R Memory Keepers)
Adhesive: Glue Dots, Mono Multi Liquid Glue, Dimensionals
And here are close up photos of some of the cards:
Once I was done with all of the cards, I punched out a ton of extra hearts and cut up the remaining pieces into useable sizes for layers. So I can make plenty more of these cards if I want to. But as you can see, these cards are all pretty feminine, so my goal is to make the next batch of valentines more masculine, or at least gender neutral.
Thanks for stopping by!


Ohhh I love these Andrea! So pretty and sweet! I am sure everyone who receives one will just love it!
ReplyDeleteWell done!
Sunshine, New Zealand
www.ihearttostamp.blogspot.com