I've fallen a little behind on my blog posting during the past week because I was busy trying to finish the pack of birthday cards I gave to my grandma for Mother's Day. I was stamping like mad early yesterday morning, and I managed to get all the cards made, photographed and packaged just a couple of hours before our Mother's Day dinner. Whew. It was a little stressful at the end, but now I have several posts' worth of cards to share with you! I'll start with a fun kids birthday card with a Lego theme.
Supplies (all Stampin' Up!)®:
Stamps: Big Bold Birthday, Birthday Wish, It's Your Birthday
Card stock: Confetti White, Pacific Point, Real Red, Daffodil Delight, Glorious Green
Ink: Pacific Point, Real Red, Daffodil Delight, Glorious Green
Accessories: Mono Multi liquid glue, Dimensionals
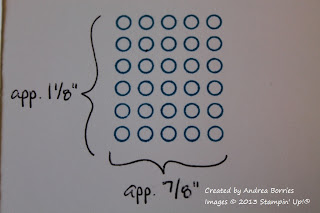
This card was something of a happy accident. I was trying to create some masculine birthday cards using an image from the Big Bold Birthday stamp set (see photo at right). I had stamped and cut out the image in several different colors and was playing around with a layout when I realized that if I colored in the circles and then cut the image apart, the pieces would look like Legos.
I stamped the image four times: once each on Real Red, Daffodil Delight, Glorious Green and Pacific Point card stock (using the coordinating ink). I colored the circles and cut the images into different sized blocks. I considered lining up the pieces to create a border around the card edges or to form an image or word. But to me Legos are the most fun when they're spread out on a table or all mixed together in a bucket. That's when they are full of possibilities only limited by your imagination. So in the end I decided to have a few groups of randomly scattered Legos on the card front.
I had some pieces left over, so I added a border along the bottom of the inside of the card. (I think I may have had to cut out a few more blocks to finish the border.)
If you want to get more elaborate with your Lego card, you could recreate the green Lego base plate. Start with a Glorious Green card base and use the Stamp-a-a-jig tool to cover the card front with stamped circles. Then adhere your stamped Legos to the card front so they look like they're on the base plate.
Thanks for stopping by!


1 comment:
I read your blog and one thing I found that if you have zeal, you can do anything. You did your job well and you inspire me. Now my time has come to make some cards.birthday greeting cards online
Post a Comment